28.2.19

28th Feb 2019: Solar

*

Thursday: Cloudy start but cleared to thinner, high cloud.

11.20: 51/45F Blank disk again in white light. Sun still covered in thin, high cloud. Made a crude, taped cardboard, 6" aperture stop for the 7" for f/14 equivalent to f/19 with R35. No advantage.

11.25 H-a: One detached prom at my 3.00 and a dark, linear speck on the disk at 12..00 about 1/4 way in. Could be a tiny filament? Seemed to have dissolved but is was just cloud obscuring the detail. A brightening produced a small dark line leaning to the right of vertical. I hoped to tease it out in WL+SC but there's nothing there.

11.55 65/48F Add a new, short filament at about 6.00. Dark smudges around 10-11 on Gong. Look lighter to me.

12.15 60/47 The 12.00 'filament' becoming broader and softer. The 6.00 is getting smaller. 3.00 prom shrinking.

12.27 57/48F  Tried 5" and 4" aperture stops on the 6". Both worse than 6". Obvious softness and loss of surface texture and detail with 4". Using 20mm for 60x each time. Much prefer full aperture. Small proms at 2.00 and 3.00. Bright spicule at 10.00.

14.40 57/50F, tiny proms scattered around the solar limb. Small, short filament at about 10.00.

Have finally heard from TS about my misaligned binoviewers. They are sending me a replacement pair. Probably here next week, with any luck. They say they are struggling with staff shortages and inundated with emails.

14.45 58/51F Tried a 4"aperture stop on the 7". No change. Just dimmer. A visible something-or-other, in white light, would be nice. Anything to confirm I really am looking at the sun and not a featureless lump.


*

27.2.19

27.2.19 Solar

*

Wednesday:  Clear and bright again after a cool night. Only a little, distant mist today.

10.00am  49/45F [Out/In] Nothing visible in white light. 

10.15am  50/46F Sun at 21° altitude. A quick scan in H-a shows proms at my 4.00, 8.00, 9.00 and 11.00. The 4.00 and 9.00 are the largest and best defined. GONG not showing much on the disk except for a dark smudge at 4.00 . I'm only seeing some subtle light areas.

11.20 53/50F Sun surrounded in a flood of red light. So I cut out a stop ring to the theoretical 120mm aperture resulting from the PST optical limitations. The 150/8 becomes a 120/10. It had no visible effect.

12.00 56/52F So then I removed the 6" tailpiece and sprayed the bare aluminium matt black. It had been too cold to paint until now. I have left the tailpiece to dry off outside in the sunshine. To avoid fresh solvent fumes inside the OTA.

The dome plywood panels inside are showing similar temperatures to yesterday's. 90F when facing the sun. Higher panels have higher temperatures. 90F when direct sunlight is shining on them through the slit. The unlit panels are all in the low 60s F. The open shutters are blocking the sun from reaching the two vertical rows of overlapped panels.

I have some wooden louver panels about 1.25m high x ~60cm wide. Which I thought I could incorporate into the dome walls to minimize thermal differentials inside and outside the dome. With the veranda doors open I could generate a cross draught. "Dome seeing" is the result of warmer air rising through the observing slit. If the air in the observatory can be kept cooler then the gradient won't be so deleterious. Shading the southern quadrant of the obs. walls might have similarly, beneficial effects. Shading the dome is much more difficult due to its shape and need for rotation.

14.40 60/56F breezy now. The sky just arrived from the NW in the form of rippled clouds. I'm getting some excellent views of clouds passing across the sun in WL. More confusing in H-a because they affect the sharpness. Might as well give up.


*

26.2.19 Star testing the 7" iStar.

*

With time to spare before dinner I went back out to do some start testing. It did not start well due to ribbed cloud. Orion was just west of south so I chose bright stars there to ensure I had enough light. 

I started with the 32mm to find the stars and centre them with the paddle. Then I worked upwards in power and down in focal length. I added the 1.25" Baader Solar Continuum filter to each new eyepiece in the no-name 2" star diagonal. I started with Rigel but the cloud and thermal effects on the image made me up to Betelgeuse. 

At focus the star was nicely small and intense with only a ring or two. Inside focus there was a mass of evenly bright rings and a fuzzier and brighter, outer ring. Outside focus was dimmer and showed thermal effects crossing the image rather like clouds. The image was much scruffier but occasionally showed a similar pattern to inside focus.

Eventually I ended up with the 10mm EP for 215x. This meant I had to stay closer to focus but the results were no particularly awful. Being similar to longer eyepieces but much more sensitive to focus. 

The star images without the green filter were much messier as the chromatic aberration was no longer concealed. Reds and purples dominated depending whether I focused inside or outside focus. It also showed far more thermal agitation. Though it may be that the seeing was going due to a massive cloud bank appearing in the East.

I didn't have time to use my Ronchi "filter" with the green filter as I had planned. I had tried this some time ago but the forum experts seemed to be in disagreement with each other.

While star testing is an interesting exercise it is not the same as have a "great" lens which shows fine detail on the moon or planets. Seeing permitting. I have tried stopping down the iStar with cardboard rings in the dewshield but the results were inconclusive. I always preferred the brightest image.

An interesting but probably inconclusive series of star tests. It needs much better seeing to stabilise the image. Particularly outside focus.

iStar claim 1/4 wave accuracy as their minimum standard. The reason for my testing was seeing a forum discussion on star testing another iStar objective. A 6" F/10. My 7" [180mm] is an f/12 R35. The R35 is supposed to suggest it performs as well as an f/16 normal achromat. Stopping my 7" down to a 6" would make it an f/14. Adding the 35% reduction in false colour would make it the equivalent of about f/19. Which puts it more safely in the green zone of allowable CA by Sidgwick standards. The yellow zone in the chart is supposed to represent where colour correction using minus-violet or "Fringe Killer" filters can help to improve matters to visually acceptable levels.

I keep wanting my 7" to show the small craters in Plato but still haven't succeeded. Where others have seen lots with far smaller apertures. Poor/unknown collimation has always been an issue until recently. So there is still a chance. The Orion Cheshire body is grossly undersized. So needs a compression band fitting to be used at all. Then there is always the issue of star diagonal alignment.


*


26.2.19

26.2.19 Solar:

*

Tuesday 48/43F [in/out] very thick mist clearing to bright sunshine. Patches of thin, high cloud crossing from the NW. Enough to diminish the light on the observatory wall at times.

11.30am Nothing visible in white light at 68x. 180/12 + 2" Lacerta prism + Baader Solar Continuum + Polarizing. No visible thermal issues.

Several proms in H-a at my 2, 9 & 11.00. The 11.00 is a twisted loop seen almost edge on. 150/8 [120/10] 60x with modified PST & TS star diagonal.

More even surface texture must mean better seeing today. Allied with the new [correct] 200mm etalon spacing inside focus. I can actually see fine texture over the entire disk. Which is a first!

Just a hint of a short filament above center, right, but otherwise nothing very noticeable on the disk. Seeing the texture is almost like using averted vision. Or is it it curvature of the field at the focal plane causing difficulty in the center of the disk? The PST etalon?

12.20 54/49F The lack of a binoviewer is emphasizing my [eye] floaters!

12.45 Just as I was set up for some H-a imaging it clouded over!

13.0 Cloud has cleared to reveal a tall leaning prom at my 6.30 with a small companion. An eaqually tall smudge stands slight further away along the limb

Gong isn't showing anything yet so I can't confirm the correct orientation.

14.30  Back after lunch. Had to do a manual flip. AWR wanted to go the wrong way, via North,  again. Proms still visible.  The Lacerta prism heat sink remains only lukewarm after hours of direct sunlight from the 7".

15.50 60/53F Sun now only at 13° altitude. Struggling for sharp surface texture in the middle of the disk but still very sharp proms. A lovely, high arch at my 8.00. Tried a 15mm for 80x but a bit soft.

Checked around the inside of the dome at intervals with a laser guided "gun" thermometer. Maxed out at 100F on panels directly pointing at the sun in the early afternoon. The temperature dropped rapidly the further away they faced. With rear panels in shade matching ambient outdoor air temperatures.

Downside with my east of the pier computer desk is sun shining through the slit now that it has risen well above winter levels. I may need to seek the shade of the southern obs. wall.

16.10 Lost the sun behind the trees.

*

24.2.19

24th February 2019 Solar

*

Sunday: The weather forecast is promising sunshine. In variable amounts. Best clarity early on. Completely calm at present.

I haven't had a chance to try the new geometry of the H-alpha 6" [120/10] since changing the etalon distance from focus to the expected 200mm for a modified PST. The distance was previously too short by 20mm. 

The sky has been very hazy or very cloudy. I should have my chance today provided the optics don't dew over. It is just below freezing at the moment. [08.00.] Still waiting for the sun to rise despite an official sunrise of 7.23am. There are the first signs of a shine on the dome.

0930 CET: 41/38F clear and still. Sun at 16° altitude. Blank in WL.

The dark filament is reduced to a small C-shape. With pale areas [plage] surrounding it. I am still adjusting the etalon and focus to try and bring out more detail. No proms so far. GONG H-a showing no proms and a smudge for the filament.

10.00am The filament is now only a short straight line and difficult to see. It is now forming a dark edge to a lighter spot.

After this I wrote half a page of my usual diatribe only to lose it somewhere between the laptop and the PC when I went in for elevenses.

13.00 54/49F Thin, high cloud moving across from the WSW. Still struggling for surface texture in H-a. I have removed the etalon and adjusted everything. No magical fix. I have opened the veranda doors to clear out any excess warmth in the dome. Breezier than before but the temperature differential between out and in is almost unchanged.

After hours of pointing at the sun the Lacerta heat sink is only slightly warm to the touch.

Added a spacer to the rear end of the etalon adapters to take up the slack. Surprisingly, I now have much more even surface texture but still, rather low contrast. One very tiny prom at my 8.30. At least I now have a reference for etalon tuning.  

13.30pm 53/50F [improving] but the sky is becoming ever more milky from thin, high cloud becoming denser. Lunch. Even more cloud after lunch. Parked the scopes.

Click on any image for an enlargement.

*

22.2.19

A shocking discovery?

*

I can sense a very mild "tickle" effect when I touch the telescope or mounting with my fingertips. Best described as if the metal is slightly "sticky" to the touch. At first I thought it was low level vibration but I'm getting a very slight, neon, orange glow on the electrical test screwdriver. The screwdriver has to be very well shielded from the light, or dark in the dome, to register any glow at all.

It is not normal for the 2-pin mains sockets to be earthed here in Denmark, except in brand new installation work where 3-pin sockets are presumably fitted. We had some new sockets fitted and they used all 2-pin to match the rest of the house. The Danish mains plugs are obviously 2-pin too. So reversing them in the socket, each time something is plugged in, is completely normal behaviour here.

Most mains appliances bought here have a 2-pin, moulded-on plug from new. Hi-fi components, TVs, kettles. toasters, lamps, lawnmowers, hair driers, power tools, etc. are all 2-pin, mains devices. The consumer unit has a sensing device to protect the occupants. While a 10A fuse in the consumer unit protects devices from the consumers.

My observatory is fed by a 30 meter, 2-core extension lead. My home made mounting only ever sees the 12V, two core, 2 pin plug, power supply for the AWR stepper motor drives. Which are intimately connected metal-to-metal to the mounting.

Green earth leads are provided on the various AWR motor connecting cables but I have never bothered to connect them. [Yet.] I always presumed these were only for use in UK, earthed, 3-pin systems. Which are usually protected by a dedicated RCD socket adapter for outdoor use. As is recommended for lawn mowers and other mains power tools in the UK.

There never seemed any point in earthing my 12V connecting cables unless I actually provided a local earth spike. Which would then have to be connected to the mounting with a hefty [lightning?] conductor.

The mounting is presently well isolated, by the well protected, dry timber construction for the 14 odd feet pier supporting it. The feet of the pier are bolted to pre-cast, concrete foundations blocks but these are within the dry building area. Above the mounting is the insulating plywood dome.

Should I give the mounting a direct route to ground? That might raise the potential for shorting to 250V for any other mains driven service in the observatory. Things like my LED light bulbs run on mains. Do I increase the risk of a lethal shock if I am touching the [newly] earthed metalwork? I really have no idea.

Perhaps I should simply reverse the 2-pin mains plug in the 12V power supply? We soon discovered, on arrival in Denmark, that our imported [UK] home appliances lost their shock potential when we did that. The "British" metal sewing machine was a case in point. A tickle of electricity when touched was confirmed by a bright glow from the test screwdriver! We reversed the 2-pin plug and there were no more shocks and no more neon glow.

Danish bought washing machines can give a shock when the 2-pin plug is put in the "wrong way" around. No shock the other way. So I routinely mark the plugs green and red. Now they always go in orientated correctly without any problem. There is the German Schugo system of earthing but I'm not sure it offers any protection unless used with 3-pin plugs and sockets.

What I could do is run a hefty 3-core extension lead out to the observatory and use 3-pin sockets instead of 2-pin. Perhaps what I really need is a "tame," Danish electrician to advise me. Without getting into a full mains system with consumer unit and multiple outlets in the observatory.

Readers in the US may wonder at the amateur way I am dealing with the electricity supply. They have countless rules governing all aspects of building. If I really was breaking all the Danish installation rules then I'd simply revert to a rechargeable battery. To provide a 12V DC supply for the drives and matching LED lights.

Saturday: Cloud again. Lots of high cloud making the sky milky and the sunlight soft. Checked the effect of plug reversal. Zero effect. Identical, dull, neon glow from both plug orientations. My camera wouldn't register the neon glow so you'll just have to imagine it.

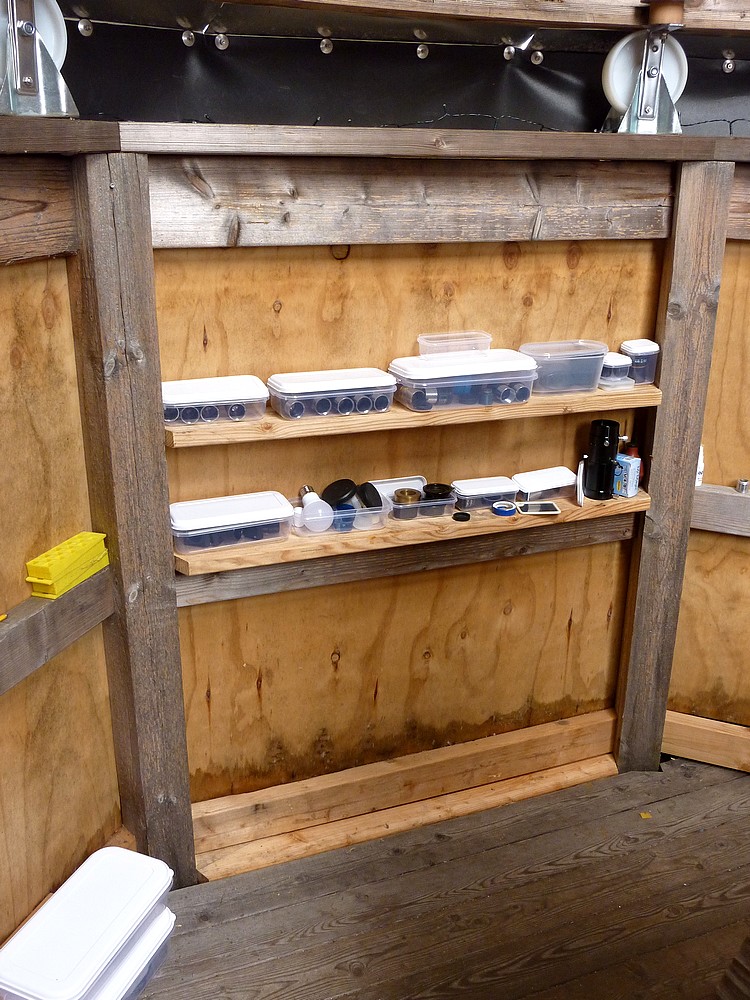
I bought some more of the nested, snap-on lid, plastic storage box/tub sets. I needed more of the small ones rather than the larger. Now I could separate accessories between regular and occasional. No point in repeatedly handling items which are only rarely needed. Nor unnecessarily exposing them to dust and dew. Small boxes leave less room for confusion since it reduces choice in the dark. A red light over the top shelf would be useful but I don't want anything projecting just there. The height of the tops shelf was chosen to allow clearance for the boxes.


*

20.2.19

Wednesday 20th: Mods and sods.

*

A bright, but cloudy day. With not much chance of solar viewing between the clouds. I have been tidying the observatory and still have minor jobs to do. Sealing around doors, fitting water bars, etc. To stop driven rain coming in. The damp plywood, which turned black in winter, now shows much reduced moisture content on the meter.

The dome has been remarkably waterproof so far. With no damp spots on the floor regardless of often heavy rain and strong winds. The curved outer segments, which I applied to the top ring, worked a treat. Greatly reducing draughts and stopping the rain from collecting on the top ring in the SW. 

I'd forgotten that I had fitted the missing northern floor board because it had been hiding under lumps of wood. The equipment shelves are proving quite practical so far. Though a third, upper shelf would make better sense to avoid bending to select eyepieces from the smaller containers.

With the dewshield removed I had much more dome clearance for the 7" objective. While the focuser had poor clearance from the top ring in its southern pointing arc. So I shoved the main tube 4" up through the opened rings and clamped it tight again. Then I removed the upper, offset weight stalk and loaded the lower one instead. The idea was to give a greater tail end bias in balance and it worked. The 6" H-a refractor was still balanced.

After freeing both worms I could confirm I had neutral balance in all telescope positions. A few trial slews ensured there was no imbalance or tight worms. It rained in the afternoon.

Thursday: 46F. Dark grey overcast weather but quite mild. Worked on the main [entrance] doors to reinforce them and increase security. It stayed dry just long enough to use the bench saw outside. A shopping trip produced a new 1m length of M16 galvanized studding for the offset weight stalk. M12 was probably fine but looked too spindly to my eyes.

Friday: Fitted a length of M16 studding in place of the 12mm offset stalk while I waited for the promised sunshine. Cloud and wind coming from the SE like the sun. Few clearances and poor seeing. Though I was able to confirm the dark filament's progress across the disk. Nothing in WL [white light.] No proms visible so far. The cloud overhead is now coming from the NW! Two very distinct layers. Then completely overcast! Turned my attention to making a third, larch, accessories shelf.

14.30pm Lunch over. Still far too much cloud. Poor seeing with heavy, thermal, image disturbance. Very odd to see cloud layers traveling rapidly in opposite directions.

15.00pm 45/40F. In/out. Still very cloudy with a few short breaks. By the time I dash to the eyepiece the clearance is already over. The solar prism heat-sink is quite literally cold.

The eyepieces are much more accessible now I have three shelves and can all be easily put back into secure storage. The snap-on lids can be dropped over the boxes just to keep the dew off while I am in the observatory. It hasn't proved necessary to mark the lids as to contents. Repeated habit soon teaches even an old dog new tricks.


Click on any image for an enlargement.
*


19.2.19

Tues. 19.2.19. Hacksaw Massacre II [The sequel]

*

Tuesday: After teasing me for ages I finally had enough sunshine to measure the focal plane from the backplate. 30cm or 300mm exactly after repeated trials [and tribulations.] Which means I need a 70mm extension to bring the etalon tuning ring to 100mm. Or 200mm inside focus. The distance to the far side of the etalon ring on the telescope side is 30mm.

Except that nobody makes a 70mm extension. So, for the moment, I'm using a 60mm extension with 10mm of the etalon spigot visible. Had I chopped only 10mm from the main tube I'd be golden. Ah, the wisdom of perfect hindsight!

The only time there was any real sunshine, between the heavy clouds, it rained. So I'm waiting for this afternoon's promised sunny periods to see if using the correct etalon distance actually improves matters.

I can't be certain but I think I've been using too long an extension until now. Probably putting the etalon at 180mm from the focus instead of the desired 200mm. I was actually doing the right thing by chopping the main tube but overshot by 10mm. When I only needed to gain 10mm of inward focus. I can experiment with reducing the 10mm of spigot overhang to see if it helps the image quality.

I'm keen to see if the PST "sweet spot" has changed with the correct geometry. It was a nuisance having to constantly move the sun's image around the "O-ring" of increased sharpness. The best eyepiece focus is longer than before. Because I'm having to use a bit of extension on the 2" spigot of the short helical focuser and a bit less on the eyepiece barrel. This could be improved by adding a T2 extension.

As I enjoy lunch the sun keeps coming out full strength for a few moments. It's going to be a long afternoon. As soon as I was back out to the observatory it started raining hard! Then hailed. It was lucky I took my laptop with me so I can waffle during heavy showers.

15.00pm and still no sun!

15.35 and still waiting for long streams of cloud to pass. Large patches of blue overhead. Even when the fast moving lower cloud clears there is often higher cloud. I did a manual flip and centered and synced briefly on the sun. So the drives can keep it within sight in case of a sudden clearing. It saves time not having to search for the disk. You need the patience of a saint with astronomy!

15.40pm 48/43F [Out/in] cooler in the wind through the slit. Sun at last! The large dark filament is now just above central in my view of the disk and nicely clear with lighter patches around the base. Quite a tall "C" shaped prom growing at my 10.30. Or about 10.00 on GONG H-a. Best seen at 60x. Still nothing visible in white light +SC. Sun now only 8.5° in altitude. Milky sky low down to SW.

16.10pm Filament still visible but local trees now obscuring the sun.

16.15pm Cold and giving up for today.

Click on any image for an enlargement.
*

Monday 18th Hacksaw Massacre! Director's Cut.


Monday: Those of a nervous disposition should probably avert their eyes now: It seems I have been working with a measurement of 22cm or 220mm inside focus for the rear of the etalon band. It should of course be the magical and almost legendary 200mm or 20cm. Whichever floats your boat. I have no other explanation for the 22cm figure, wobbling about in my head, other than age, idiocy or failing memory. Or, probably, all three and more besides.

As I was admiring the shiny, new bit of kit I suddenly realized that I could use this 2" EP holder as my first line of support for my modified PST. It had the same thread as the removable nose-piece of the 60mm extension fixed irrevocably to my massive back plate.

Small gap [arrowed] where the rotating polarizing adapter is lifted slightly by having two 50mm filters stacked at the bottom.

So I dutifully re--checked the focus position and then measured inwards by the completely and utterly wrong 22cm. I even chopped another 20mm from the end of my old 6" f/8 Celestron! If I carry on like this the stumpy dewshield will be longer than the main tube! Dogh! 😳

Tomorrow is promised grey until the afternoon so I shall have to wait for a chance to find the focus using the sun.  If only that bloke didn't keep shortening the main tube it might have been worth [magic] marking the back plate with the distance to focus. There's nothing else for it: I'll just have to hide all his hacksaws from him!

I hereby promise [cross my heart and hope to die] not to shorten any more telescopes until I have a clearer idea of what [on earth] I'm supposed to be doing. Luckily I had been ploughing through the old modding threads on the Solar Chat forum and immediately discovered my [20mm] error. As they say: "It's not what you think you know. It's having no idea what you're thinking. Nor why.

Must try harder. D-


Click on any image for an enlargement.
*

18.2.19

18th Feb 2019 Solar musings.

*

Monday and it's sunny again. Though a bit milky around the edges. So I'm not rushing out there before morning coffee. It always takes a little while for the sun to gain enough altitude to sharpen up and lose its initial thermal "boiling."

I have a 2", ST, UV/IR blocking filter for the solar prism coming in the post today. It may not be strictly necessary but why take the chance? Having the new filter will give me greater freedom to compare the effects of using the SC [green] filter and viewing without it. I saw the Solar Continuum as a mild blocking filter and extra insurance for my eyes. 

IR and UV are quite "sneaky."[technical term] Being completely invisible then can cause eye damage without any apparent extra image brightness or pain. Lacerta recommended using such a filter for larger apertures. My 180mm [7"] refractor is a bit larger than most amateurs use for solar, white light viewing. Hopefully I shall enjoy the advantages of greater resolution once the sun rises far enough to escape the worst effects of the turbulent atmosphere. That said, higher solar altitudes produce more ground warming. Leading to increased thermal effects. There is a belief that limited apertures [~120mm] provide the clearest solar views more often. 

I'm hoping my raised observatory will distance me from the worst ground currents. Though placing myself in a dome is supposed to make matters worse. So called "dome seeing" can produce its own thermal problems with image agitation. A white dome would have helped reflect the sun's heat away but I don't want the attention.

I do have the option of opening the ground floor doors. To hopefully induce a strong chimney effect. There are also the double doors to the veranda. Which can be opened if there is a westerly breeze to flush the dome of warm air.

I have considered adding louvers to the dome to block direct warming. There is also the option of an adjustable shutter screen to stop the sun from entering the observing slit. Not easily done but possible. It has been known for decades that an opening to en enclosed space leads to solar warming. There is no need to add glass to warm the interior.

10.50am 48/45F [Out/in] nothing visible on the disk in WL.
Prom on the bottom of the sun at 7.00 in my view. Showing as 10.00 on GONG H-a.

11.20am  I have cut out another stiff, black foam, light shield for the eyepiece itself. This blocks the bright, peripheral dome interior from my field of vision. The main shield blocks the direct sun from reaching my face. Both shields contribute to the contrast in H-a. You'd think the sun was bright but not in H-alpha. Which is a deep red to which the eye is less sensitive than to brighter surroundings. It's much like trying to see the night sky with overhead street lamps.

The dark filament, surrounded by the large, lighter, disturbed area, from several days ago, continue to cross the disk. Some other darker markings on the disk [on Gong] worth looking out for.

12.15pm I tried a 15mm for 80x but had to return to the 20mm for 60x.  

The TS items have arrived in the post. There wasn't quite enough room to add the IR blocking filter below the polariser. Fortunately there is a shoulder stop to prevent damage to the prism. The small standoff won't affect anything so I have ignored the slight projection. The three, rotation locking screws provide security enough.

I also ordered  a T2 > 2" eyepiece adapter for the prism thread in the hope of greater support for a binoviewer. A sturdy bit of kit, too, with a good bit of weight to it. If I want to use it on top of the Lacerta prism it needs to be a really solid fitting.

Another week has passed since I sent my last email. So I have reminded TS that they still owe me a response about the binoviewer misalignment.

Click on any image for an enlargement.


*

17.2.19

17.2.19 Balancing the OTAs.

*

Sunday: Cloudy until the afternoon and then only short sunny periods of weak sunshine. With the added weight of the 2" Lacerta, solar prism I decided to check the balance of the OTAs on the mounting. I had the distinct feeling that I was pushing the absolute limits of the four x 5kg counterweights. [44 lbs in olde money.]

By slackening off the Declination worm housing/support plate nuts I reduced friction to what little is left in the main bearings. Which are self aligning, 50mm bore, cast iron, flange type, ball bearings. The pair of OTAs was a little nose heavy so I adjusted the tube balance weights on their rails. Soon the entire revolving mass was in a state of near equilibrium.

I wanted to ensure that the pair of OTAs would stop at random positions. So I then had to reduce the offset weights on the stalks. They were initially heavier than required to balance the entire 6" OTA attached to the side of the 30" long saddle. I had deliberately placed the tube balance weights opposite the 6" refractor on the saddle. So they were helping to manage the offset 6".

Eventually I reduced the balance weights until the 6" wanted to be positioned gently downwards. Moving the "stalk" weights out a little more again then neutralized the balance around the Declination shaft.

Spinning the OTAs produced no obvious bias but was very impressive! I could then lock the Declination axis worm into its wormwheel again. Allowing two axis freedom is much too dangerous with such large instruments unless they are already close to perfectly balanced!

The image shows the set-up before I replaced the offset "stalk" weights with much lighter ones. The 6" H-a refractor is surprisingly, easily balanced with these. It was too dark for pictures by the time I had finished balancing. Now I can reduce the lengths of the threaded stalks and increase the barbel weights slightly to compensate and maintain their combined moment. Anything projecting from the sides of the OTAs is a nasty "head magnet" for the unwary climbing up to the observatory floor. So I want to minimize the projection of these extended weight stalks.

Note the "posters" on the obs. wall with large, block text tables of magnifications of both telescopes against eyepiece focal length. With GPC compensated powers alongside for when [if] I ever get my misaligned binoviewer back from T-S. I also have an AWR button pressing menu for the Intelligent Handset IH2 [paddle.] There's nothing worse for somebody who needs reading glasses than fine print in a darkened, red lit dome. I don't want to be finding and then donning spectacles just to see what power I'm using.

Only now could I safely slack off the RA worm while keeping a firm hold on the 7' long 7" OTA. You can't just remove the friction and expect such a large structure to remain still. It has quite a serious moment [total effective mass x distance from the pivot.] It also has a large arc of swing [at both ends!] Which is only just contained within the hemisphere of the dome and its lower, octagonal walls.

Meanwhile the intrepid "mechanic" is standing firmly within the 3/4 of a sphere of potential range of motion. It may not quite have the power to hit me out of the observing slit and on out to the garden boundary. It can still be painful to be struck without warning by the accumulated mass.

The objective of the 7" alone weighs 10lbs. The 6" objective is no lightweight. 20kg of counterweights will do what they will when released. Then there's all the extra OTA balance weights, two telescope tubes, the focusers, PST and solar prism goodies.

Thankfully the release proved that the main counterweights were still [just] in charge. The OTAs wanted to gently nose dive if left to their own devices. More adjustments of sliding weights and the polar motion of the entire mass was very slightly, main counter weights down but predictable.

I really ought to have an adjustable weight to balance around the polar axis. I can't put it on top of the Declination, bearing housing because that would upset the torsional balance. It would need a balance weight on rails on either side of the Dec housing to keep things neutral. I had the idea of using large, eye bolts to support these threaded, weight rods. Though this wouldn't be as "pretty" as brackets and a plain, tubular rail. The main advantage of Dec side weights is overall compactness. Extending the Declination shaft, to improve the leverage, would increase the projection of the main weights into the already cramped work space. 

Absolutely worst case scenario when balancing is the OTA's wanting to swing downwards in a hurry when released! This could happen if the main counterweights were not heavy enough to balance the combined OTAs.  Not this time. I re-clamped the RA worm nuts and all was safely gathered in. At least for the moment. The drives would no longer have to lift heavy stuff uphill. Nor resist its impending descent. Both problems leading to noisy motor stalls. A sure sign of imbalance.

The gibbous moon was rising when I went in for a cup of tea and rest. More later if it stays clear. It did, but the moon was blindingly bright. With little to see except on the terminator. I went up through the powers to 220x but Plato was so poor in contrast that I could see no minor craters. I even tried the Baader Solar Continuum and the Orion 2x Shorty Barlow but it didn't help. So I switched off, locked up and retired indoors to prepare for dinner.


*

16.2.19

16.2.19 Solar

*

Saturday 16th 42/41F [In/out]  Clear and sunny start. SE sky rather milky. Forecast for cloud later. Time depending on which forecast I trust. None of them!

09.30am Blank disk in WL SC filter.

H-a: Small & fuzzy prom on eastern limb.  Strong thermal effects from low sun. Still only 13° altitude.

10.20 am: 46/43F. Back from morning coffee. Sky now covered in persistent vapour trails! Blogger language has switched to US Ingleesh. Should be UK English. UK English now gone as an option.

A clearing has exposed surface detail with yesterday's disturbed area with dark thread [filament] further onto the disk.

10.30am GONG H-a shows small proms on western limb but my etalon is not cooperating.  WL still blank.In/out]

10.45am: The dark filament has taken on a seagull form. Tried 15mm for 80x but doesn't show any more than the 20mm for 60x. Wind picking up from SE. Same direction as the sun so getting breezy inside the dome. Thin cloud streaming over from the NW. Thermal shaking on the limb. It's odd how my eye has to tease out the surface detail. The immediate reaction is blank bright red disk. Then the 'orange peel' starts to show up and spreads towards the center.

11.00am: WL+SC  now showing the disturbed area very subtly.  Even more difficult to see than in H-a! I wait for a brightening of the light patch on the obs wall from the open slit for best results. The shadow edges harden. Then there is a hint that the whole disk is covered in fine texture.

It is probably too early in the year to expect much from such a low solar altitude. I find it best to wobble the image slightly to allow my eye to lock onto the surface texture. The limb looks sharp but the subtle detail is slightly off best focus.

11.20am: Just to be fair, I put the Baader solar foil filter back onto the objective and swapped back to the star diagonal. The Lacerta prism is definitely superior in these very difficult seeing conditions. I don't even have a slow motion focuser.

I want to improve the collimation but will not waste any sunshine hours. It is fascinating to swap eyes at the eyepiece to compare what I see with the other. I normally use my right eye and the sun looks a completely different green to the left eye through the Baader Solar Continuum filter. Which always looks brighter and pure apple green compared to my right eye's much duller and more sage green.

11.30am: 51/46F. Occasional bursts of thermal boiling on the sun's image.  I have the south facing door open downstairs to help flush warm air out of the dome. Though it is so breezy now the air should be well mixed. Things have even been blowing off the shelves! A goose has just flown across the sun. Jet blank in H-a.

1140am Sun at 21° altitude. A conspicuous, jet prom has just become visible at my 8.00. Small but narrow. Hardly showing anywhere on Gong yet. Mostly a broader smudge at their 10.00. The nearby filament [on the disk] is surprisingly narrow, sharp and dark. A gust just rotated the entire dome by 1m/ 3'! I cannot believe how effortless it is to rotate the dome with the friction roller and hand crank. Before that I was at my physical limit tying to push it round directly by pressing on the ribs.

I found my copy of Baxter's "The Sun and the amateur astronomer" yesterday. (1963 edition) His [film] sunspot photography makes me blush at my own pathetic efforts using a handheld, short zoom, digital camera.

Baxter was busy long before H-alpha became accessible remotely affordable for the average amateur. Sidgwick "Amateurs Astronomer's Handbook" has almost nothing on solar observing. I was looking for diagrams of the various types of solar wedge [Herschel prism] online and found almost nothing. I remember being shocked at first seeing the Sun using a home made, Baader solar foil filter on my 90mm f/11 Vixen. Quite a revelation after decades of occasional, fuzzy, eyepiece projection!

12.25pm 56/49F Sun at 22°. It feels much chillier in the dome than earlier when it was almost still!

12.45pm 52/50F Proms on western limb at my 2.00 & 4.00. The 4.00 looks much more interesting. With a pyramidal spike and "smoke" running parallel with the limb. It is so small that it deeds the 15mm 80x to see anything much at all.

13.00pm Cerro Telolo, Chile, is showing the best image so far on GONG @ their 2.00. I just had to fetch my old down jacket to keep warm. The Lacerta heat sink is at 27C/80F.

13.30pm Indoors for lunch after quickly adding the Nyloc nuts to the push screws of the 180mm objective cell.

14.00pm 53/50F. Back out to check the collimation. Still full sun but the sky is slightly milky. I was able to overlap all the reflections from the objective surfaces. The image shows how the nut increases the surface area of the plain screw end.

Before collimation ensued I ensured the push screws were central in their thread length to avoid squashing the nuts between the cell and the plywood. I had always planned to cover the bare plywood ring neatly with an example of recycled aluminium cookware but never progressed further.

15.00pm H-alpha now dimmer than before. Sun now only 14° altitude. Did a manual flip before packing up for the day.

*

15.2.19 Moon, M42 and miscollimation.

*

Went over to look at the half moon up high in the SE for an hour before being called in for dinner. Back up to 220x [20mm x2 Barlow] but I just couldn't resolve any craters in Plato. A quick check with the Cheshire showed that both the focuser and objective were slightly offset.

The plan is to add a locking nut on each of the objective cell push screws. I think the  ends of the present screws are pressing into the plywood ring. Which is repeatedly throwing off the collimation. I don't have any aluminium sheet large enough to cover the entire plywood ring. Though pads could be placed where the screws meet the plywood ring.
 
The sandwiched, aluminium dewshield used to protect the plywood from the screws but not any longer. Adding Nyloc nuts will greatly increase the surface area of the ends of the push screws. There is room for them between the cell flange and lens cell itself. I just have to make sure the nuts don't get compressed between the cell parts or it will lock up the adjustment range.

The focuser backplate is also adjustable but with springs as the push element. This is obviously not ideal since it keeps moving relative to the main tube. I have repeatedly replaced the compression spring with stronger examples without reaching a satisfactory result.

It looks as if I really need to replace the springs with serious push screws like an objective cell. The weight of the solar prism is obviously a new factor in resisting misalignment. With the added weight of a binoviewer attached it wood all get a bit risky for continuously stable collimation.

I looks at M42 in the wrong order! After time spent, even at high powers with a dark green SC filter, I was made Moon blind. So I struggled to see the full extent of the nebula.  


*


15.2.19

15th Feb 2019 Solar: First view Lacerta 2" solar wedge:

*

Friday: Overnight frost. Mist clearing to sunshine behind thin cloud in the south east.

9.45am 41/38F In/ out. Already set up. Disk blank in white light. 

Noticeable prom on the eastern limb in H-a. Some surface texture. Waiting for improved clarity with cloud hopefully clearing. Expecting my prism adapters about lunch time. My lucky day! They arrived at 10.30am!


Unbelievable difference compared to my oversized Baader solar foil filter! Instant surface texture near the prom. Rather like the scar from a childhood injection. Moved to 26mm EP for 87x.

Gong now clearly showing the prom "ramp." It was just a fuzzy tuft earlier on GONG's various disks.

The rotating polarizer feature feels very sophisticated. Dimming to personal taste and best clarity. I have only ever had access to a polarizer on a borrowed, brass 'research' microscope in my youth.

11.35am After nearly an hour the temperature of the Lacerta's heat sink has risen to 30C/90F. Warm to the touch but not remotely unpleasant. The 'ramp' prom has changed into a tall, leaning post in front of a smokey bonfire blowing downwind.

11.45am Changed to 15m for 80x. The former 'leaning pole' is now very wavy. With the upwind 'bonfire' now brighter than the smoke. Changing by the minute! Pole now resembles a sloping tornado. The bonfire has detached from the limb and its smoke become very humped. WL[SC] surface detail spreading as a patch further onto the disk.

12.00am The smooth tornado is turning into an ugly twister full of debris. The bonfire has moved behind the twister or simply vanished. Smoke thinning with a bright tip to its tail. Smoke humping, thinning and detaching from the limb. Bonfire smoke more strongly humped with a tapered attached tail reaching the limb. 100x still too much for best clarity. Returned to 87x. Smoke now branching from the tornado, more strongly humped with a fishtail.

12.15pm Tornado getting steadily messier above the base. Lean angle increasing. Small proms on limb nearby. 'Branch' gaining in thickness and density. Tornado has reached 45° lean and thickening. I wish I had my binoviewers!

12.20pm  Tornado curving back upright at mid height. Getting thicker above the base. A dark, curved 'shadow' of the tornado has appeared on the disk nearby. Not visible in WL.

12.30pm Twister now heavily knotted and bifurcated at the base. The humped smoke is also becoming knotted. A patch of smoke as appeared upwind of the tornado. Tornado twisting, knotting, losing height and dispersing. Upper tip thickening and brigtening into an arrowhead form.

12.35pm Whole prom becoming wispy and tenuous. Dark thread on disk still visible. Small, bright hump on limb below the former prom. Now gone again. WL Prism heat sink 38C, 100F. Surface feature becoming very hard to see.

12.45pm Prom now hard to find in H-a. Still just there, but very wispy with a slightly brighter tip.

12.50pm 52/49F Downstairs door open for chimney effect. Prom now hardly a shadow of its former self. I'd struggle to find it now unless I knew where it was. Dark line on disk still there as a guide.

13.00pm Nothing visible in WL. Heat sink stable on 38/100. Sun at 21° altitude.

13.10pm Prom now two wispy deltas pointing away from the limb. Thermal effects becoming stronger.

14.30pm 54/51F Back from lunch. Small proms sprouting like weeds from the bottom of the sun. Eastern limb on Gong. Still signs of this morning's very active prom and the dark line on the disk.

WL mottled patch is still visible. Better seen with dim polarization. Heat sink still stable on 38/100.

Now I have to go shopping! ;-(


Click on any image for an enlargement.
*

14.2.19

Lacerta LACS2, 2" [50mm] Brewster Angle, Herschel, Solar Prism Pt.3:

*

Pt.3: The more I write the more new stuff occurs to me that I have not already covered. 

Another image of the side view with the 67° Brewster Angle [eyepiece viewing angle] drawn in. 

Note the hex socket head screws in the slotted recesses: These are for aligning [or collimating] the prism in its housing. By this means the prism tilt can be adjusted to make the input and output beams concentric with the tubular adapters.

Here I have rotated the image by 57 degrees to show the eyepiece angle at my maximum, local, solar altitude, at lunchtime, in high summer, here at 55N. I can't see any problem.

Relative size compared with a 2" star diagonal in their storage box. The star diagonal felt absolutely huge when it first arrived in the post. Now it is, itself, dwarfed by the Lacerta solar prism.

The Lacerta probably weighs twice as much. Mostly thanks to the hefty plates from which it is constructed. A simple, bolt together solution, involving CNC machines but no expensive castings. It can be easily dismantled if necessary for cleaning or modification. Rumour has it that these units are made in Hungary.

Here is the Lacerta dangling from my old, Vixen, refractor, 2" focuser on a heavily overcast day. Well, you have to practice, when you can, don't you?

No doubt more pictures will follow when I can actually fit an eyepiece to the prism. Delivery of an M48 to T2 adapter and T2 to 1.25" receptacle from TS expected tomorrow.  Their same-day dispatch, via UPS, is amazingly quick. Two days from ordering from Germany items are delivered to my home in Denmark.

Here is the screw-in 2" filter holder & 48mm threaded adapter. The rotatable filter holder with Baader 2" polarizing filter and M48 male thread is inverted to show the layout.

The adapter will normally be rotated to the required angle for desirable dimming and locked with the three thumbscrews. An eyepiece receptacle is attached to the M48 x 0.75 thread not shown.

M48 to eyepiece adapters are available in 1.25" and 2" sizes from TS amongst other dealers. M48 x 0.75mm pitch is the standard 2" filter thread.

The 2" filter holder now inverted. Shown with ND3 filter installed by the factory. Already covered in dust and only one day out of the packet. I keep a rubber bulb, lens blower in the observatory.

The final image [right] shows both components the correct way up. The M48 male thread is on top of the rotatable, polarizing filter holder.


Click on any image for an enlargement.
*

13.2.19

Lacerta LACS2 2" [50mm] Brewster Angle, Herschel, Solar Prism Pt.2:

 *

This post grew too long for one blog page so I have split it it into Pt.1 and Pt.2.


The open bottom of the Lacerta prism housing is not the usual open window of the classical Herschel solar prism. From which a terrifying beam of transmitted heat would exit. Enough to burn a track across the lawn beneath the telescope. Or to cause severe burns to any unfortunate skin passing below the open prism!

Well worth bearing in mind if children circulate around a telescope used for solar observation. Or a solar instrument merely standing outside in daylight for adjustment. A classical Herschel prism would be a very poor choice for "public outreach" use without very careful and continuous monitoring.

No telescope should EVER be left unattended in daylight because the obvious risk of instant blindness! Even when it is overcast the sun could easily come out just long enough for an innocent to point it at the sun. With terrifying long term effects from instant blindness! The human retina may recognise brightness but has no pain receptors for invisible infra red and ultra violet. The blindingly bright, perceived brightness could be very short lived indeed for the unwary! Imagine the effects of a child or toddler looking upwards into the fiercely concentrated beam of a classical Herschel prism!

Fortunately the Lacerta's base is only open for better air circulation. Though four small screw holes are present in the base rectangle of the sturdy construction. Presumably these could be used to keep inquisitive fingers well away from the naked prism with the addition of a metal [?] mesh cover. A solid plate closure would probably be a bad idea. Possibly leading to overheating of the housing.

The intense, and focused, solar heat from the Lacerta prism, is instead fed to the inside of the milled and cubed, heat sink on the back of the housing. Though there is no obvious sign of a specially absorbent surface just there.

Online user reports suggest that the Lacerta heat sink does not become as hot as the more expensive competition in other closed [heat sink] Herschel prisms. There are ample images online of owners putting their hands under the Lacerta's open base. Just to confirm the safety of Lacerta's solar prism design.

Their 2" prism size is recommended by Lacerta for larger refractors provided a UV/IR blocking filter is also employed. No doubt anyone could fit a small computer fan over the heat sink if it should become dangerously hot after many hours of observing. Which could easily happen during a transit for example.

I shall report back on my experience with the heat sink. I have a remote thermal sensor "gun" to monitor the exact temperature. A device which is usually used to check home insulation [or more usually] a lack of it. The price of these laser guided sensors has dropped dramatically of late.

There was always a tendency to presume that Herschel prism owners were more serious solar observers than those who employ the much cheaper solar film filters. Perhaps it is rather like new hifi components bringing rapture to the owner. But most Herschel prism owners do seem to think they see more surface detail than with the Baader solar foil. Others are more doubtful of any real difference. 

I took the solar prism housing outside and photographed it in the even light of today's overcast. This thing is huge and very sturdily built, it will require considerable balancing on most equatorially mounted refractors. Even my relatively large, 7" f/12 will need some careful longitudinal balancing. With three, sliding, tube balance weights mounted on rails already I should be able to cope.

Some people imagine the rather weird exit angle of Brewster Angle prisms will mean aching necks. However, one would need a very lowly mounted refractor to cause such problems. At 55N the sun never exceeds about 57 degrees altitude and then only for while each day. So I can't imagine this being a great difficulty compared with the more normal 90 degree devices. Those further south will just need a lower seat or a taller pier. I haven't measured the exact angle in the image but it is nearer 90° on the [capped] telescope side. The eyepiece angle is still manageable IMHO. 

Having read the warnings on the Lacerta web page I decided I'd like the safety of a UV/IR filter to cope with my 7" refractor. TS offer a cheaper filter in 2" than Baader and others. Which can be left in the prism housing instead of changing a 1.25" filter with each change of eyepiece or the addition of a camera. Cameras are more sensitive to UV and IR well beyond human vision. There is always the nagging doubt that long term IR/UV "cooking" of the MkI eyeball is going on unnoticed. Better safe than sorry.

Click on any image for an enlargement.

*

Lacerta LAC2S 2" [50mm] Brewster Angle, Herschel, Solar Prism: Pt.1:

*

The postperson delivered my Herschel prism today. Well wrapped, thank goodness, because it had a large boot print and matching tear on the outer padded envelope! The prism came in a white cardboard box and multiple layers of tight bubble wrap inside the padded envelope.

Included in the package [at extra cost] was a single, Baader, 2" polarizing filter for solar image dimming. This is fitted to the outlet side, rotating ring. Which has a beveled undercut so that the three pinch screws cannot lose the ring.

No filter must ever be fitted on the inlet [telescope] side of a solar prism! The intensely focused heat from the objective will soon heat a filter to destruction. The moment the filter disintegrates is when your eye is no longer protected. On the outlet side of the prism most of the heat and energy has already been turned away by the prism.

Never use a so-called "Solar Filter" at the focus of any telescope. Cheap telescopes are sometimes provided with these supposed "Sun filters" to screw into the eyepiece. Then, as soon as the filter is destroyed by the focused heat the user is likely to suffer instant blindness! Never risk it.

It should be noted that the polarizing filter is not the main means of energy reduction but merely an eye comforter. The ND3 filter does most of the heavy lifting once the prism has shed all but 8% of the incoming energy. Interestingly [?] the Lacerta solar prisms use the so-called Brewster Angle in their design. Which explains the larger than 90 degree angle of the eyepiece [or output] end.

This increased angle [over the more normal 90°] slightly increases the reflected energy. compared with the 90° type which reflects only 6.5%. But, the Brewster Angle has the effect of almost completely polarizing the reflected light. Which means that a single polarizing filter can be rotated to dim the light before it reaches the eye. Hence the rotating collar, with built in filter thread, in the eyepiece adapter.

A 50mm, 2", ND3 neutral density filter is already fitted to the lower section of the outlet side. The view though the prism is exceedingly dim. More so than I had imagined until I remembered the ND3 filter was already installed by Lacerta in this particular model. Note that Lacerta also sell bare prism housings without any input or output adapters. These are for those who already have such fittings and filters so can avoid the extra expense of duplication.

Note that the bare prism housing can be fitted with a Baader Click-Lock input adapter to shorten the glass path length. This may save some telescope tubes having to be chopped to reach focus. Most telescope manufacturers have become aware that their products will be used with solar prisms and binoviewers so make the main tube a suitable length.

I hope I have a suitably threaded 1.25" eyepiece holder. It looks like a male T2 thread. WRONG!  It is the larger M48 x .75mm male thread. [standard 2" filter thread] I have now had to order an M48 female to T2 male adapter. Plus a T2 female to 1.25"eyepiece adapter with compression band. Will it never end?

Care will be needed to avoid damage to the installed filters when inserting eyepieces. I shall have to check the insertion depth carefully if there is no built-in step to act as a positive stop in the bore of the new EP holder.  Or that the shoulder of the eyepiece hits the top of the holder before the nose bounces off the filter!

The additional depth of my existing, 1.25" Solar Continuum filter must also be taken into account. I just couldn't bring myself to spend the whopping price of a 2" Baader SC filter as well. The piggy bank will have to cool off before The management starts making false accusations of excess frippery in the solar telescope department.

See Part 2:


Click on any image for an enlargement.

*

13th Feb. The long and the tall of it.

*

It's Wednesday and my prism parcel has reached another delivery office. The post doesn't usually come until well after lunch so I shall have to hope it went on the van. They have all the equipment and the technology but can't be bothered to scan all the parcels. Which makes their website, track and trace service a matter of guesswork and unnecessarily overloads their customer services. Often with 20 minute, telephone waiting times.

I shall have to allow for the extra weight of the Herschel prism in comparison with the present 2" diagonal. I may even have to add the binoviewer if TS ever get around to sending it back.


I am very tempted to go back, cap in hand, to the local engineering company who sold me some 50mm stainless steel bar for my axes. I thought I was being generous with my measurements at the time. But  have doubled the instrument load and moved the RA wormwheel to the bottom of the PA axis since then.

I now have four counterweights on the Dec shaft with only just enough room for the retaining clamp.
The PA clamp is just a stainless steel Jubilee clip. There was no room for anything else. I could do with a minimum of another 100mm [or 4"] on both shafts just to be on the safe side. Perhaps even longer would be more sensible in the long run. 

I have a 10" f/8 mirror burning a hole in its storage box and am not sure how much longer I can put off putting it in a tube. Earlier attempts to build a lightweight OTA failed due to torsional flexure. I have a 30cm [12"] steel duct tube waiting but couldn't possibly mount it alongside the existing refractors without adding several more counterweights. 

I'm not even sure it would be a good idea to have the 10" in the observatory. Which was specifically designed for refractors. Putting a 10" f/8 on a mounting above head height is really rather silly. It would need a stepladder to reach the eyepiece when it is horizontal! I am already having to stand on a beer crate. Just to reach the eyepieces of the refractors pointing at the low, winter sun! 

Putting the long 10" on the MkIV mounting pushes me right back down to the ground. Where I can't see the sky for tall shrubbery. Not to mention pushing the MkIV's capacity to the very limit. Fullerscopes used to put 12" reflectors on the MkIV but that may have been too optimistic. 

I could build a raised platform to the west of the dome but the considerable expense and all the work involved puts me right off the idea. I could build a Dobsonian but the whole point of a long reflector is a leisurely look at the planets and Moon. An altazimuth with no drives is the absolute opposite of my needs in that capacity.

I've had another idea. Instead of using weights on the 7" telescopes rings to balance the 6" I have made a simple balance weight on a threaded stalk arrangement. This reduces the moment of these weights relative to the main Declination counterweights. As well as increasing the moment of these smaller weights to balance the offset of the 6". I'll buy another length of studding [threaded rod or all thread] to allow me to make two, matching, but longer weight stalks.

I decided earlier on not to mount the 6" outboard of the 7" refractor. The 6" rings are mounted directly to the saddle. Being inboard of the 7" reduces its moment by several ft/lbs or cm/kg.

Some large, professional German mountings have a further declination counterweight outboard from the main cwts on extension rods. This saves having to extended the declination axis shaft to accommodate further weights. The outboard weight can usually be adjusted to balance the OTA[s]. If I drill and tap one cwt. for some threaded roads then I can do the same. The outboard weight can have matching clearance holes and be held by nuts on either side of the weight. This will allow fine tuning of the OTA balance and give me added counter-weighting into the bargain.

An alternative would be a weight bar mounted on brackets on top or sides of the declination axis housing. Smaller weights could be slid along the bar and locked in place with collars. Providing smaller balancing forces, than a full sized weight, but more finely adjustable.     

Click on any image for an enlargement.

*

12.2.19

12.2.19. More solar and RA worm adjuster.

*

Tuesday: Another sunny morning but cloud is expected later. Light winds today from NW but feels much colder.

Still no response to my emails, from either online dealer, concerning my Herschel wedge and binoviewer.

9.30: Setup on the Sun and set the drives going. 35F/35F. In/out. AWR/C-du-C has reversed the Dec drive direction overnight again. This is a daily occurrence now. I have to set it to Neg every morning.

Nothing visible on the disk. Proms at 5.00, 8.00 and 10.00. The 8.00 is the most interesting with two arches leaning towards each other. The 5.00 is a jet spreading out like a tree higher up. The 10.00 a hazy hump.

Yet again, I am struggling with the PST etalon's ring-shaped, sweet spot. The proms literally come and go with a small movement of the Sun's disk in the field of view. As does the surface texture. Rotating the tuning ring "switches" the proms on and off over a small movement.

10.30: 36F/40F. Thin cloud going over from the NW. Gong H-a shows the same proms but rotated clockwise by a couple of hours. Or ten minutes, if you prefer. As usual, I am having to stand on a beer crate to reach the eyepieces.

The sun is already coming and going behind thin, high cloud. Trying the 15mm for 80x but fighting with a plate of dimming cloud now. Sun still fits in the field of view with a small annulus.

11.00: Cloud increasing with few clear views. Blue sky turning to cloud in SE.

11.20: I'm wasting my time now. The cloud is forming downwind of me over the sun. Meanwhile the sky overhead get cloudier all the time.

Spent some time making a simple tension screw and bracket for adjusting the engagement of the RA worm. Then spent more time loosening it off because it made the stepper motor stall! There was no need for anything more exotic because it only rarely needs adjusting.

I had to re-balance the telescopes on the mounting after having removed the dewshield on the 7". Slews are much better now. It pays to release the worm from its wheel completely before you can trust the mounting's balance. Just slackening off the clutches isn't good enough in my case. The complexity of two large unstruments on the same mounting needs care. I have reached the limit of the four counterweights on the Declination shaft. Adding quite small weights to compensate for the offset of the 6" has had a surprising effect.

I have just received an email with the tracking number for the Herschel prism after 6 days and several emails. It's at the local delivery office so I'll see it tomorrow by the look of it.

Click on any image for an enlargement.

*

11.2.19

Night: Moon, Uranus, Mars.

*

The long, sunny day became a clear night. I was back out to the obs. by 7pm. Corrected the latest reversal of AWR Declination drive and synced on the Moon. With Uranus and Mars nearby I had C-du-C slew a few Gotos and made handset corrections until it was no longer confused.

Uranus is very small. As is Mars. I kept bumping up the power but neither was large enough to expect much. Mars was oval and Uranus showed limb darkening which emphasized it's ball shape.

Back to the Moon which was looking more rugged than usual. With lots of craters in deep shadow extending out into invisibility on the terminator. There was some thermal movement but the detail held up to 200x and beyond. After exhausting my range of shorter eyepieces I settled on an Orion 2x Shorty Barlow and a 20mm Meade 4000 for 10mm and about 220x. This remained crisp enough to satisfy but I missed the sense of flying above the Moon's surface and ease of seeing detail offered by the binoviewer. 

At 8.30pm I was called away to go in for dinner. Orion is almost south now so I want to see what the 7" can do with M42 in The Sword. I have been so busy building domes, mountings and telescopes over the last few years that I seem to have lost the habit of viewing the night sky. Having a higher viewpoint, Goto capability and C-Du-C means I can find stuff. Objects which were always invisible behind the tall hedges and trees are now within my reach. 

No more setting up and taking everything back in when it is iced up or saturated with dew. I just switch off, close the shutters and lock up. Moreover I am protected from the almost constant wind. 

Dinner is over and I'm going back out for a while. Thin cloud came over which spoilt M42. The Trapezium stood out like jewels  but the "wings" lacked contrast against the clouds. Packed up at 9.30pm.

*

11.2.19 Solar

 *

Monday: 39F, clear sky, NW wind. I'm still waiting for my Herschel prism tracking number 5 days after confirmation of order 6.2.19. No track and trace number for £16 postage? Who are they kidding? Registered on their website but still no sign of my order on their website order history. No response to entering the order number. No response to my emails requesting a tracking number.

Still waiting to hear about my TS binoviewer misalignment. First reported on 15.1.19. Confirmed they received the binoviewer back for examination on 29.1.19.

Opened up at 09.30 CET: Sun still only +14° altitude with thermal boiling on the limb. Blank disk in white light SC green filter. 32mm for 68x in 180/12.

Two untidy proms at 2.00 and 5.00 on the limb in H-a.  Confirmed with GONG H-a. Promising amount of surface detail with 20mm for 60x in 150/8 [120/10 equivalent with PST mods]

10.30: 40F. Sun has reached 17°. Noisy in the dome due to the NW wind. A bit breezy at times but I am well sheltered thanks to the wind direction being opposite to the slit. Surface detail and sharpness of proms slowly improving.

 11.00: Barely a hint of thermal effects now. Tried higher powers with mixed results. 15mm okay for 80x in H-a but loses the sharpness of the 20mm.

11.30: Sun at 19°. Tried 15mm and 12.5mm but still too soft.

12.00: Sun has reached 20° altitude. Changed from the Baader 45°elbow to a TS 90° star diagonal. Sudden improvement in image quality. Able to define the prom at 5.00 now into a complex form of floating and attached clouds.The shorter glass path of the diagonal requires the etalon adapters be adjusted to bring the EPs to focus. Tried varying etalon distance from focus but has no observable effect apart from shifting the focus. 5.00 prom seems to be changing rapidly but is too poorly defined at higher powers to be sure. NSO is showing the best prom image at 2.00 but not nearly as clearly as I am seeing.

Sun reaches max of 20° altitude at 12.22pm CET according to Stellarium.

Captured stills and videos in white light and H-a.

13.22: fine prom at 12.00 had all but disappeared earlier. The PST etalon "sweet spot" misbehaving?

13.30: Going in for lunch.


15.10: Sun below 12° and clarity is gone. Tried a flipand it tried to go via 

For those interested: There is a rusty Fullerscopes MkII mounting on eBay[UK] No slow motions, drives, telescope nor accessories but has an original pier with cast feet.

The IO film on Netflix is filmed largely inside a French Observatory. The female 'star' actually points the 77cm /30" refractor at Jupiter and gets a nice [Jupiter orbiting satellite] view of IO with an orbiting colony visible! The telescope was once the largest, longest and highest refractor in the world. The film is glacially slow and has a weak ending but is worth scanning through for the intermittent views of the huge telescope. There are images of the telescope on Pinterest if you can cope with the total anarchy of their website.


*

10.2.19

180mm [7"] refractor mods.

*

Sunday: It rained later as I worked for several hours inside the closed dome.

Physically collimating the big refractor was so challenging I risked everything and removed the objective. Removing the heavy lens in its cell is not a trivial matter! Supporting a 10lb lump in the depths of downward facing dewshield over a desk is apt to cause the jitters. The three, long, socket head, retaining screws are not only invisible but almost impossible to find with a long hex key on an extension. It must all be done by feel alone without scratching the front of the objective.

In the end I managed the task without dropping the lens. Nor letting the 8' long telescope swing viciously once it was no longer balanced by the lens! Last time it did swing. While I was perched high on a stepladder. The bare tip of the tube almost hit the objective right out of my hands, through the open slit and on down to the ground some 20' below! Lesson learned!

No such drama this time. I had a noose around the objective end of the tube with a loop on the other end of the cord wrapped around my foot. I also lightened the focuser end as much as possible and moved the three [tube] balance weights towards the lens end of their travel.

Of course the very last screw wouldn't come free of its T-nut. So I had a loose lens cell still deep in the now rotating dewshield. I used to think I was so clever trapping the dewshield flange behind the cell for simplicity. Not any more, I don't!

Once I had cleaned the back of the lens I refitted it back onto the tube without the stub dewshield. The thick, laminated, Baltic birch, plywood ring is a tight fit on the 8" diameter tube. The ring locks against the small flange on the end of the steel, duct tube. So the objective cell can be safely pulled against the ring without any risk of it pulling off the end of the tube. Push-off collimating screws through the objective cell flange provide the adjustable alignment.

A quick check through the Cheshire with a torch fitted with new batteries showed that my initial rough alignment was actually spot on. And I still hate the Orion Cheshire's foolishly thick, wire cross-hairs!

After lunch I shall remove the entire, 7" OTA from its tube rings using the pulley and block system. Then the stub dewshield will be slid along the main tube. To be held in place by nuts on the cell's pull screws behind the plywood ring. Whenever I need to collimate, in future, I just need to slacken the three nuts. I might even file keyholes so that the dewshield can rotated slightly to remove it or lock it into place. Then the obscuring dewshield can be easily withdrawn backwards. To allow free access to the collimating screws in the front of the cell.

The image above shows the full aperture, Baader solar foil filter in place on the front of the now-bare, objective cell. I made the filter holder from a modified baking tin. Using double sided tape for a snug fit and excellent grip without marking the iStar cell. The looseness of the filter foil is deliberate. Tight and flat foil ruins the view of the sun.

Fitting the stub dewshield to the main tube was a non-starter. There is one weight rail, three U-shaped handles, the finder base and the focuser backplate to come off first. All of which would need distant nuts to be removed. Inside the tube, at arms length, with my hand forced through the sharp-edged baffles. I decided to make the long dewshield smaller in diameter to match the plywood ring. Then it only needs a couple of wood screws removed to allow it to slide back or forth.

Tomorrow is promised to be cool but sunny! Hopefully back to solar observing.

Monday: I'm still waiting for my Herschel prism tracking number 5 days after confirmation of order 6.2.19. No track and trace number for £16 postage? Who are they kidding? Registered on their website but still no sign of my order on their website order history. No response to entering the order number. No response to my emails requesting a tracking number.

Still waiting to hear about my TS binoviewer misalignment. First reported on 15.1.19. Confirmed they received the binoviewer back for examination on 29.1.19.


Click on any image for an enlargement.
*