30.1.19

Avoiding dew inside a large refractor.

 *

Wednesday: 33F. Checking through the telescope without an eyepiece, yesterday, showed a large mist patch in the center rear of the 7" objective. It seems like madness having to warm a telescope for solar observation. It takes a long time for inner dew to lift when there is no heat in the sunlight thanks to the solar filter. Removing the filter might not help either. Though I have avoided doing so for safety reasons.

Overnight, the front of the objective lens is only partially protected by the full aperture, solar foil filter. The dewshield is always capped overnight with a large saucepan lid lined with a thin disk of foam. The foil filter has an aluminium housing and the saucepan lid is also of metal. All this metal only increases the area of conductivity in the unheated and well ventilated observatory.

I'm not sure if there would be any advantage to having an insulating foam or polystyrene plug directly in front of the lens. The 10" diameter aluminium dewshield is also in contact with the heavy lens cell. With the 7' long x 8" diameter steel tube immediately behind it. A bit of a no-win situation without added heat close to the lens cell?

I have no desire to spend hundreds on a commercial dew heater band and control box. So I think I'll try a sleeve of camping mattress foam on the upper main tube and dewshield first. Just to see if it helps to insulate the area around the objective lens.The temperature differences to avoid dew are quite small.

I may even try a computer fan to circulate air in the tube. This had been on the back burner to see if it helped instrument seeing in hot weather. The problem is deciding which end to have the fan and whether to suck or blow. It would require a large hole be cut in the tube. Finding a new [secondhand] tube in decent cosmetic condition may be difficult if I make a mess of it. A door behind the objective could be useful for [careful] cleaning. It could carry a small computer fan.

11.00. The sun is teasing again with milky light through thin cloud. Wish me luck.

11.15. 33/36F The edges of shadows of the slit on the observatory wall are not sharp even now. I could get a sharp edge on the sun's disk but little else. I have removed the solar foil filter in an attempt to clear away any dew inside the obj. lens.  The sun is steadily brightening so there may still be hope. I found enough grey foam for the upper end of the tube but not the dewshield yet. This stuff is as cheap as chips so I may buy another roll. It's a shame it marks so easily.

12.00. 34/36F sky still milky as the wind picks up and blows inside the dome. Still no definition!

13.15. No change in image clarity. Went in to have lunch.

14.30. No improvement in image clarity so I gave up for today. The sky never showed any blue even overhead.


*

29.1.19

29. 01.19 Solar

*

Tuesday: 28F overnight. 33-35F ext. 36-38 int. Early sunshine teased me into going over to the observatory. Whereupon it immediately clouded over with only brief glimpses through the overcast.

11.15am. 33F ext. 36F inside the dome. The telescopes and mounting were covered in white frost but the covered objectives and boxed eyepieces seemed to be clear.

12.00. I can see one small spot near the western limb in white light @ 83x in the 7". Not enough light in H-alpha to see more than the disk so far.

12.22. A clearing confirmed the small dark spot in H-a @ 80x. In white light the spot has a northward penumbral extension longer than the spot itself. A lesser grey extension southwards. A smaller spot is nearby on a line with the center of the disk. As the cloud cleared again it started snowing through the observation slit and I had to close up!

12.32. H-a. A dark triangle has appeared nearer the limb beside the spot. A large pale patch is firming up around the spot extending more towards the center of the disk. A constant struggle with the clouds crossing the image. Not to mention eye floaters. I am really missing my binoviewers! TS has just confirmed receipt for checking the [factory] misalignment. 

12.50. 39F int. Cloud getting thicker again and the wind is blowing through the slit. Hands getting rather cold from typing on the cold laptop. As soon as the dome lightens with sunshine I dash over to look through both eyepieces. The dome has to be moved on at intervals using the crank and friction wheel. This manual drive system works extremely well with very little effort required to rotate the dome in either direction.

I was lucky to have a grippy polyurethane wheel of the correct size. The long wooden lever, with heavy weight attached, did all the rest. In providing a continuous and smooth drive despite the variations in level of the dome base ring. Rebuilding the dome "upstairs" undid the original care in leveling while working down on the ground.

13.00. Solid cloud and cooling fast! Going indoors to warm up and have lunch. My old [black] down jacket may be bombproof for working in. But isn't the warmest for sitting around waiting for the cloud to clear at these temperatures. I wore my walking boots today and felt the benefit in warmer feet. My safety work shoes offer protection against things being dropped but aren't warm enough.

While I was waiting for a clearing I checked my site coordinates in AWR on the IH2. I was showing west instead of east! So I re-entered my observatory's longitude figures from Google Earth with a negative sign and was rewarded with an Easterly location on the IH2 screen.


*

27.1.19

Wet but busy.

 *

Sunday: There were several wet spots on the top rail where the dome was leaking at the joints. Despite almost continuous rain today I fitted the last, missing floor board in the observatory. This had required removing a veranda floor board. So that the mitered 'indoor' board could be pushed under the northern wall between two octagon posts. Fortunately the stainless steel, Torx, decking screws came out without much effort.

While I had the miter saw running I cut two more larch boards to make some accessory shelves. I would have preferred 150mm or 6" width instead of  the 120mm [nearly 5"] of the larch boards for the lower shelves. Though I suppose I could cut some battens to fit on the front to deepen the lower shelves. Then the larger accessories could be fitted into the slightly larger, plastic boxes. Instead of being housed in several boxes. There was a special offer of nesting, plastic boxes in the local supermarket so they may still have more.

The eyepieces fitted nicely into two middle sized, rectangular boxes. I'm now keeping the binoviewer pairs separated from the rest. This will save searching for the focal lengths in the microscopic writing on the Meade 4000 Series. The drooling moron who got the job of designing the orange writing should be languishing in jail somewhere. For wasting massive human resources over several decades. Not least mine as I search for my reading glasses and torch, yet again, just to be able to read the unintelligible script! 

I have printed out some magnification tables in large bold text. Then fixed them to the observatory walls in plastic filing sleeves. With two telescopes and a binoviewer, I find it almost impossible to remember the powers. Nor do I want do the sums in my head for four different focal lengths.

I also fitted a U-shaped, drawer-type of handle on the inside of the observatory front door so that it could be more easily pulled open. I still have to fix a strong roller catch to keep the door closed in strong winds. A Suffolk latch might have done but I haven't found any in Denmark. I can't have anything which locks from the inside in case of an accident and I can't be reached. My wife regularly visits when I am observing or working in there. So it would not be sensible to have to go downstairs just to unlock the door every time.

Rather than paint the inside of the observatory walls matt black I thought I'd use tar paper. This is a bitumen impregnated, heavy paper sold in a roll. Commonly used as a wind stop in lightweight wall constructions. I lined my workshop with tar paper when I built it and it has lasted for many years. Though I can't say I have spent lots of time in there with the door closed. I usually leave the door open for the extra light it provides.

My wife questioned the unknown toxicity and suggested charcoal grey, garden fleece instead. This is commonly used for stopping weeds from growing. It is also available in slightly heavier weights for stabilizing loose gravel drives and for under-sealing paving slabs against weeds and ants.

Fibertex is one commercial offering with claimed 3-5 year UV stability when exposed to sunlight. The idea is to remove the plywood panels from the observatory walls. Then to staple the material to the timber framing before replacement of the grooved plywood cladding. Hopefully the material will not sag over time and look untidy. While still providing a uniform, dark and non-reflective surface.The saving in time, over painting, should be quite considerable.

*

Weatherpoofing and storage.

 *

Saturday: I went up to check the observatory. To find a wet patch on the floor on the south side of the pier. The mounting was covered in heavy condensation but unlikely to be the prime cause of the wet floor. The dome's shutters are by no means well sealed at the outer edges when closed. Their overall width is critical for sealing where the outer ribs meet. The shutters butt together in the center at the same time as they meet the outer ribs. A central strip overlaps both shutters to prevent direct ingress.

In summer the slightest increase in ventilation will keep internal temperatures down. In winter I need better sealing of the shutters to keep the weather out. I could apply temporary arcs to the slit ribs to close the present gaps.

The floor hasn't been wet during rain before now. So the wetness might have been wind-blown snow. Today is forecast for all day rain. So I shall have an excellent chance to monitor the situation for leakage. The larch floor boards seem impervious to weathering. Once they turn grey they seem not to change. The observatory floor was certainly exposed for long enough for weathering to take place before the dome went on. The boards are intended for decking so could probably do with an oiling.

Fortunately, there was very little wetness on the top ring just under the dome. Normally it would be swimming on the south western side despite the overlapping rubber skirt. The curved extensions seem to have done their job by sealing the former 4" [vertical] gaps. I shall have to give the new timber a mineral treatment to darken them down to match all the rest.

I had a look at adding larch storage shelves at mid wall height on the north and northwestern walls. The midriff 2x4s would provide plenty of support for a 5" wide shelf laid on top and simply screwed down for security. These shelves would not get in the way when I am looking south with the telescopes. Yet would be wide enough to hold long and narrow, snap-top, food storage containers. Plastic boxes would provide direct weatherproofing and mechanical protection without impeding observatory use. Being well below the large radius of swing of the focuser on the 7" f/12.

I am beginning to get a better feel for heavily trafficked areas and those which don't need to be "child-proofed." Safely moving about in the pitch dark needs very careful thought and planning. Projections and sharp corners can easily cause injury when the user is completely focused on another activity. It's no use thinking you can duck under something given enough practice. It never happens! You will bang your head as soon as your mind wanders. Low doors and beams are a perfect example. Only the mounting, counterweights and telescopes offer potential targets for my head.

The LED lighting I have installed is doing its job well. Providing red background light without spoiling my night vision. I have a low wattage bulb inside the pier to highlight the stepladder and the large hole in the floor. [When the hatch is open.] Another overhead bulb washes the entire dome with dim, red light. 

I haven't done much night observing to have needed the string of red led "Xmas lights." They offer very little background illumination but are handy for marking out the borders of the dome and support ring. I am planning to fix them more permanently with staples once I decide on their best location. At the moment they are threaded through the roller support pressings and merely lie loosely on the top ring.

*

24.1.19

Observatory base ring sealing.

*

24th Jan '19. Despite it staying at 24-25F, -4C outside and heavily overcast I have been working on making arcs to add to the top ring. There are crescent shaped gaps between the skirt and the top ring where the rotation rollers sit. The gaps have allowed the wind and rain to blow into the dome.

The first image shows one curved addition from the outside. The heavy, 1.6mm EPDM skirt has been lifted out of the way to show the joint with the octagonal top ring. Which was constructed with 2x8s laid flat on top of the 4x4 full height posts.

The dome is 16 sided while the top ring on the building is eight sided. There will never be a perfect match between them but the rubber skirt can adapt to such variations if I make the ring as round as possible on the circumference. 

The view from the inside of the dome. Note the domed, aluminium, roofing washers to spread the loads into the rubber skirt. Hopefully this will avoid the fixing bolts tearing through the edge of the rubber over time.

 I used a 1.6m radius bar to mark the curves out of lengths of 2x4. While I could have nested the curves to save on materials I was using the bandsaw to cut them out. Which meant that I needed shorter lengths of timber to be able to handle them comfortably.  I could have used a jigsaw but on 2" thick material the blade can easily wander. 

I ran the curves across the 12" disk sander to tidy up any saw marks and produce a well rounded edge. The curves are each drilled 4" from each end ready for the 75mm [3"] Torx CSK screws which will hold them in place.

I was able to finish all eight curved lengths and screw them to the top ring. There is hardly any wind today. So I can't make a proper comparison with the former, very draughty conditions inside the dome. There was so much clearance in some places that the rubber skirt would slap noisily against the base ring when it was breezy.

The dome was given a quick spin, using the drive crank and 4" friction roller. This showed that there was no increased resistance to turning the dome due to skirt friction with the new timber. Snow is forecast and I didn't want a dome full of spindrift. So this was a good time to close off as many gaps as possible before the event.


Click on any image for an enlargement.

*

The Sun goes round and around.

*

My attempts to show the reversal and inversion of the binoviewer view compared to reality are not very convincing. Binoviewer view left. Reality on the right. The differences are shown inside and outside the circles.

The same geometry holds true of a single eyepiece in a straight through view. i.e. without a star diagonal or 45° terrestrial elbow.

I use a 45 elbow exclusively for single eyepieces because it provides the extra glass path length I need for focusing within the desired PST geometry. The problem with this arrangement is the constantly changing field orientation with instrument elevation.

Not that there's much change at this time of year with such a low sun. Looking downwards into a 45 elbow in a telescope would normally give you an upright, "terrestrial" view. Left to right are not reversed so you can still read writing on road signs. A star diagonal gives an upright image but reverses left and right. Twisting the elbow and diagonals around the telescope's axis gets much more complicated as to image orientation.

The red arrows [in the images above] represent the Sun's surface rotation as seen from the Earth. In the absence of clear sunspots it is not easy to judge this from intermittent observations. I constantly surprise myself on my complete ignorance of these simple matters. After over half a century of looking up I have only rarely looked at the sun and then only in filtered white light.

So it has never mattered to me which way the sun seems to rotate or which way is upside down or left to right through the telescope. I tried Googling about it. Nobody seems to make it remotely clear regardless of search terms. All they want to do is talk about the Earth's rotation.

Solar rotation matters because there is an emergent limb where new "stuff" constantly pops into view around the curve of the sun's surface. Then there is the opposite edge where everything is carried out of sight. It takes about 14 days for a feature to cross the Sun's disk. Too slow to easily judge movement if you have no obvious spots to watch.
 
My freehand drawing skills of solar phenomena would only embarrass me. Such daubs would still need to be photographed and then reproduced in a suitable format for the blog anyway. With the disk presently starved of spots, at this part of its cycle, any minor detail is interesting. It is also good practice for training my eyes to seek out this low contrast detail.

My view is very dependent on the position of the "ring" as I move it around the sun's disk. Prominences can literally switch "on and off" as the "ring of truth" is moved near the limb. The same is true of surface detail.

The so-called "sweet spot" is a well known phenomenon amongst H-alpha solar enthusiasts. My own "sweet spot" just happens to be ring shaped. If I try to expand it by tuning the etalon I get no surface detail at all! The ring appears as a slightly darker, finely textured area, projected onto the sun's surface. It lifts the fine texture out of an otherwise plain, red sun.

Difficult to describe but not unlike rolling the sun's image with a finely textured paint roller. The better the "seeing" [atmospheric steadiness and clarity] the more detail I see and the more the ring spreads its amazing clarity. This is demanding a great deal with the sun scraping along the heated ridge of my house in mid winter.  Though I am certainly not complaining. I have had some amazing views of our Sun's surface and "smokey" prominences in the crimson red of Hydrogen-alpha light.

15.30 38F out. 44F in. Tried the 20mm EPs with more success. Sun just clearing the house ridge going West. Just in time for the cloud to arrive! Closed up and returned indoors to the warmth.


Click on any image for an enlargement

*

21.1.19

21st Jan: Lunar eclipse: NOT! Sun instead.

*

I looked out at 03.30 to thick cloud and went back to bed. By the time I rose again we'd had an inch of snow. The first the dome has seen.

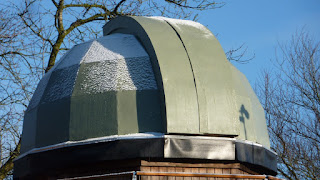
Adhesion is obviously proving difficult. Lots of snow had slipped off by the time I took a picture through an upstairs window.

11.30-12.00 The dome has remained dry inside in the snow. Lack of wind probably.

Solar: Another full day of sunshine. No proms visible nor anything of note on the disk. GONG H-a agrees.

12.30pm After a misty start with thermal issues in H-alpha I am now seeing a dark spot and a pale patch at 3.00 inv. True east side of disk. Can't see either in white light with green SC filter in the 7".

14.30pm Yet more detail coming out as I roll the 'sweet spot' ring around the disk.  Dark and light spots. Binoviewer with 26mm EPs for only 46x. With the 20mms [60x] the fine image detail goes soft. Still nothing visible in white light. A completely blank disk.

I can't capture any of this fine detail with afocal snaps. So perhaps the answer is to mark the detail onto blank circles. Using an imaging/drawing software like PhotoFiltre. The advantage of this is that I can rotate my virtual drawing without the mental gymnastics required to draw mirror images.


Click on any image for an enlargement

*

20.1.19

Jan 21st Early morning Lunar Eclipse.

*

Sunday 20th. 23F, -5C. A mostly clear sky found me back in the observatory to have a look at the sun. I wore my walking boots and salopettes for greater comfort in the even colder conditions.

Despite being covered overnight, both objectives were dewed over after a cold night. I pointed them into the sun to warm up naturally. Nothing interesting was visible in white light nor H-alpha for the first hour.

While I was waiting for dew clearance I added a rectangular, black, camping mattress foam sunscreen. About a 30cm x 23cm, it is thick enough to be self supporting. First I marked it off center with a 2" EP fitting and then cut out the circle with scissors. It slipped over the first extension at the backplate to still allow me to reach the etalon tuning ring. It has transformed my viewing comfort after being "blinded" for so long.

I also checked some details in the H-a telescope. While checking the focus point I discovered the etalon is bathed in a hot beam from the objective. With a target at focus I was easily able to burn the black foam.

Have I accidentally reversed the D-ERF? Or is this infra red beyond the Baader filter's rejection band? This needs further attention! Can the PST etalon survive such heat? The D-ERF proved to be orientated correctly.

The seeing had improved at 12.30 CET. Revealing two proms. at my 2.00 in the binoviewers using 26mm EPs direct view. Further, less obvious proms on the opposite side of the disk at 8.00. I need to confirm right to left and up or down through the binoviewers. Thy don't change what the telescope is doing so I'll assume my view is normal astro telescope: Left and right reversed and inverted. East is West. North is South.

Dew on 180mm, 7" refractor lens as seen through the 2" star diagonal.

The temperature inside the open dome had reached 40F by 13.00pm with the outside temperature at 36F. A difference of 4F. There are no visible thermal effects on the limb at this time. On previous days there was obvious boiling at the limb.

Back after lunch at 14.25 and some thin cloud has arrived. Clouds more visible as bands in white light. Some faint markings visible at around 1.00 on the disk in H-a. Perhaps a darker filament. Difficult to be certain as I move the doughnut of sharpness [sweet spot] around while standing on tip-toe!

It is easy to see how the sun's average altitude has changed over a short time. Last week the chimney shadow was well up on the dome. This week it is down on the obs. wall. Even the shadow of the chimney pot is below the skirt.

----------------------------------------------

Tomorrow's Lunar Eclipse will not only be with the moon low in the sky but very likely to be clouded out. Total Eclipse is early morning but the later stages will be below the local, Western horizon.

From the DMI [Danish Meteorological Institute weather and climate website] All times CET! January 21st at. 03:36 the shadow from the earth begins to slide over the moon. From 5:41 am to 6:43 we have total moon eclipse. At 08:48 the moon will again be free of the shadow. The last 13 minutes, however, the moon will have gone down and is therefore no longer visible. [Google Translate with numerous corrections.]

*

18.1.19

Solar 18.1.19

*

Friday 18th: 10.30am. Clear sky with bright sunshine 31.5F outside, 32.9F inside dome. Nothing visible on the disk in white light.  180mm f/12 R35, Solar Continuum green filter. 32mm EP.

Struggling at first in H-alpha. The binoviewer has steamed up. As has the 6" objective inside center. Leading to misty views. A "tree"prominence at 1.30 [inverted.] Has become more complex since I first saw it. Three "tree trunks" now. I'm getting a much sharper view than Cerro Tololo! That sounds boastful or even ridiculous. But, my view of the biggest prominence showed lots of structure which was completely absent on the Gong image. That said, it wasn't a good day for surface detail through my own telescope.

 These images show the intensely hot, refocused reflection from the internal D-ERF in front of the dewshield. The smoke from the target was instant and the beam burnt through the rubber in under a second! Is there any starker warning against taking short cuts or penny pinching with solar observing? Knowledge is safety. Take no chances out of ignorance!

The 6" objective looks filthy but is a common sight for optics under intense lighting. Flash photography will usually make a lens or mirror look very similar. The rings seen through the glass are the telescope's baffles.

Perhaps I need a hair drier to gently warm my cold, misted optics? If I take the optics indoors they will only steam up when they go into the warmth.

Surface detail coming out now. I tried the 20mm in the binov. but they steamed up from the moisture of my eyes. Have put them in an inside pocket to warm up.

The optics finally cleared by 11am. Another prom. on the opposite side of  the disk at 8.0 inv.. 26mm EPs. Since vanished. New 'leaning' smokey prom seen at 3.00 on the disk inverted  in the binov. 20mms EPs will throw double images sometimes.

12.20 pm. Now 34.2F out. 38F in. Airliner crossed the sun at 12.28pm. Inverted! "Please fasten your seat belts and remain seated." ;-)

Sun reached only 13° altitude by 12.47pm. Tried a meridian flip! Mechanically it worked okay but did not quite center the sun perfectly. This was probably because I had not synced for several hours and had done some gentle nudging in between as I looked around the sun's disk.  The typical etalon "sweet spot" is ring shaped. Features and prominences pop out and vanish completely as I move the field of view around the object. 

There is also no guarantee the mounting is properly aligned. I have only used an inclinometer and a compass so far. Since I am not hoping to capture images of the nights sky I am not presently asking much of the mounting drives and alignment. It will be an interesting exercise to align the mounting properly. Before that I need to make fine adjusters for the worms.

I have had to re-direct the paddle cable though the north side of the pier. It was originally going through the west side and the meridian flip risked stretching the cable. I decided to hook the paddle over the north side of the pier instead of from the OTA itself. On the pier it remains easily within reached and always accessible for objects in the southern E-W arc. Nor will the cable need to move with the telescope.

15.00 35.4F ext. 40F internal. Several proms. Still trying to capture afocal snaps of the prominences. A second, smaller plane passed across the sun. By sheer luck I caught another plane without trying or even seeing it! Three planes in one day! I have inverted my afocal snap to avoid passenger vertigo.

Later I went out to have a look at the gibbous Moon which was high in the east. Rather bright and lacking in contrast, with thin high cloud, as I pushed the power up beyond 200x. So I tidied everything away and closed up for the night.

Saturday: Afternoon viewing of the sun through thick mist. NO features visible but another plane crossed the disk.


Click on any image for an enlargement.

*

17.1.19

Observatory chores.

*

I am still very happy with the small AWR 'paddle' dangling near the focuser. It has cured my overwhelming desire to nudge the OTAs to center on an object. Doing so would lose the sky to the drive software and make Goto slews a disaster.

The other day I discovered that when the mounting was covered in condensation a lot of it ran down onto the 11" RA wormwheel. Where it would [potentially] run off and land on the AWR electronics. So I have moved all the boxes around to the bottom of the east side panel under the laptop shelf. I drilled holes though the pier's 3/4" plywood to feed the connecting plugs through to hide all the wiring neatly out of sight inside the pier. The IH2 is now a permanent feature on the pier just above the laptop.

More white light is needed for working inside the observatory when the shutters are closed. I have already fitted a switched bulb holder on the ground floor. By positioning the bulb behind the pier cladding it does not shine into the observatory upstairs but is easy to reach when needed.

It is difficult to believe how many new jobs present themselves after a little experience in actually using the observatory. I still haven't found a sensible storage solution for all the bits and pieces.  Eyepieces, elbows, star diagonal, binoviewers, spacers, filters, etc. Fitting them in sealed, plastic boxes is a bore when the lids have to be repeatedly prized off. Nor do they want to be completely open to the night sky. Where dust and condensation will inevitably take their toll.

Because I own large refractors, the south side of the observatory is clear. While the north side is where I usually stand and move about. That said, I'd rather the accessories were readily accessible near the focusers. Without having to walk right around to the south side. Particularly when I have to step cross the yawning gap over the access stepladder. While hoping to avoid the overhanging telescopes.

Perhaps I need a series of fairly narrow shelves arranged in tiers on the north side of the pier to carry covered boxes. The slope of the pyramidal pier aids stability and avoids things rolling off.

Close to the pier is no man's land. While the outer floor is heavily trafficked. So the northern observatory walls are a very poor place to have storage. Because I'd be constantly bumping into it. While the pier is a good place provided the storage doesn't project too much.

All this may sound terribly pedantic, but it all needs careful consideration. If only to maximize the functionality of the observatory. If something proves to be impractical, then the pleasure may be reduced but the problem may never be fully corrected.

Inertia rears its ugly head and the user [me] may choose to temporarily tolerate the problem. While busily thinking, in the background, of ways to improve the situation with the minimum of effort. And so the years pass unnoticed... I still haven't fitted that coat hook.

For most people an observatory won't get as much use as mine will. Being retired means I can spend all day [and night] in there if I want to. Thought Police willing, of course. So everything needs to be right and comfortable and functional. Time spent is not the same thing as time wasted. Repeatedly working around a poor arrangement can waste huge amounts of time over the longer period.

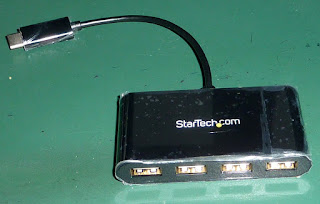
My mini Startech 4x USB hub has arrived so I had better check that out before it becomes vital to imaging and Goto drives. We are promised sunshine for tomorrow. Cold but with light winds. Sunshine is rare enough without wasting valuable time fixing stuff before I can even start.

Click on any image for an enlargement.

*

15.1.19

Mon.14th TS binoviewer misalignment.

*

The sky was still clear in the late afternoon as it darkened with the moon still high in the SE. So I tried combinations of the binoviewer with the GPCs and Barlow and different eyepieces in the 7". As the powers rose I discovered a serious misalignment in the TS binoviewer. The views in the left and right barrels were vertically offset.

After an hour or more of struggling with this, my [normally good] distance eyesight had changed. Bright, naked eye stars were now all double! With a constantly changing, vertical offset. This wasn't a small effect either. Because the distance between the two star images was several moons in diameter! The moon also looked double and I was unable to focus my eyes properly to make a sharp, single image.

By now I had a splitting headache from the eye strain and was feeling queasy. For a while I had gone back to using one eye with a star diagonal to give my eyes a rest. It had still taken over a quarter of an hour for all the double stars to merge back into single stars again. Fortunately I had to call a halt just then to go in for dinner.

Images taken through the empty binoviewers with the camera lens against the nosepiece. It is obvious that everything in the image is duplicated. The hedge on the left was about 30' away. 50' on the right. It has occurred to me that binoviewers would be set up for parallel light at a great distance. So I checked more distant views. The woods at 500 yards were just a fuzzy mess when seen through the binoviewers 'backwards.'

It's odd that I hadn't noticed the problem when using the binoviewers on the sun. Perhaps it was the low powers I had been using. I still have only 3 pairs of secondhand Meade 4000 eyepieces so far for the binoviewer. 32, 26 and 20mm. [For 41, 50 and 65x] I need a Barlow lens or GPC to get higher powers but find the step up in magnification too extreme even with the 32mms. The second 20mm EP has only just arrived so I have only ever used up to 50x with the 26mm.

The effect of stereo viewing on the moon was quite stunning at first but quickly grew unpleasant with higher powers. I kept trying different combinations to see if it helped but should really have given up much earlier.

Looking through the bare binoviewer's entry point at arm's length, at very distant objects, shows two badly offset images. The moon was rotating about its double as I turned the binoviewers around their own axis in my hand. I will have to dismantle the binoviewers to see if I can re-collimate them myself.

Cutting the long story short: I carefully removed one plastic body cover. They are secured by the front screws but the sides of the moulding seem to be clipped very firmly into place.

Take great care if you are tempted to try removing these covers yourself. There is a patch of glue visible once they do come apart. So the factory obviously hoped you wouldn't try. I can accept no responsibility for your own clumsiness if you do try to take these apart. Nor have I suggested that you copy my example. I have a very long lifetime of making [and breaking] things to guide me.

I soon discovered that the TS binoviewer prisms are not intended to move internally from the factory settings. Big dollops of white cement lock the prisms firmly in place. The collimation screws are also glued over to avoid user adjustment.

It seems obvious that these binoviewers have been factory misaligned and cannot be corrected by amateur means. Nor are they likely to go out of alignment with slight bumps in normal service. I have contacted the dealer to see what they have to say.

Update: I have been asked to return the binoviewer for examination by the dealer. Date of dispatch was March 19th 2018. 10 months ago. They have hardly been used since new and were always treated with the greatest respect. Being automatically returned to their padded case when not in active use.


Click on any image for an enlargement.

*

14.1.19

Mon.14th Jan 2019 Solar

*

Mon 14th 35F, full sunshine with strong NW winds. Seeing is not very good at first. With some limb boiling. Blank disk in white light. Altitude only 12°. 180mm f/12 R35 + green Solar Continuum.

A small prom. at my 10 o'clock in binoviewer 20mm Meade 4000 EPs. Just confirmed in Gong Cerro T. [only] at 4 'clock on the limb. 150/8 [120/10.]

My new PST filter barrel adapter is giving me a more centered darker [etalon?] ring. Measurement from the rear of the etalon ring shows it is still long at 210mm. This can be adjusted out at the AOK fitting. Cleaned the PST etalon, ITF and BF5 with a lens tissue and bulb puffer.


Steadily improving seeing at 12.00 with finer adjustments to focus and etalon tuning rewarding with more even spread of surface detail and finer detail at the limb. I'm seeing a small hump on the limb at my 12 o'clock [inverted.] 6 o'clock true.

It is strange how the entire surface pops into view as my eyes settle in the binoviewer. I believe there is also the seeing involved. The better the seeing [with increased solar altitude] the more even the spread of fine surface detail. Tiny dark spots show up where I could see nothing at first. Just practice I suppose. Like planetary viewing. Still some limb boiling but much less than earlier. 12.27 CET and surface detail increasing. Even small dark threads [filaments] becoming visible.

12.50 Proms at my 1-2 o'clock. 7-8 o'clock true. A dim arch and a bright 'mast.' No confirmation on Gong yet. Proms now appearing at 6-7 o'clock Inv. Fast moving cloud increasing from NW. Cerro T. is now showing the proms.

13.11 Small dark spots around my 2-3. Wind increasing with more cloud. 13.30 indoors for lunch to warm up! I really should wear my warmer boots. The rest of me is fine after I put on some gloves.

There is still the matter of the 90mm D-ERF alignment. It hasn't [been] changed since I first installed it some 13 months ago. Back then I was using a dowel through the focuser to tilt the filter and its supporting baffle! So it is a large unknown regarding its effect on the clarity of my view. If I was to make an adjustable cell it would be best to wait for a dull day rather than wasting valuable sunshine. I'd need an access door. Which should be positioned to avoid baffles.

I dismantled the 6" f/8 Celestron to remind myself what I had done with the Baader D-ERF and the baffles. The original optical layout no longer made much sense since the PST components stopped down the telescope to 120mm f/10. This meant that the light cone from the objective was narrower but of the same length.

I drew a full sized optical layout of the bare 150 f/8 and the 120 f/10 overlapping each other. The PST's etalon is 20mm in diameter and normally fixed at 200mm inside focus. So I drew lines from a 120mm aperture to the etalon. On that new taper I could move the baffles and D-ERF towards and away from the objective and focus to more optimum positions.

Where before they might have obscured the light cone they now cleared it more easily. The D-ERF could be moved nearer the objective [if desired] without vignetting the narrower light cone. The nearer the objective I placed the D-ERF the further the burning cone of reflected and refocused light would project beyond the dewshield. Moving it towards the focuser can hardly be described as wasting its 90mm aperture. It is what it is and has already been paid for. At that point I decided to think about the layout overnight. It kept raining so I had to close the shutters. It is much more fun sitting in the opened dome with the sun shining.

Wed. 16th. Since it was completely arbitrary where the D-ERF should sit, I put it in the middle of the tube as it was and aligned reflection of my eye with the center of the tube. Then I rebuilt the H-alpha OTA and remounted it in the rings.

I have moved the digital thermometer onto the pier above the laptop and run the external sensor wire to place the sensor outside in deep shade under the veranda floor. I bored a small hole for the sensor in the pier so there were no trailing wires inside the observatory. I like to monitor inside and outside temperatures to compare with the "seeing." I may tidy away the AWR drive cables to put them inside the pier. Though it will need larger holes for the plugs to pass through.

I still need to fit a sun screen to the tops of the OTAs to avoid being blinded by sunlight when looking through the telescopes. Since both telescopes will be pointing directly at the sun only a small shade is needed. I'll use card mounted on a bit of alu.angle profile on the upper tube ring[s]. A sun screen has been a need for ages without my ever making a start. Another roundtoit which should ideally be done in today's wind and rain.

With an endless supply of free card I can experiment to see what works best. Checking with the real sun I found that I probably needed a crescent shaped card to wrap around both OTAs.

Have I mentioned that I use the 8x50 finder to project a solar image onto the inside of the dome. The bright circle is placed inside its own round shadow to find the sun quickly. The finder is far too high to tempt me to take a peek though it. I'd need a stepladder! This saves lots of messing about opening a planetarium software. Or for when I don't have the laptop in the obs. I have a proper bag for the laptop now and can take the laptop back indoors when I'm not in the obs.


Click on any image for an enlargement.


*

13.1.19

PST Filter Barrel adapter.

*

Sunday: I finally got around to turning a supporting bush/adapter for the PST filter barrel. As mentioned before I have turned away the original PST eyepiece socket. I also had to turn a reduced shoulder so that the socket would fit inside the helical focuser. 

The adapter also needed a shoulder and a recess to allow the barrel so fit inside the 2" : T2 adapter.

Eventually I was able to screw the two halves of the PST filter barrel together while leaving just enough freedom to rotate. This was important to ensure the two halves were joined. The barrel adapter was also sunk into the 2":T2 adapter to bring it safely under flush. The helical focuser has been photographed twice to show its full range of motion. Forgive the oily fingerprints from working on the lathe.

 This series of images show the T2:T2 helical focuser and T2 : 1.25" eyepiece receptacle with compression band. The PST eyepiece socket was not remotely up to the job of supporting a binoviewer. The new fitting is superb at holding the binoviewer's weight.

The bright aluminium barrel adapter [far left] is sandwiched by the two halves of the PST filter barrel. The whole of which slides into the 2":T2 adapter. Though the front section of barrel and adapter go in first and only then can the rear section be screwed into place from the rear of the T2 adapter thread.

The brightly turned tail end of the PST barrel fits inside the helical focuser and could have been left full length provided it was turned down enough for generous clearance. The barrel is now held securely and squarely to the optical axis. It no longer prohibits the smooth action of the helical focuser.

Here an eyepiece has been fitted for scale. The telescope would not normally focus without the addition of a star diagonal or an erecting, terrestrial 45 elbow. After a quick look at the H-a sun with the single eyepiece I always prefer the much more relaxing view in the binoviewer.
Now the filter assembly is fitted into the AOK Swiss PST Etalon : 2" adapters. The PST etalon lies under the plastic knurled ring on the left. The heavy duty AOK fittings sandwich the etalon securely by the etalon's threads.

Turning the heavily knurled ring "tunes" the exact frequency of the H-alpha light passing through the etalon. There can be a difference in tuning between showing surface detail and prominences. Though in my case they seem to be close together in their tuning. PST [and those of other maker's] etalons are known to vary quite widely in quality.

It is a vital part of the modified PST's optical construction that the rear of the etalon ring is 200mm from the donor telescope's focus. The PST is designed to work at f/10 and will automatically stop down any variation on this theme. The etalon is sandwiched by a negative and a positive lens to ensure only parallel light passes through it.

Now the previous assembly is fitted with the binoviewer. Which has a standard 1.25" chromed nose-piece. GPCs and Barlow lenses can be screwed into the binoviewer nose-piece which has a standard 1.25" filter thread.
And, finally, the complete, modified PST H-alpha assembly. Which is fitted into a 60mm long x 2" adapter in the turned, tailpiece backplate of the 6" f/8 refractor. Which now works at 120mm f/10. A loss of 30m aperture but still 3x larger than the original PST objective. A 6" f/10 would give me back my full aperture but I consider the iStar example to be far too expensive for my tastes. They were once an affordable choice but their prices have inflated to almost double previous levels. 

A 90mm Ø Baader D-ERF rejection filter is fixed about half way down the inside of my 6" OTA. A vital part of the optical system to provide user safety. By reflecting away almost all of the sun's fierce heat from the much larger objective lens. The original PST has only a 40mm objective.

Click on any image for an enlargement.
*

10.1.19

10.1.19 Trees in Registax6

*

With a heavy overcast holding up H-a progress I decided to play with the Neximage5, iCap and Registax. Just to get some practice  with the software. The telescope used was my home made, 180mm f/12 R35 iStar refractor.

The first image is a still from the original video grabbed from the Registax  page and then cropped to the progress window borders.

The second image is from 40% of a 1000 frames taken of the tops of a copse of mixed trees 450 yards away. Registax brought out the feathery detail.

Finally I brightened and improved the contrast of the stacked image in PhotoFiltre. I still have no idea why I'm seeing lines like an old CRT TV.

It was lucky I could come back into the warmth for lunch. Because it is horribly cold today despite being quite a modest 35F. Not really much different from recent days. Not even any wind to blame.

I was supposed to make a sleeve for the PST filter barrel but my feet are still like blocks of ice. I tend to wear steel toe-capped, work safety shoes in the observatory in case I drop something heavy. They do not provide remotely as much warmth as my walking boots. Which are far bulkier for climbing ladders and can't be slipped on an off so easily when I have to go back indoors.

Friday: Some sunshine is promised for later. Thin high cloud teased me in the afternoon. The sun looked more like a watery Jupiter at times. I found the 80mm extension too much to reach focus with the 45 terrestrial elbow or binoviewer. So I swapped it for a 60mm just in time for the sun sink below the local trees. No surface detail visible.

The second Meade 4000 20mm EP turned up in the post looking cosmetically tired but optically clear. I should have bought new given the tiny difference in price after paying £14.30 priority postage from the UK! Bought on the 29th on FleaBay and then taking all this time to get here. Small packets are usually only about 3-4 days delivery on average. Never again from that particular dealer! 

The Chinese lander and rover are taking pictures of each other on the far side of the Moon. I wonder how long it will take the conspiracy retards educationally backward cynics to question which Bollywood film Lot they are really using for this? 

Saturday: Heavy showers. Added some electrical tape to tighten up the PST filter barrel inside the 2"-T2 adapter. I found that the long nose of the Swiss AOK etalon adapter allowed me to add the required 10mm to bring the rear of the etalon adjustment band to 200mm. Ordered a Startech USB mini-hub for the laptop. USB-C to 4 x USB2.0. I had run out of USB sockets.

Click on any image for an enlargement.


*

9.1.19

Getting the chop! Main tube faux pas!

*

Wednesday 9th. 36F and blowing a northerly gale. With sunny periods to play with I tried various set-ups. The seeing was poor with serious boiling along the sun's limb in H-alpha. A small prominence sat on the bottom of the sun in my binoviewer view but I could see no surface markings. Nor in white [green] light in the 7".

Yesterday's talk of trapping the PST filter barrel between a 2" : T2 adapter and a cheapo helical focuser was only an illusion. The barrel was sagging except in one position of the focuser. Rather than waste precious solar time, by turning a metal support tube, I temporarily used a plastic bottle top with a suitable hole saw [35mm] drilled in the middle.

Today I was getting poorer images than before. So I carefully measured the distance of the rear of the PST Etalon ring to the focus of the 6" F/8 objective. I find this easier with a dark piece of card and a steel rule. White paper or card is too bright and spoils the view of the sharply focused solar disk.

It was supposed to be 200mm but measured 225mm or an inch too much! Which meant I had to add to the Celestron's main tube or add a 1" spacer. Rather than what I did. I scratched a ring around the tube using an old vernier caliper and marked the three fixing holes for the tailpiece. Hoping to reach focus with a star diagonal and binoviewer.

Then I hack-sawed off the 1" wide ring from the main tube. The tube had been chopped by a previous owner for imaging but I had no idea by how much. I just remember telling him that I couldn't reach focus. He suggested I try a star diagonal and that was enough.

That's as far as I have reached this morning as I pause for lunch.  The cloud has now cleared as I prepare to return to the fray but the sun is already sinking fast below the ridge of my house to the south.

After lunch I discovered I still couldn't reach focus with the binoviewer and 1.25" star diagonal. So I recovered from my major faux pas by swapping a 40mm x 2" extension for one 80mm long in the tailpiece backplate. I have recovered all but 10mm of my error and can easily overcome that small difference. The telescope looks better with a longer extension in the backplate. I prefer the traditional stepped sized tubing at the tail end of a telescope. A 3.5" Starlight Feather Touch refractor focuser on the 7" would do very nicely but is an expensive luxury when I already have an old Vixen 2" focuser.

I must have been having a brain freeze when I measured twice [well three times] and then cut the main tube [only once.] It really needed to be longer to shorten the distance between the PST etalon and the focus of the CR150 objective. By chopping the main tube I actually doubled my error.

I went through all of this late last winter. That was before somebody, far more experienced, pointed out that the REAR of the PST ETALON BAND should be 200 mm INSIDE FOCUS.

I have typed this out to ensure I can find it again after wasting valuable time on the laptop searching through my old posts to confirm my hazy memory.

It was blowing a gale all day and only just crept up to 40F in the dome. I was perfectly comfortable in my usual, scruffy assortment of winter clothing and never even bothered to close up my old, down jacket all day. It is certainly breezy in the dome whenever there is any wind. I shall have to do something about that and soon.

*

7.1.19

H-alpha: Putting it all together. Not!

*
Monday 7th Jan: My new T2 fitting has arrived from Telescope-Express. Though assembling it into something useful took some ingenuity. The first image shows the procession of parts in order of fitting. The two halves of the PST filter barrel had to be separated and screwed back together umpteen times!

First I had to turn down the PST eyepiece socket to get it to fit inside the cheap, helical focuser. I sawed off 8mm and then reduced the diameter of what was left. Until the parts would just slide together with the helical focuser contracted to its minimum length. It was fine when expanded. 

This machining was not remotely my intention when I ordered the new part. I wanted it to be easily put together by anyone using the PST filtration system on a donor telescope.

Though anyone copying my set-up could simply saw off the eyepiece socket and file it smooth. Thereby saving themselves the lathe work. A ring of the original diameter should be left to center and locate the barrel in place. Great care should be exercised to avoid damaging the hideously expensive but tiny, PST filter optics!

The DSLR-T2 fitting TS-Optics, T2-D42 was meant to grip the PST's 36mm Ø filter barrel. Despite being in the center of the expected range of 30-42mm it was not nearly as positive as I had expected from studying the T-E website images. Being considerably oversized even for the 36mm barrel. It is sold as a digiscoping adapter.

I had to use the thickest rubber packing strip supplied with the fitting to get a firm enough grip on the 36mm diameter. The film of adhesive on the rubber strips was worthless and soon fell off. Not that it mattered much once the pressure was applied by the four screws on the compression band.

The thickness of the rubber strip can be seen in the image alongside. The 36mm barrel diameter did not want to go in and when it was in and fully tightened it wanted to fall out! Each time I tried I had to split the two halves of the PST filter barrel [by unscrewing] to get it to go into the rubber ring.

Originally I had no focusing system on my H-alpha telescope. Which meant using the barrel and a bored out 2"-1.25" adapter as a crude push-pull, drawtube arrangement. Which made for a rather sloppy set-up when loaded with the binoviewer and two low power eyepieces on the end of further items. I could lift the binoviewer by at least half an inch [12mm] even though everything was strongly tightened up with maximum finger strength.

This image shows the modified, PST filter barrel now trapped between a 2":T2 adapter and the cheap, helical focuser. There being no real benefit from using the external, eyepiece clamping device as shown above. I just couldn't get it to hold the barrel firmly enough!

Anyone thinking of hanging a DSLR body from one of these clamping rings should take extreme care and use a very short safety lanyard to catch the camera body when it falls off the eyepiece! Which it probably will do IMHO! I certainly wouldn't trust it myself! Once the camera falls off, the telescope goes very light at one end. Then what?

I can well understand the need to protect the cosmetic finish of expensive eyepieces when a DSLR is used to take images through a complete telescope. The problem is that the variation in diameter for the two models of compression ring is simply far too large. After considerable thought I could rescue the situation with solid jaws instead of loose, rubber strips.

My PST filter barrel is certainly no longer in any need of cosmetic protection. So a more solid grip is indicated if I am still going to use it as intended. The TS fitting has a plastic coated, copper compression band. The problem is that the band is lifted right out of its groove as the four thumbscrews are tightened. Once that happens there is no longer any lateral location except by friction.

I am still trying to think of a suitable firmer material to form solid jaws inside the digiscoping adapter ring. Solid copper strip? Perhaps the answer is to increase the diameter of the barrel itself? Then the compression ring can do its job without leaving its groove. No compliant sandwich material required. I just need to turn a tube with a 36mm bore and 42mm exterior. The flanges on the end of the PST barrel will prevent longitudinal movement.

This adapter is probably just complete waste of time and money! Despite the expense and all the hours spent trying to make it work, I have decided not to use it. The modified PST filter barrel is now firmly secured without it. Though it took some slow and careful machining to make it fit inside the helical focuser. I was afraid of damaging the optical elements.

The PST barrel certainly won't fit the helical focuser, as standard, because of the PST's eyepiece socket's, length and large, external diameter. It is this socket which must be reduced in diameter to fit inside the threaded portion of the helical focuser. I could have left the socket longer than I did. Provided, I left a lip to grip with the components on either side. Greater length might have provided better alignment of the axis of the filter barrel.

I'll post some daylight images tomorrow showing my final[?] set-up. We shan't see any sun until at least Wednesday or even Thursday. With another windy couple of days forecast. So I'll have to wait to check the precise component spacing and solar, H-a, image quality.

The last image shows the inside of the CR150 tailpiece with new packing disk of 10mm thick aluminium. The cantilevered weight of the H-a components and binoviewer was dragging the whole lot out of the tailpiece despite its very tight, press fit.

Now the tailpiece is almost solid metal and the visible focuser disk can't be levered out any more. The three screws pass right through three thick rings of aluminium. I shall fit Nyloc nuts and paint the internal disk matt black when conditions allow.

In retrospect I could have machined a complete new tailpiece from solid metal. Though it would have taken many hours on my modest, vintage, S&B lathe.

Click on any image for an enlargement.
*

5.1.19

Much less than a dollop [of sunshine.]

*

Those who are into modding PSTs [and other solar telescopes] should take a look at the Solar Chat Forum. Most modification ideas have been tried there and discussed, proved or disproved of. Stargazers lounge has a strong group of Solar instrument builders, imagers and observers.

Avoid Cloudy Nights Forums. Talking about building or modding solar instruments is still a hanging offense over there in the Land of The Free.

I was really struggling to focus the Neximage5 from my distant laptop. Now somebody on Stargazers Lounge has suggested I use TeamViewer with my tablet and laptop. That way I can have the tablet right beside the focuser while actively using the Neximage5.

Then return to the heavy laptop on its pier-mounted shelf to carry out the capture stages. Today, I was able to see the last dregs of sunshine hide behind cloud directly on my tablet screen. This was with the Neximage5 right beside the camera in the focuser. Magical!

On returning to the laptop, exactly the same image was showing in iCap. Racing cloud! This remote control idea has worked beyond all expectations! I am very pleased with this sudden leap in imaging progress. The tablet is not only light and handy, with a sharp image, but able to be turned at will to avoid bright reflections.

When not in use the tablet rests happily against the sloping pier beside the laptop. With its lower edge sitting firmly on the mouse mat. I could make a ledge for it to sit on the [sloping] north side of the pier. Just to be nearer the telescope. This would need a longer charging cable from the laptop. Which is permanently powered from its unbelievably massive power supply.  

________________________________________

Today I managed to find a load of nesting, food storage boxes with snap-on lids on offer in the local supermarket. So I was able to bring some order to my very mixed collection of star diagonals, extensions, binoviewer and pairs of eyepieces. Conversion to the Light Side [Solar] meant an extraordinary collection of bits and pieces to satisfy the exacting needs of the H-alpha telescope.

The etalon and filters must satisfy their [original PST] positioning relative to the focal point of the bigger, donor telescope's objective. Arranging this with non-standard fittings and spacers is an expensive exercise! Fortunately I was initiated into the 2T thread size. For which a whole range of spacers, extenders, helical focusers, adapter and rings is readily available. At a price!

It may seem odd, to many, exactly how large my instrumental set-up really is. When the telescopes are parked horizontally, on the south side of the mounting, the weights are down. I simply cannot reach the objective lens covers without the help of a beer crate. Even when the instruments are right down beside the mounting and almost horizontal, I cannot see into the dewshields to check the objective lenses or filters.

At this time of year the sun is very low indeed. Around 10 degrees maximum altitude! Which has required the beer crate, or paired off-cuts of 4x4, just to reach the eyepieces. My eye level is not far short of 6' on tip toe. Beware of blind ambition!

As the year progresses I shan't need the extra risers as the telescopes are tilted far more. So I am loath to invest in any more stepladders. Since these would soon become an absolute nuisance in the limited space available in the observatory. I keep one extending stepladder in the observatory for reaching high in the dome or to work on the mounting. It takes up serious acreage even when folded flat and vertically against the observatory wall.

An octagon is considerably smaller than a circle of the same radius. A square is very much larger. I would urge those contemplating a design for a domed building to give these simple facts considerable thought. Why a dome? Because it is traditional? You can avoid the infinite complexity of constructing a plywood dome by building a rotating, half cylinder. This has a nominally square base and can be parked [squarely] over a matching square building.

More importantly the half cylinder [dome] has no 3D surfaces on which to try to crease and fold 2D metal or plywood gores. The corners of the half cylinder provide lots of headroom. The flat end walls offer room for storage or even windows. You need no fancy flashing to make the dome run-off fall outside the building and everything is in straight lines. The shutters lie flat on the half cylinder instead of catching the wind as mine do regularly. Doing so whether open or closed.  

Sunday: Further improved security on the observatory. Then turned a 10mm thick, aluminium disk to fit inside the CR150 tailpiece. I plan to run adjusting rods forwards to the internal D-ERF to see if tilting helps and by how much of either. So I need a stable surface to thread for the adjusters. The D-ERF sits on an original CR150 baffle about half way down the main tube. I tried gently poking the baffle with a dowel but it's bit crude and risks scratching the D-ERF.

*
3.1.19

Half a dollop more.

*

Thursday: 23F -5C. A hard white frost. I went out to have a look at the sun as it fought through thin cloud. The mounting and telescopes were spotted all over with frost. Worse, the 6" H-alpha scope's objective was completely misted over. I haven't been covering the lenses because of the relatively mild conditions until now. I've left them tracking on the sun to see if the 6" will clear from the sun's warmth.

At 33F inside the dome I can see my breath showing the refocused light cone from the D-ERF about 8" in front of the dewshield.

Yesterday's sunspots are still visible in the 7" with the green, Solar Continuum filter but much changed in position and layout. I'm still waiting for the H-alpha to clear. Eventually I could confirm two small prominences and a pale patch around the re-arranged spot group.

I'm typing this in thin, rubberized, workshop gloves at my computer shelf with the dome now at 35F inside. Plans to move the shelf to the north side of the pier have been shelved. It would be impossible to avoid the blinding sunshine from the slit if I sat there. On the east side [of the pier] the dome places me safely in its shadow until the afternoon. 

I just thought of a plug-in shelf idea using fixed pipes on the shelf fitting into pre-drilled holes in the pier. I'm trying to avoid any kind of stand for the laptop. Because I am almost bound to fall over it even in daylight.

I found an old cake tin in the cupboard which fitted the 6" refractor's dewshield. So hopefully the 6" lens won't be covered in dew next time. I lost an hour and half waiting for it to dry completely. The 7" was protected by the Baader solar foil. Though I have now fitted the saucepan lid which fits its 10" Ø dewshield for better protection.

I think I've finally made a breakthrough on the binoviewer : PST etalon adapter. I had bored out a 2" : 1.25" adapter to 36mm to hold the PST/BF/etalon barrel. With only a single, wimpy, clamping screw the binoviewers sagged.

Telescope-Express lists a series of T2 adapters to provide external eyepiece clamping. These are designed to allow a DSLR to be screwed to any eyepiece in a given range of external sizes. Hopefully this will safely grip the PST barrel and allow me to use a T2 helical focuser to high quality 1.25" compression band eyepiece receptacle. I had bought these items earlier but couldn't use them as intended. The plain, PST, eyepiece socket is inadequate to support a binoviewer. I was having to use the 2" to 36mm adapter as a crude push-pull focuser on the PST barrel!


Click on any image for an enlargement.

*

2.1.19

Another big dollop of sunshine.

*

Wednesday 2nd Jan. 2019 36F: A clear sky but still blowing a gale! I went out after breakfast to have a look at a very slim crescent Moon and a 'hungry' half Venus through the 7" refractor. 

It was already too light to ensure high contrast on the Moon. I pushed the power over 100x with the 20mm but it didn't help much. Venus was quite sharp but very bright even at 110x. So that it had a halo of light around it with its colour depending on focus. 

The northerly wind was so strong it was blowing under the dome skirt and making my eyes water. I tried using my gloved hand to shield my face but then my hand became cold on the back.

I really must cut some curves from 2x4 timber to close off these gaps between the straight octagon sides and the 16 sided skirt. Which is a much closer approximation to a circle. As the rubber skirt will rub against this newly circular surface I had better ensure a smooth finish to reduce drag. Which means I can't just hack away with a wobbly electric jigsaw.

Ideally it needs a router but the great depth of cut is very time consuming and needs a very rigid radius bar. I could use my bandsaw followed by the disk sander. Though that would need a sharp and accurate line to work to.

One might think I could just clamp a router to the dome and rotate the dome around the building. Unfortunately the dome doesn't track so accurately that it can be used as a tool guide.

Later I found some off-cut arcs of ply from cutting out the shutter ribs. By clamping these to the top ring I was able to exclude most of the wind. A far more positive result than I was expecting. Which suggests I go ahead with my arcs of 2" thick timber to make the top ring fully round instead of octagonal.
Even at 10am I can see the shadow of the trees and hedges cast onto the lower half of the dome. So it will be a while before I can get a clear view of the Sun in H-alpha.

Eventually I took some afocal snaps with my Lumix TZ7 at the eyepiece using a Green Solar Continuum filter. A chain of small spots is ringed in the attached image. Then I tried the Neximage5 in trying to capture the spots in closeup. The problem is that a year has passed since I used the camera and iCap software. So I can no longer remember much about the settings. I took a few stills and left it at that.

In H-alpha the spots are surrounded in a large pale oval. There are prominences at 3 o'clock and 9 o'clock. I went on trying to capture what I was seeing but was generally disappointed with afocal snaps and the Neximage5.

I was trying to take an afocal snap in H-alpha when my down jacket cuff suddenly started smoking from the focused finder image. Fortunately it is an old jacket which I usually wear in the workshop too. No obvious damage done. I have been using the finder's projected solar image inside its own shadow projected onto the dome to quickly center the telescopes. I shall have to make a pierced objective cap to greatly reduce the focused heat!

The wind picked up after lunch but the shelter of the dome allowed me to remain in relative comfort despite the breezes wafting about inside. The open areas under the floor meant there was a proper gale blowing around "downstairs."


*