31.12.19

31st December 2019 Waiting for the sun!

*

Tuesday 31st 41F. A rare cloud-free start to the day though breezy from the west. As I enjoy morning coffee I am watching the shadows of a neighbour's trees descend slowly down the dome. 10.00am and the shadows are still covering the lower half. The wind is supposed to turn north westwards. So I should be free of the telescopes shaking when I eventually get a clear view of the sun. The trees behind the dome are rocking and my large, but obsolete, Met Office anemometer has just started to twirl. Always a sign of a good breeze. The forecast is for 25mph gusts but falling slowly all day.

10.20. Still a sharp shadow of the top branches on the dome. 10.45 should provide a clear sun. So I had better get set up.

10.50 and still waiting for the sun to clear the top branches.

11.00 Still heavy shadows rocking across the sun's image.

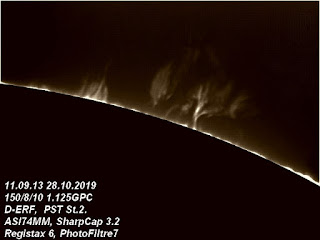
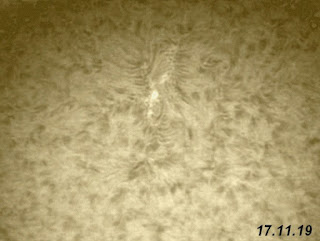
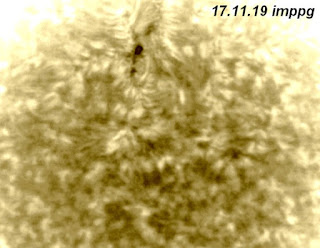
Carried on capturing videos until 12.30 and early lunch. Sharpness is poor as can be seen from the image. Even after beating it to death with iMPPG and PhotoFiltre I couldn't bring out the smudge visible on Gong H-a. 

13.00 Already clouded over! Extended lunch.
14.00 Still clouded over. Doing a meridian flip. Chimney total eclipse of the sun!
14.15 cleared long enough for more captures. Local solar altitude only 7.5°! The roof beckons!
14.50 Sun below roof. 2x Barlow on changed prom on last dregs.

*

30.12.19

30.12.19 Year's End Future Plans?

 *

Tomorrow, 31st December 2019, is finally promised to be sunny all day. Starting windy from the NW but dying down over the course of the day.  That shouldn't bother me too much with the sun in the SE until lunch time. I am getting fed up with losing captures to wind movement. The 7"  f/12 is quite close to the slit and today the wind was straight on. Barely a second passed without some bodily movement of the sun on the monitor.

Initial thoughts are to resurrect the folded 7" OTA. Which has been in storage since I rebuilt the long, straight version. It's not as if I am using a dewshield on the 7". That would just catch even more wind. No dewshield means some dew. Dew heater bands can solve that problem. The open framework of the folded 7" would avoid wind problems but means a hot, unfiltered beam being folded back and forth within the open framework. I don't think the folding [coated Zerodur] mirrors will be much bothered by the heat. Nobody else has access to the observatory so the risk of personal injury is limited to my own idiocy.

I can also remove the 90mm Vixen f/11. Which is hardly ever used but helps to balance the asymmetrically mounted, 6" H-alpha OTA. The smaller refractor is handy for a quick look at the sun in white light and has a permanent solar foil filter over the objective. The 90mm adds some weight, moment and only a very little wind drag.

With the new, 6" f/10 lens coming over the horizon I really have to decide how best to proceed. I am now concentrating almost exclusively on H-a, solar imaging. No point investing so much time and expense unless I maximise my results. I have wasted decades without any serious goal for my astronomical activities. In fact most of my time has been spent building equipment rather than actually looking at the sky. The local trees and tall hedges made observation extremely limited. Which is my excuse and I'm sticking to it.

I could just mount the 6" H-a OTA alone on the big mounting. Or even use the Fullerscopes MkIV mounting? Though that doesn't have proper drives since I cooked the poor old, original, Fullerscopes VFO, drive controller with 7 hours of Mercury Transit. That was with the 7" aboard the MkIV! The old mounting is still functional, thanks to its replacement, stainless steel shafts. Though it could do with a new paint job after years of living under a leaky tarpaulin. The MkIV can easily handle a 6" f/10 and has a massive, welded steel pier to support it. But where would it be sited? No point in returning to the ground where the view and thermal effects from the shrubbery are concentrated.

Despite the endless problems with the AWR stepper motor, Goto drives I have become completely spoilt by the drive accuracy. Both adjustable speed control paddles are very user-friendly. That is when the drives keep going and it doesn't stop tracking apparently randomly. The ease of moving the sun around in the camera's small field of view is quite mind blowing and would be very painful to give up now. I probably shan't live long enough to fit a fully working AWR system to the MkIV. Not to mention the expense.  A new VFO controller might be doable though. 

*

30.12.19 Solar?

 *

Monday 30th 42F some intermittent sunshine appearing at 10.30 after a false start, earlier this morning. When more low cloud arrived. Sun very low and the sky is still full of fast moving, low cloud. Probably a waste of time trying to do any imaging. Gong Ha shows a white smudge in the southern hemisphere but little in the way of proms.

Pm. 14.00 45F. Sky cleared but a strong, gusty, southerly wind blowing straight into the dome and moving the telescopes around. The house chimney is totally eclipsing the sun! Sawed off the motor support bracket to clear the helical focuser. Needs still more metal to be removed but the motor tuning is still working. Quite a sharp image until the chimney intervened. 6" H-alpha objective is slightly steamed up inside.

14:20 Now the sun has cleared the chimney but the telescopes are shaking. Strong, thermal wave agitation of the disk and limb. Just when things could not get any worse, low cloud is scudding across. Fps dropped from 280 [800x600] to about 75fps. Captured a couple of 1000 frame videos but they were shortened by cloud crossing the sun.

4:25 Sky rapidly becoming completely obscured with low, racing cloud from the SW. Disk just visible through the cloud to the naked eye without discomfort. I might as well find something more constructive to do.


*

29.12.19

29-12-19 Minor dome repairs.

 *

Sunday 29th 33-36F, dark overcast again. I extended a ladder up past the mounting to reach the top of the observation slit. A little cycle oil on all four draw slides [top and bottom] eased the remaining friction. The shutters could be then safely closed again from the dome floor. My wife spotted me standing at the top of the dome and saw me as a tank commander in my trapper, lambswool hat.

The top of the dome is showing the same damage to the paintwork as lower down. If I'm lucky there will be warm, dry spring and I can put a couple of coats of paint on the dome to reseal it. There will have to be some rubbing down to get rid of the loose undercoat primer. I expect the wood treatment paint would have been fine without the crappy, white undercoat.

I went around tightening the screws clamping the rubber skirt to the dome flashing. I had used stainless steel nuts and bolts. So they never corroded enough to remain tight. Particularly when subjected to the continuous rocking action of the skirt in the almost continuous wind. Nevertheless only one screw had fallen out since I fitted the skirt. I found it lying on the veranda. The nut and load spreading washer were still inside on the dome base ring.

While I was busy on other things, I gave the red diode string battery an hour of recharging using the diode table lamp on the desk. With the little solar panel placed close against the table lamp diode, the performance quickly returned to normal.


*

28.12.19

28th December 2019 Winter and recalcitrant dome shutters!

*

Saturday 28th 30-33F, frosty overnight but now with a heavy overcast. The serial grey skies continue.

I spent some time clipping the string of red diodes to the inner edge of the dome's base ring. The string [green twin flex] used to be laid loosely on the top of the base ring but always looked untidy. The solar panel control box/battery unit had almost run out of juice through cold and lack of sunlight.
The diodes provide too little light to spoil my night vision. They only help to show the limit of the floor space. Or rather the inner edge of the dome's base ring. Which can approach the limit of seriously overhanging telescopes. Usually the binoviewers cause the problem. I can't get my head behind them at certain object heights.

After that I went round tightening every screw and nut on the mounting. It seemed to help the overall stiffness when the telescopes were manually pushed back and forth. Having opened the shutters to let some light in they wouldn't close again. They were dragging at the top for the very first time since I built the dome.

Standing on a crate didn't help. I still couldn't get high enough to use the shutter's own inertia. So I had to drag a stepladder up the steep ladder to the observatory floor. The heavy duty, drawer slides at top and bottom are fully covered  by the shutter "boxes." So it may just have been local icing. Pushing the shutters closed at half height solved the unusual friction problem.

The shutters have been remarkably easy to close until today. Usually I just gave them enough of a tug to get each whole shutter moving as one unit despite their inherent flexibility. Then they would close tightly together without the least gap between the inner ribs. There is, of course, an overlapping weather strip of ply to shed the rain from where the inner shutter ribs come together. Initially, I had planned to have cords over pulleys to pull the shutters closed together at the top. It was never worth the effort to fit them until now.

I made the shutters slightly too wide to ensure they would meet. So there is an air gap between their outer ribs and the fixed ribs on the edge of the dome's observation slit. This provides some air movement when the dome is closed in hot weather. Despite letting in some light the gaps have never leaked even in driving rain with a gale behind it.

The ability to open and close the dome in mere seconds is a major advantage of domes. It allows much greater freedom to use the telescopes in changeable weather. Many amateur astronomers have to carry everything outside and set up from scratch every time they want to observe or image. The mounting usually has to be re-aligned to ensure accurate tracking. With a permanent observatory none of this is necessary. When the choice is between going out in the cold, or watching TV, the observatory will win every time over the open lawn.

Being sheltered from the local breeze will depend on wind direction and where the dome [observation slit] is pointed in the sky. Fortunately my site enjoys SW winds while I am usually pointing the telescopes at the sun in the SE all morning. Much the same orientations exist after dark with the moon and planets. There is a wall of tees to the west. This helps to dull the wind but robs me of seeing objects in the western sky.

Only after lunch, with the meridian flip on the sun, will it sometimes become breezy in the dome. I even have a better way of coping with cold, breezy conditions. I add a tubular, fleece, "polo neck" to my usual, winter outfit. It makes a huge difference not to have the wind whistling around one's neck. Though I usually wear collared jumpers under my down jacket and wear a trapper hat, these do not offer the same protection as my simple, fleece neck "sleeve." Highly recommended if you can find one.

Skiing salopettes are very useful to avoid cold legs and feet if you are sitting for long periods in the observatory. These insulated over-trousers can usually be found for small change in many charity shops. My latest winter observatory wear is a pair of fake-fur lined, "snow" boots. Bought cheaply online and good for -50C! I haven't had cold feet since I've tried them. My feet slide effortlessly in and out of the boots thanks to the glossy fur lining. Far easier to don and remove than my usual walking boots.


*

25.12.19

25th December 2019 Season's Greetings.

*

My apologies to anyone who found a post here obviously aimed at another of my blogs.
Google has the nasty habit of changing any New Post to another blog without apparent logic.
I have now deleted the New Post on both blogs.
Have a good one. If you can.


Thursday 26th 41F: Tidying the observatory of accumulated materials, junk and tools from recent projects. I have also added more screw hooks to the dome wall framework for hanging cables and other occasionally used items. Like small mirrors and hair driers for examining the objectives and then drying them of dew. 

I'd like to organise the cables and USB "boxes" on the desk. Move them onto the pier if possible. Though the same cables still need to reach the laptop when it is lying on the desk. I don't leave the laptop in the observatory and don't think the Wifi would work with the laptop resting on the sloping side of the pier. I shall have to check this before making any assumptions. It would be quite handy to have the laptop out of the way once it has been switched on. The keyboard, mouse and monitor then take over imaging duties.

That was interesting. Lying flat on the desk, laptop hinge towards the house, the Wifi internet speed is 20-22Mbps download. On edge it drops to 5-7Mbps. Yet the router indoors is on a vertical surface with 3 antennas pointing vertically downwards. Which makes no sense that it won't work with the laptop also vertical.  Resting near vertically on the hinge the speed is 13Mbps. While lying flat, the laptop seems immune to telescope position at a steady 22Mbps. All other laptop orientations are inferior. The top flap seems more radio transparent than the bottom of the laptop.


*

24.12.19

Lower profile DC Motor driven etalon tuning.

*
A shorter 240mm timing belt turned up in the last post before Christmas. It had been out of stock at the Danish online dealer. I was unable to use the belt in same way as before without doing some metalwork. That would involve drilling and threading two new holes in the small motor bracket. Not major surgery, but I wanted to keep it simple if anyone wanted to copy my idea.

The heavier and larger motor bracket, supplied in the Skywatcher clone, focuser kit, had its screw holes lower down. Which meant the shorter belt would provide a lower profile motor siting. The downside was the necessity to file a curve on the ends of both the motor mounting bracket and the attached motor plate.[See arrow, image upper right.] 

Ideally, the heavier motor bracket should be chopped off at the X in the upper image. Otherwise the unwanted tail end of the bracket will foul the helical focuser. I haven't sawn the tail end off mine yet because I am still looking at different motor mounting options. If you don't have anything in the way you can save yourself the bother of sawing off the unwanted end.

To be on the safe side I removed the two tiny screws and filed the bare motor plate in the vice. I didn't want metal dust getting inside the motor/gearbox housing. Besides, it would be very difficult to hold the motor still while coarse filing.

The second image [lower right] shows the original layout with the longer 250mm belt and smaller motor bracket. The difference in motor height isn't huge but is probably worth the effort if you can obtain a 240mm belt. 

If you are willing to make a new motor support bracket, completely from scratch, you can lay the motor on its side using a shorter belt. This would require a much taller bracket, after the 90° bend, to match the needs of the motor slots.


*

21.12.19

21.12.19 Wifi problems cured?

Saturday 43F: After a long, grey start, the sun came out too late in the morning. So that it was already over the house roof.  Not ideal for good seeing conditions at this time of year with the sun so low in the sky. I rushed out and set up just before lunch. Synced and tracking but with the shutters blocking the sun. So now I'm ready for imaging as soon as lunch has gone down. Gong Ha shows a hedge-like prom at 10 o'clock but little more than small, bright smudges on the disk.

I want to try to get some temperature readings at focus without the PST etalon and following filters. No chance! The moment I was back in the dome, cloud covered the entire southerly horizon. At least it proved that the telescopes are blocking the Wifi. As soon as I sent them back to park [horizontal & facing east] the internet immediately came back on again. I'd previously tried all sort of heights, positions and angles for the laptop but nothing helped. The signal is just too weak.

The indoor router was always pressed up against the sloping, attic ceiling at waist height. There was nowhere else for it except on top of the rarely used printer. This meant no air around the antennae and the full thickness of the roof for the wireless signal to pass through. Before crossing the yard to the dome. About 15-17m away from memory. [40'-50'.] I had no desire to stretch a cable across the intervening gap. The indirect route over there, from the house, is more like 30 meters with lots of changes in level.

So, before investing in a Wifi repeater I have moved the indoor router. It is now vertically on the wall near the top of the projecting, dormer "box." Where it can "see" the dome through the window. Whether glass is more radio transparent to radio waves, than 12" of rock wool, the roof covering and thick lead flashing, is anybody's guess. I shall check tomorrow to see if it helped reception in the dome.

The wireless Internet was just far too variable over there in the observatory without obvious cause. Other than the three, large, metal telescopes literally hanging over the laptop on the desk below. ASCOM kept saying it had lost the server today! I had no idea it needed one. How on earth can you run an ASCOM driven eq. mounting at a dark site well away from the Internet? Or with a typical US, UK or Australian, rural bottleneck? Does not compute!

Moving the indoor router has worked wonders! 30+Mbps download and 50+Mbps upload on the laptop flat on the desk, out in the observatory. Normally I would have to put the laptop on top of a box to get any reception under poor conditions.

I deliberately slewed the telescopes over the laptop and nothing much changed in Wifi speeds. Slight improvement in upload speeds if anything. Playing 60fps 4K YT videos went smoothly. I just had to tidy the four, white, dangling cables, indoors with some tie-wraps. Only further tests in different conditions will prove if I have overcome the previous Wifi problems. Though the change in router position seems to be a huge improvement.

Monday. Another grey day. Went back over with the laptop to check Wifi reception in the dome. With the telescopes parked it was over 20Mbps down and 50 up. The latest download of Malwarebytes Free is broken. It refuses to let me online whatever I try. It has done this on both my computers now and I have had to uninstall it. Reinstall? Exactly the same problem on both. 4.01.49? I've been using it for years and it hasn't behaved like this before. Found a replacement.

A new [faster] version of iMPPG is available for download from github:

imppg-win64.zip

*

19.12.19

19.12.19 Poor sunshine?

*

Thursday: It brightened up later in the morning so I set up for imaging. No Wi-Fi internet in the dome and HitechAstro focuser motor controller won't play with ASCOM again. Locked up the laptop requiring several restarts. Dreadful seeing conditions today with strong thermal currents on the solar limb and image softness. It stayed bright and clear for most of the day but video captures were few. I tried to capture the visible proms but the contrast was just too poor. The forecast was for a long, grey day.

Even with well-tightened 2" fittings, with three thumbscrews per joint, there is still sag at the camera end on my long PST stack.

I have dug out my 160mm steel tube which I had been storing in reserve for an improved, 6", DIY, H-a, solar refractor. This will allow much more space behind the lens where the CR150 has grazing incidence in a very mean, 140mm Ø Celestron tube.

I'm still looking at a rigid means of support for the PST filter stack. Being equatorially mounted means the stack must be fully supported regardless of orientation.You can't just extend the telescope's main tube backwards because you need full access to all the fiddly "bits and pieces."

So an open skeleton is indicated. A single, tubular beam would provide best access but may flex too much. There are no small enough, hinged tube rings for 2" fittings. Though there are "finder" rings. With extended thumbscrews for centring the image with the main telescope. These might offer what I need. I shall investigate what is on offer. £100-200 for a couple of Chinese cast alloy rings and a dovetail? You can't be serious? Definitely another DIY project in my stars.  

*

18.12.19

18.12.19 Motor etalon tuning in practice.

*

Wednesday 18th December 2019, 11.30am, 42F, highly variable, fast moving cloud. With only occasional clear periods. Breezy from SW and blowing the telescopes around. Small proms at 2 & 8 o'clock on the limb. Nothing much visible on the disk. Gong Ha agrees. Sun at ~12° altitude at 12.00.

The PST etalon is moving as expected under motor power. Though I'm getting so few clearances that its effects are difficult to judge. Trying some 2000 frame captures of the disk at 320fps 800x600 on the ASI174 in SharpCap. The hope was that I could capture the 2 o'clock prom as well as the disk. Plates of low cloud becoming established! Clear blue overhead much of the time. Or higher, fluffy cloud.

My wife has bought me some huge, Kamik winter/snow boots for Christmas at a ridiculously low price online. So I'm trying them out. I have been really struggling for foot warmth in the observatory before now. These still feel comfortable after an hour in the breezy dome. They should do too with a -50C / -58F rating on the [still] attached label. They slip on and off effortlessly. I could never be bothered with my walking boots. Too difficult to get on and off and then there were the fiddly laces.

I'm wearing my new, fake lambswool, "trapper" hat too. This covers my ears and neck where the wind usually whistles. I really ought to dig out my old duvet jacket with a hood for even more protection. These breezy condition really makes it feel much colder thanks to wind chill. That's the advantage of a rural observatory. Nobody can see how silly you look! Comfort is far more important than appearance. As long as you aren't daft enough to share images of your get-up.

12.30 and that's over an half hour without a clear view of the sun. Following the sun with the dome slit is effortless with the drive crank being so near my computer chair.

It was nearly 1300 before I could finally capture more of the disk. The cloud to the south does seem to be sinking slowly towards the horizon. Just in time for lunch! Well past the meridian now so I should do a manual flip before I'm called in. It's best to wait as long as possible before making the flip. Then the telescope tails don't try to hit the pier or overhanging monitor. Nor try to brush the laptop off the desk!

Luckily I can add a lot of westerly travel on the Simple Handset [paddle.] Then the mounting slowly corrects any changes I made at the end of its initial slew. Though you can't do anything manually. Start pushing or pulling on the telescopes and the mounting will be completely lost. It must always be driven by the stepper motors.

Lunch over and the sunshine is looking very watery. By 3pm the house was casting a shadow half way up the dome and I'm in the bottom half. I told you the sun was low at 55N! Stellarium says only about 11-12° high at maximum.

For my next trick I'm going to beat Windows 10 around the head if it doesn't start saving my videos onto my external SSD! I've told it countless times but it never, ever listens! Why bother to ask me what I want it to do with the external HD if it then completely ignores my choice? #"X¤%X&*! It's a good job Big Brother isn't listening! Isn't it? 😏

I had to snigger. The big American & global IT monopolies are getting together to agree SMART standards. Supposedly to get smart objects to talk to each other. Don't they really mean agreeing advertising standards to show on very smart object screen regardless of the maker?

YouTube is rapidly becoming completely unwatchable. With an advert aimed squarely at the mentally handicapped showing before every damned video! This is what the Sci-fi authors really meant by dystopia. Zombies with mashed potato brains. Raging against intolerable levels of advertising in every waking moment.


*

16.12.19

16.12.19 Shorter timing belts finally arrive!

*


Monday 16th. Three weeks and three days after posting, my shorter timing belts from the UK have finally arrived. Avoid Standard International Letter Post if you can. £2.80 worth of postage for nothing at all. Let's call it Substandard and be done with it.

My DC, focuser motor driven, PST etalon tuning has been on hold all of this time. I couldn't get enough tension with the 280mm without adding a foolishly long, extension bracket for the motor. I'll leave the clumsy motor arrangements to the ridiculously expensive, commercial, motor units. I much prefer the most compact motor siting with nothing sticking out. Like I did for my big, Feather Touch FT3545 focuser.

Hopefully, I will now be able to complete the project in a short time. The new belts are 250mm 2GT with another of 240 mm still waiting for stock to arrive at a Danish dealer. I shall have spares for other projects.

The belt drive with 16T pulley and 250mm 2GT belt. The angle of the motor bracket needs to be reduced slightly. It is more than 90° as supplied. The bracket is only soft mild steel. So a vice, adjustable spanner or pliers will bend it to 90°. I don't recommend trying to bend the bracket by pressing down on the motor!

I want to drive the helical focuser as well on the H-a telescope. Though that presents even more problems because both ends of the focuser move in opposite directions. The belt will fall off either end of the focusing ring during full travel. At least the ring rotates smoothly and easily. I shall just have to support the motor with sky hooks. Or off a separate bracket not directly attached to the H-alpha OTA.

I have also been stalled on finding a suitable replacement for the original and far too tight, PST etalon band packing O-rings. Several sizes of O-rings were tried but all were too small in diameter. Leaving a lot of play in the outer ring of the etalon tuning band. I tried various strimmer or [US bushwhacker ?] monofilament cord. That was either too tight 1.6mm or too loose in 1.3mm. Most electrical flex had 1.3mm cores and was therefore much too loose. 1.5mm Ø would do but nothing in everyday materials presents itself.

The new 250mm 2GT belt fitted nicely with a 16T pulley on the motor shaft. The 20T needed a curve filed in the original motor bracket to allow the motor body to sink into the bracket. Without the filed curve the 20T made the belt far too tight. I am still trying to lower the motor even more by rotating it by 90° to the bracket. It might then be possible to use the 240mm belt I have been waiting for. We shall have to see if/when it ever turns up.

I swapped original PST O-rings for 1.3mm monofilament strimmer line. When motor driven a bit of play in the tuning band is irrelevant. The motor and belt tension will always hold the etalon in the chosen position Allowing fine tuning without touching the telescope.

Pictures and quite possibly, a YT action video of my motor driven, remote etalon tuning in daylight tomorrow. If it ever gets light! Heavy overcast and fine drizzle. You'll have to make do with a flash image, or two.

The motor happily drove the etalon form end to end of its travel in both directions. See the very dark video at the top of the page. Despite being taken at lunch time it never became fully light today.

I had another thought after carefully centring the belt on the tuning band. The PST O-rings are heavily offset to one side. So the drive belt really ought to be centred over the O-rings. Even if it will look all wrong.


*

15.12.19

Sunday 15th Storm in [an inverted] teacup!

*


Sunday 15th. A storm passed over in the afternoon with rain in the morning. I noticed the south facing dome trying to turn out of the wind during one, fierce gust around 1 o'clock. So I went over to turn the shutters into the SW wind. It was a bit noisy up in the dome. Mostly from the rubber skirt flapping. I added three long F-clamps to the upwind side of the base ring. Though the eight hold down disks have been good enough until now.

Being round, they allow the base ring to slide effortless beneath them. Without having to worry about the truth of the base ring causing digging in. Each disk sits on a strong, SS shelf bracket bolted to each, of eight,  7" industrial roller metalwork stands. With the steering rollers, just below on the same axle, it makes for an efficient and tidy system.

The wind was supposed to peak mid-afternoon with gusts to 50mph+. It seemed like a good idea to park the telescopes horizontally for a change. Low down on the north side of the pier seemed more sensible today. Than sitting up high, parked horizontally, on the south side. If the dome were to move sideways [however unlikely] it won't scrape the telescopes along with it.

The huge, old, plum trees behind the dome are swaying wildly. I hope they don't drop any branches on the dome or workshop! The balance of the massive branches is all wrong for amateur felling. It would need a big tractor in the field behind. With a long chain, or very strong rope, to pull the tree, or individual branches away from the garden during each cut. With the perfect hindsight [of a woman] the tree should have been removed twenty years ago. Now it hangs right over my buildings but I'm too afraid to climb up there to try to shorten each 40' branch in turn. My tallest, 20' ladder hardly reaches up a third of the way! 

*

Saturday 14th Dec.2019. Thermal issues in H-alpha modded telescopes.

 *

The forum discussion on the thermal stresses [if any] in an H-alpha telescope is ongoing. As soon as I see any sunshine I shall measure actual temperatures hitting thin, blackened, metal targets using the thermometer gun at close range. This would seem the best way to confirm real world temperatures, after the D-ERF, where the etalon sits in the beam. I just need to remove the long, filter stack from the focuser. Take a reading of my target. Then replace only the etalon and take readings behind it and at focus.

What should have been a simple procedure of a few moments is being endlessly delayed by the grey weather. We have a storm coming this afternoon with 55mph winds forecast. I am still waiting for drive belts for the etalon ordered a month ago on eBay[UK.] Plus some more O-rings. Which are still untraceable in the post. The local stockist is still sitting on my order for 240mm belts which were "temporarily" out of stock with a promised delivery in 1-2 weeks.


*

13.12.19

Dec 13th: More H-a-musings.

*


Here's a token live video from my heavily modified, 6" f/8, H-alpha telescope. The seeing wasn't particularly good and the thermal agitation, caused by the intervening atmosphere, is self-evident. ZWO ASI174MM [mono] camera. It is views like this which drive me on to continuously improve my solar instrumentation. Solar imagers use videos like this to produce high resolution "stills." Usually adding false colour.


It has been grey for a few days so the discussion on H-a instrumentation goes on. My plan was to add a full aperture D-ERF to my 150/8 OTA to reduce internal heating..

Quote from Baader sales website:  "Our 43-layer dielectric DWDM-coating delivers a COOL-beam of pure red light, with a HBW of 80 nm!"

I had a very interesting response on Solar Chat! forum to my worries about heating effects inside the D-ERF filtered telescope. BobY analysed the heat passing through the "cool" full aperture, Baader D-ERF with startling results. He went so far as to suggest adding [potentially sacrificial] protective blocking filters before the etalon. I can vouch for the warmth of the red focused beam after it passes through my sub-aperture D-ERF and the PST etalon. The Etalon sits in that hot beam for countless hours quite close to focus!

My habit of tracking the sun all day long, on sunny summer days, may well have been stressing my PST etalon. It was a danger I never really considered seriously. Replacement of the PST etalon is a ~£500 bet on getting a good, secondhand one from any random, PST, donor telescope purchase. With rather doubtful odds according to some experienced PST users and H-a telescope modifiers. Some PST etalons are excellent but do seem to be very few and far between. There are even reported to be PST etalons, which are so poor, they should never have left the Mexican factory.

Without a suitable comparison I cannot be sure where my etalon lies in the quality spectrum. It has given me a lot of H-a fun. So I'd hate to think I have damaged it by naively believing Baader's sales propaganda at face value.


*

10.12.19

10.12.19 Sun? What sun?

*

Tuesday 10th 32F, overnight frost. Early clear sky so it's back to the observatory to capture some solar H-alpha.

10:50: Objectives still steamed up on all surfaces. Sun still behind neighbour's tree. Used gentle warmth from the hair drier on the 6". The Lacerta prism is well dewed up too.

Grr! The tree doesn't respond to the hair drier! Variable cloud moving across from the NW but still hope.

Gong Ha shows proms at 2, 4 and 8 o'clock. The 8 o'clock looks big enough to be well worth capturing. I'm missing the correct nomenclature for solar disk positioning. 8 o-clock is presumably SE provided the camera and image are correctly oriented to match the naked eye view.

Got no proms, Dad! Has the etalon gone off band? It is quite possible after all the adjustments to O-rings and moving the inner etalon arc. I might as well remove the rubber band and outer shell and turn the etalon directly with a screwdriver.

11:20 34F Found the 2 o'clock proms. Then the 4 o'clock. Poor contrast against H-a background sky. The objective is still steamed up inside! Now I really have to think about fitting heating bands!

Still trying to find the 8 o'clock proms as a thick plate of cloud moves over the sun from the west. Blue behind, so I'm persevering. A breeze is picking up now. The forecast was for later cloud. Presumably the swing to the south west is bringing the cloud. I've suddenly lost the wireless internet again after earlier success. And now back again after opening Settings > Networks. Curious. Still less than 4 Mbps.


11:40 37F Solid cloud low down now. Only partially blue overhead.

12:30 Back indoors and the sun comes out!  Grr?


*

8.12.19

8.12.19 The future of my solar H-a instruments?

*

For high resolution, solar imagery, aperture wins. Though always within the limitations of local seeing conditions. The larger the aperture the more the atmosphere can interfere. This is the result of the physical size of thermal convection cells. Also because of the inevitably higher magnifications involved. Unless optical means is used to reduce the focal length, the camera sensor is fixed in power or image scale.

The larger solar telescope will provide unprecedented detail but only when seeing conditions favour it. Which suggests a fall-back, smaller instrument for all those occasions when the seeing does not cooperate. Which makes the considerable investment in the larger instrument even more doubtful.

The present "quiet sun" offers reduced opportunity for any instrument to capture noticeable surface detail. [Active Regions or Sunspots] Though the larger aperture can capture what passes unnoticed in a smaller telescope. 

When only prominences are available for solar interest then the larger instrument can really get into its longer stride. Surface detail might also be lifted to the point where it becomes far more interesting in itself. Where a small instrument cannot possibly reach the level of detail required. All of this is largely determined by the skill of the imager with his choice of processing software.

Larger instruments concentrate a lot more heat. Which must be managed by safe filtration. Inevitably that raises the argument for full aperture D-ERFs to protect the instrument from excessive heat. With some reservations about the internal thermal conditions within the instrument. In theory the air itself shouldn't be warmed by the hot beam from an unfiltered objective. 

In practice there are "things" in the way which will almost certainly absorb some heat from a hot, focused beam. The nearer the optical element is to the focal plane the greater concentration of heat. 

I can safely [?] vouch for the fact that my 6" lens focuses a lot of heat. Some of which passes right through the internally placed 90mm D-ERF. [Rejection filter.] I can still burn my hand if I place it in the focused beam without the PST etalon and following filters fitted. 

Is this entirely the fault of the sub-aperture D-ERF? For all I know the D-ERF, with its multiplicity of deposited layers, is designed to work properly, only on parallel light. The light emerging from the f/8 objective is far from parallel. Which might suggest that the filter cannot perform optimally. Baader clearly recommends placement of their D-ERFs in front of the objective. NOT somewhere behind it. 

Well, they would say that wouldn't they? The cost of D-ERFs rises rapidly with increasing diameter. You can buy an achromatic objective [even a complete ED OTA] for less than the price of a larger, Baader [or Airies] D-ERF. That doesn't mean the filter manufacturer's safety advice is wrong, of course. It is eminently sensible and provides a level of safety for all users. Perhaps one not enjoyed by the cost-cutting sub-aperture, filter users, like myself.

There is a move towards Schmidt Cassegrain telescopes for solar H-alpha imaging. The problem is obtaining a full aperture D-ERF within one's budget. There is only one manufacturer [Aries] and the costs are frightening for mere mortals wanting to try these larger apertures. These instruments can't be used with internal, sub aperture filters because of their design. The secondary would be cooked by the concentrated beam from the large mirror even if the filter could be placed anywhere useful. 

Where does that leave me with my desire for more surface detail and increased scale for prominences? I have my 7" f/12 R35 iStar objective. Presently only used for white light imaging with a Lacerta 2" prism. The iStar has a focal length 1.44 x that of the Celestron CR150HD f/8 which I presently use for H-alpha. 2160:1500 [with GPC.]  Given my experience of a hot beam from the 6" the extra heating from the 7" could be considered a serious problem. 

I would like to use the 7" in its folded form to reduce the far greater moment of the long tube version. While the beam folding, optical flats of the 7" are of Zerodur, I really don't want them being baked for literally hours every day it is sunny by the 7" objective. Which means selling several kidneys for a 180mm D-ERF. Ouch!

The much more compact, folded 7" framework would give me a more solid base to support the extended stack of the PST etalon and following filtration. Provided with motor focusing and etalon tuning, there would be no need to handle the telescope during imaging sessions.  A 2" star diagonal could turn the final leg of the beam upwards for a really solid attachment to the OTA. 

*


6.12.19

3rd December: Grey weather and new software revelations.

*

Tuesday: 43F, grey, wet and miserable. Literally everything is covered in heavy condensation!

Wednesday: Mid 40sF and grey. I refitted the inner, upstanding skirt of recycled plastic, lawn edging with about 100 screws. Most of the time the inner skirt is not necessary. However the rubber, outer skirt flaps noisily in windy conditions.

I am tempted to see if warming the plastic with the new [recycled] hair drier would allow it to be straightened. The plastic is very stiff and more wavy than I would have liked. Causing occasional, outward waves which rub against the rubber skirt and increase dome, turning friction. The dome is sixteen sided and rotates over an eight sided building. Leading to occasional conflict between flats and points.

Thursday: 45F and grey again. Just as well I replaced the inner skirt yesterday because a storm is forecast for overnight tonight. It is twenty years since the last really big storm. When we lost a quarter of our roof. I went ahead and replaced the whole thing after that. Working alone, as usual. I built two dormers and installed thick insulation at the same time.

I have discovered a [long] YouTube [streaming] video by Steven Tang. A master of solar image processing with decades of experience and frequent accolades. There is lots of padding but some vital detail on bringing out out the hidden detail in the final image. His relaxed and natural approach using the same, free software is quite startling to one who has tried and failed miserably to obtain similar results.

I'm afraid I found the other software help videos too demanding of my limited memory.  It's a shame I can't just install more RAM and a nice big SSD. So I shall just have to note the times on the video when he achieved his magical results. Throughout the video he as doing simple things I had never known existed in the software.

Interestingly, he stated that the Celestron, C6R 150mm, f/8, achromatic refractor was an ideal solar instrument. Particularly when used with a Daystar Quark for H-alpha. I am using an older CR150HD which lacks a collimatable objective cell but is quite similar. His recommendation of larger apertures for high resolution H-a imaging was good to hear form an expert.

Daystar's reputation for quality control of the Quark has taken a battering on the forums. With some very experienced solar imagers returning up to five before they received a properly working example. This is completely unacceptable at the very considerable purchase price.

As an occasional distant, online customer what chance would I have of receiving a satisfactory example? One which actually performs to claimed specification? The considerable delay in tuning is a considerable downer for one used to instant, live tuning with my PST etalon.

On the same subject, I have no idea if I have a good, average or poor PST etalon. Bought secondhand, with a dead ITF, it was never really used as a PST. So I can only judge the results with my 6" refractor. The "live" visual view is usually very pleasing. Particularly with the binoviewers. While the image on the monitor screen from both ZWO cameras has been excellent despite the unbelievable scale. Only my lack of skill with the processing software denies me the final images I desire and know already exist in the frames of the video. If only I could bring it out!

Friday 6th Nov: 46F. The dome is still attached after last night's wind. I shall have to check the rainwater, collection containers. I usually park the shutters facing south but rotated them into the promised wind. I can't make drainage gutters because the bottom of the base ring runs on the big support and rotation rollers. I am still looking at optimum waterproofing options for the entire dome.

Saturday 7th: 43F. Early sun, then cloudy and then clear for a while. Captured some videos of the area of the disk with dark filaments showing on Gong H-a. The nearby proms on the limb were too small and dim to be worth the effort. The AVIs could not be found by Registax or AS!3 [Autostakkert.] So I returned to AS!2. I could clearly see them on the screen under Desktop>SharpCap Captures but couldn't Select, Open or drag and drop!  Then PhotoFiltre7 and iMPPG couldn't find the resulting stills! The sky went very dark at 1pm so I retired for lunch.


*

2.12.19

2.12.19 Hair drier wins!

*

Monday 11.15, 37F, sun after early cloud cleared. Still being teased by long strips of cloud.
Once uncovered the objectives dewed over. So out came the new [secondhand] hair drier. On low warmth it quickly cleared the problem.Then they steamed over again. So further gentle warmth was applied with lots of hand waving of the hair drier. The inner surfaces look misty as well.

First image of knotted prom at 4 o'clock.

I am using a small makeup mirror to see into the objectives well above my head. So much easier than climbing on a beer crate or dragging the telescopes down to my level and then having to re-sync on the sun.

Have I mentioned how C-Du-C/ Skychart keeps talking to me? To which my wife would reply: "What are the voices telling you to do?" 😊  Usually followed by "Is she a blonde?" 😨


There is a rather small, looped prom at about 4 o'clock on the solar limb. Thin cloud is making it difficult to tune and adjust the brightness. When enlarged [zoomed] in SharpCap the prom appears almost knot-like. Small humps and proms at 1 o'clock and ten o'clock. Nothing obvious on the disk.

This second image was processed and inverted in in imppg from the same, still image above.
 
The tiny image was cropped from 640x480 and then false coloured and enlarged to 500pixels in PhotoFiltre7.

12:00, 41F in the dome. Much heavier cloud arriving from the NW. Hopeless conditions for capturing anything except a cold!

13.00. Paused for lunch. The sun has now come out again. I had better return to the fray! Only captured a few images of the same prom as seeing conditions worsened with the proximity of the roof. Sun sank below the house ridge around 15.00.

Having given up on the sun I did some odd jobs until the Moon rose high enough. The seeing was awful! With violent thermal shaking and simultaneous streaming. I captured a lot of videos to have something to play with later.

I have almost given up on Registax and gone over to Autostakkert. Though I have been following on from AS!3 with Registax6 for Wavelets. Imppg is getting some exercise too. As I claw myself up the overhanging learning curve of image processing. Came back in at 18.00 as cloud became a serious nuisance.


*

30.11.19

30.11.19 A martyr to dew!

*

Saturday 30th Nov. 34F. -2C white frost overnight. Almost clear sky at 10am as the last of the frost melts off the top of the dome in bright sunlight. Just checked Stellarium and the sun doesn't get above 13° today.

10.40, 37F  and I am all set up with the sun looking crisp in H-a on the screen. Everything is covered in dew. A neighbour's birch has just grown into my field of view! Grr?

Skiing trousers, two thick jumpers, thermal vest, t-shirt and duvet jacket. I'm wearing my walking boots over thick, loop pile socks to try to keep my feet warm. Baseball cap [for the peak] under a fur lined, trapper's hat.

Horribly asymmetrical variation of brightness across the field of view. I have the etalon fully turned one way. I ought to try moving the screw to another hole on the etalon. Not much difference. Then try the tilt plates. See SharpCap 'snap' on the right.

Whoops! I just checked the 6" objective. Solid dew! It's no wonder I have light and shadows on the image! I can't reach to see into the dewshield so I used a compact mirror instead. Will it clear at 36F in the dome? I don't have a hair drier. It is odd how sharp the surface texture looks despite a full aperture covering of dew. The 7" is covered in droplets so is even worse! I am losing valuable sun time with probably the best seeing of the day.

I haven't been using any objective lens covers so far. The telescopes obviously became chilled overnight. Opening the dome to the sun raises the air temperature above the dew point. While the massive lumps of glass are lagging badly behind. I have now wrapped the 6" cell and dewshield in thick, closed cell foam to try and speed up the drying process. There  is a clear crescent of glass now.

Then it clouded over so I went shopping. I am now the proud owner of a recycled Braun Mini hairdrier. £2.50 equivalent from the charity shop. The cloud has cleared as I enjoy lunch. So I shall be back out there ASAP.

Sun lost behind the roof. Slewed to the Moon with the 7" but it is getting cloudy again. Eventually the cloud cleared and I captured lots of overlapping ideos of the moon with the ASI174. The idea was to process them and then let ICE stitch them together. Getting 200fps! The downside was the poor seeing conditions. Soft, with special "thermal" effects racing across the image on the screen. The moon was just above the ridge of the roof and the woodstove was lit. Hardly surprising the moon was mush.

I have capped both lenses and wrapped the upper OTAs and cells in closed cell foam, camping mattress material. Only -1C forecast.


*

29.11.19

29.11.19 Back to the sun!

*

Friday: 36F. Early cloud cleared to the promised sunshine just before 11am. A strong and gusty north westerly is roaring around the dome and in the surrounding trees. Fortunately I am looking south east so the telescopes are remaining sheltered and still. 

The image is covered in thermal waves on the monitor as I capture videos of weak and dim prominences. Like looking through the water in a tumbling stream. Gong-Ha is showing some markings near the easterly, solar limb. All I have is an elongated lighter spot. Except it looks too far south to be the correct disturbance.  I am getting very low fps from the ASI174. Usually up in the 300s fps it is 1/10 of that. I didn't have High Speed engaged in SharpCap. It has shot up to nearly 400fps now!

The sunshine continued until after lunch when cloud started drifting across the image. I captured lots of videos for later processing.

My new sets of  o-rings arrived 45, 46 & 47 x 1.5mm and all were too thin. I have tried rocking the outer shell with the adjustment band in place but it makes no difference [at all] to the image.

Looseness of the etalon adjustment won't matter with the drive belt in place. The belt will safely lock the adjustment wherever it stops. It just feels loose in my fingers. So I have returned to the original 42 x 2mm rings. Which are very stiff. The etalon ring was still too stiff to turn using 1.6mm monofilament packing rings after rubbing between folded sandpaper to take off any possible high spots. Which makes no sense unless it is the hardness. Rubber o-rings must flatten against the outer shell. Dismantling the etalon and replacing the rings is now a 1 minute job after so much practice.

As I am still waiting for the toothed timing belts to arrive I am back to manual adjustment. Which is much easier after lunch following the meridian flip. This places the focusers and cameras within easy reach. The sun is noticeably lower in the sky than last time I was imaging. That was before the overcast weather descended.

3pm and the sun has sunk below the ridge of the house roof. A tiny, crescent moon is dragging along the horizon to the south.
 

*

26.11.19

Remote etalon drive: Pt.7

 *


UPDATE: The 1.6mm strimmer line did not work. It fitted in the groove and could be forced under the outer shell, with a struggle, but the friction was far too high. [Though lower than the original O-rings]

I have now used 1.3mm strimmer monofilament but this is slightly undersized for a hard material. Slightly better than 1.3mm copper cored, plastic covered flex but not by much.

I hardly dare to suggest 1.5mm monofilament because I haven't tried it. Being softer, 1.6mm rubber O-rings might work but again I can't speak from experience. Slightly thicker O-rings might work just as well. Provided it was less than the original 2mm. If you order any online, without a hands on trial, then you are on your own.

After endless searching and failing to find a Danish dealer I ordered some 50mm x 1.5mm nitrile O-rings from the UK. Almost giveaway prices for a packet of 10 [£1.50] plus very modest postal charges. Delivery time unknown but they should fit in a tiny envelope. Letter post? Could be only a few days.

Still waiting for the 250mm 120T GT2 timing belts from a UK eBay dealer. The one size the Danish dealer was out of stock. Grr!

Wednesday: Have now ordered several diameters of o-ring [in pairs] from the UK with a 1.5mm cross section. 1.5mm is the missing size in monofilament. I am reliably informed that 47mm x 1.7mm o-rings work well for those who find their etalon too floppy. The linked UK business no longer stocks that size! I turned a mandrel to test the internal diameter of my own o-rings. 42mm x2mm. 

Thursday: Wet all day.

Friday: Sunshine promised but breezy from the north. Can I enjoy some imaging time? 


*

23.11.19

PST etalon motor drive. Pt.6 further thoughts.

*

The motor driven etalon band needs a reduction in turning friction to function well. After thinking about it some more it occurred to me that there are alternatives to Teflon tape wrapping. As the o-rings are the only source of friction one should concentrate on those.

I tried fitting only one o-ring and it made no discernible difference to friction. Fail.

Modification could include replacement with slightly thinner o-rings of the same diameter.
Or, thinning the original o-rings slightly by abrasion. Though I certainly would not recommend doing this in situ. The o-rings would need to be removed from the inner shell of the etalon housing. For reduction in overall diameter by sanding with a cylinder of abrasive paper. 

A suitable mandrel would be required to hold the rings firmly [by stretching] for sandpapering. A perfectionist, with a lathe, could make a copy of the etalon inner shell complete with grooves. Though I doubt it would be necessary to make the grooves. Most o-rings, by their very nature, do not easily roll along a bar but remain in one orientation unless deliberately rolled from the side. Usually they just slide sideways without rolling. So sanding will slightly flatten only the curved, outer surface.

O-rings are available in a huge range of sizes and materials from specialists. The "mileage" they suffer in an etalon housing suggests the most common black rubber type is perfectly adequate.

The original PST O-rings in my own etalon housing are 51mm measured across the grooves x 2mm thick. Which suggests that 50 x 1.5mm might do the rick. I have checked the stock o-rings [locally] and their range includes 51mm x 1.6mm. A reduction of .8mm on overall diameter.

Whether these companies deal with private customers is the next hurdle. Many Danish businesses prefer to specialise in wholesale only. Leaving the private customer to find a source elsewhere. There is certainly no sales website for private customers to pay for small quantities of anything. Fail.

Which means going to eBay and the UK many times. With large postal charges for a signed-for service to avoid the career crooks. Who routinely say they never received the item and claim a refund. Then put the item on eBay. Fail.

Some companies sell round, rubber o-ring materials in long lengths to make your own o-rings. Now there's an idea! What everyday materials could replace the o-rings with something more slippery? Heavy, monofilament, nylon fishing line? Or grass strimmer line. Fine cord? Time to start looking!

I have been searching for plastic coated wire/flex in 1.5mm to replace the o-rings in the grooves. Amazingly difficult to find. Loads of 1.2mm or 2mm but nothing in between. So I used some 1.2mm and friction remained very low at the expense of a little extra slop. I have boxes and boxes of cables, from multiple disciplines, but no 1.5mm OD. The strimmer monofilament was also 1.2mm.

Tried 1.5mm brake cable, solid brass wire and solid copper wire. All too stiff. Copper cored, multi-strand flex is still the best so far.

For the truly adventurous there are stepped diameters of strimmer [grass trimmer] "wire" in monofilament nylon. 1.3 and 1.6mm are small change for a 15m length. Stiffness is unknown at 1.6mm but would seem an ideal candidate to remove the last of the outer drum slop. Not that it would matter with belt drive. It just seems a bit sloppy for my taste.

So another whole page of text dedicated to finding [about] 6" [15cm] of something better to replace the PST O-rings. It is Saturday and the nearest big DIY outlets close at 2pm. So it will just have to wait until Monday. This is weird! I searched online and none of the local DIY chains has 1.6mm nylon line in stock. I have had to order it online.


*


22.11.19

PST etalon tuning, motor drive. Pt.5: Rebuilding etalon housing for NON-Dummies.

*
I CAN ACCEPT NO RESPONSIBILITY IF YOU VOLUNTARILY CHOOSE TO COPY MY SKILLED AND HIGHLY EXPERIENCED EXAMPLE. I HAVE BEEN DISMANTLING "STUFF" FOR WELL OVER 60 YEARS.


Ever onwards:

Here we see the etalon, outer housing minus its O-rings. The vital screw rests in its rightful place of honour at the centre of the O-rings. Note the narrow grooves in the etalon housing where the O-rings would normally sit. The O-rings produce far too much friction for motor belt drive. Different lube didn't seem to help [at all] and might migrate into the optics if too runny. Some lubricants are designed to migrate. So be warned!

Here I show how far the inner etalon arc can move. About 160+ degrees. This is with a suitable bar [drill] fitted in a single drive hole. Remember to return the arc to its original [central] position or you might lose vital etalon tuning range. Which would mean dismantling it all over again.

Here I have shown the offset of the screw hole in the outer shell. [arrowed]  You can see that the offset forces the outer shell to fit only one way around. If you tried it the other way the screw would completely miss the hole. Or the shell would hang uselessly off the side of the etalon housing.


And, now, let's pretend I have re-wrapped the inner shell with Teflon tape so I can reassemble the outer shell. The last post showed the Teflon tape wrapped shell. It only remains to put that vital drive screw back in to hold everything safely together.

Then put the knurled, etalon adjustment band back over the etalon shell for the motor drive belt to run on. Finish off with the rear AOK Swiss, PST etalon adapter.

I am awaiting new and shorter drive belts. Once I have them I can confirm what length you will need for remote, Skywatcher focuser motor, etalon tuning. Only after I had ordered the longer ones did I realise that I wanted a much more compact motor arrangement.

The final image shows the etalon back between the AOK adapters. I was able to be far more generous with the Teflon tape this time. For which I was rewarded with improved stability. While I am waiting for the new belts I may as well try one O-ring instead of two.


Click on any image for an enlargement.
*


PST etalon tuning motor drive Pt.4 Dismantling The Etalon housing for NON-dummies.

*

I CAN ACCEPT NO RESPONSIBILITY IF YOU VOLUNTARILY CHOOSE TO COPY MY SKILLED AND HIGHLY EXPERIENCED EXAMPLE. I HAVE BEEN DISMANTLING "STUFF" FOR WELL OVER 60 YEARS. 

My original posts on dismantling my PST were grouped around early February 2018:  

https://fullerscopes.blogspot.com/2018/02/pst-dismantling-images-of-parts.html

You may need to move back and forth through several "chapters" of Older and Newer posts of that period to see all of it. Blogs normally update in reverse time.

Because so few people have seen the PST etalon dismantled I have photographed the various hidden parts. The inner workings remain safe from direct, physical contact if you proceed with the utmost care. No attempt to reach the active inner parts is desirable and certainly not shown here. History records that few etalons survive such "open heart surgery."

Removal of the etalon assembly from the PST gold tube requires a pair of sturdy strap wrenches. I almost broke mine in the desperate struggle to break the rock hard, red, thread locking compound. The trick is to have something useful left behind after the dismantling. A sledge hammer and cold chisel may be a lot quicker but leaves little to rescue for further use. Proceed with the utmost caution if you feel you really must copy my foolish example.

I can well understand the factory wanting to secure the PST against "idiots" taking it apart. i.e. Those who feel "entitled" to be fully protected from all self-harm.

My etalon group (or assembly) is already separated from its PST. It lives happily between the two, matching AOK Swiss PST etalon adapters. The PST has unusual thread sizes at either end. Again [probably] to protect "idiots" from committing self-harm in a dangerous lash-up.

The light from the telescope objective enters from the right in this image. The AOK front adapter screws into the PST etalon and has a 2" push fit for standard 2" telescope focusers. The rear AOK adapter screws over the back of the etalon assembly. It has a female 2" socket for whatever follows.

Here is a view of the female side of the etalon beside the front adapter. The sharp eyed will note the glass in the AOK adapter. This is a Baader 1.125 GPC to bring my Celestron CR150 f/8 to f/10 to better suit the PST etalon. I promise to clean it before it all goes back together.

The original PST was built this way and prefers f/10 for best performance. This is because the PST etalon consists of two lenses sandwiching the etalon itself. The etalon itself must see parallel light to function well. The optically weak, Baader 1.125 GPC does the job by stretching the focal length and resulting focal ratio to better suit the PST etalon + lens group.

Moving on: Here the knurled etalon tuning band has been pulled back. It looks like metal but is actually made of tough rubber. Note the cross-head screw protruding from the tape. This is the etalon drive screw and connects the inner and outer parts of the etalon. Lose that little screw and tuning becomes impossible. The PST probably wants to go into the waste basket. If only to avoid further torture at your hands!

Drop the etalon onto concrete and your etalon is extremely unlikely to survive the fall. Unsurprisingly, PSTs aren't guaranteed against being dropped by "idiots." If you object to the term "idiots" then enter a more pleasing, PC term [for] yourself.

The knurled ring is placed carefully aside. We'll want this to go back on. So the tuning band can be used, as normal, when we put it all back together.

Now take your watchmaker sized, cross-head screwdriver and remove that little screw. No need to remove the security tape. You are long past any hope of a Meade guarantee rescuing you from your own evil intent.

Just poke about with the screwdriver until it seats firmly in the cross-head. Don't round off the cross-head socket or you can't dismantle the etalon any further. Press hard and the screw should unscrew. It may be small in diameter but it is surprisingly long.

The screw is actually dual-purpose. It's second trick, beyond driving the inner, etalon adjustment is holding the etalon shells together. Take note of the Teflon tape wrapping the inner etalon shell. Note the deliberate offset. If you cover the slot then the drive screw can't reach the inner arc. Where the magic happens when you tune your PST etalon.

SEE THE NEXT EXCITING EPISODE in Pt.5.


 Click on any image for an enlargement.
*

20.11.19

PST etalon motor drive Pt.3 Mock-up with foolishly long drive belts.

*
I was cheated! Early sunshine found me in the dome setting up for imaging the sun. Before long it was completely overcast! Uniformly grey. Grr!

New version of SharpCap safely downloaded onto the laptop.  v3.2.6137.

I used some solar down time to compare camera and eyepiece focus points on 500 yard distant treetops. A thread on SGL, by a novice, solar scope owner, raised some useful points I had never thought to check for myself before now.

The ZWO cameras seem to focus at the same point relative to the 1.25" nosepiece regardless of sensor position or body size. Going on a sample of two. Possibly three. 120, 174 & 178.

This seems logical to avoid searching for focus after a mid session camera swap. A 2x WO Barlow on the camera nosepiece pushed the camera position 25mm outwards. Eyepiece focus was 22mm further out with the camera and Barlow removed. 

Worth remembering. Or adding to my observatory notice board. Memory like a sieve? Print the vital stuff and hang it on the wall to save searching back through my blog.

The post van doesn't usually arrive until after lunch. The timing belts are confirmed out for delivery today. I don't have a belt long enough to test the motor on the etalon band. No proof of pudding where reality is untested. Talk of the devil! The post van has brought my timing belts at 12:00.

The etalon drive requires some considerable tension! I fixed the motor bracket in a vice and held the PST etalon stack in my hand. It is 43F in the dome. The etalon adjustment feels stiffer than ever! Needs more friction between timing belt and etalon band. As I suspected the etalon band is too slippery for the rubber timing belt to get enough grip without lots of tension.

It seems counter-intuitive but I reversed the band and had more grip on the smooth side. Should I try a lighter grease to reduce friction of the underlying 0-rings? Removing the O-rings removed all friction but things became very sloppy. The etalon inner drive ring is effortless to move within its range of arc. A radial screw joins the two to provide the drive between the inner and outer rings.

So the friction in the O-rings is the only real difficulty. The outer ring is far too floppy without them. I'm going to try silicone car door seal grease. Instead I found some pure silicone oil for O-ring plumbing lubrication. Applied sparingly but thoroughly to the rubbing surfaces. Sadly this did not have the desired effect. The friction hardly dropped at all! I haven't used enough to leak into the etalon optical system. I had a good clean up afterwards, with clean tissue, to avoid migration.

What about PTFE/Teflon plumbing tape? Remove the O-rings and replace them with a couple of turns of tape. It's not as if there is much relative movement and no real loads to speak of. Concentricity between the rubbing surfaces with minimum slop is all that is required.

A rough wind of tape later to test the theory: Put in the drive screw. Effortless rotation! The O-rings really are where all the friction lies. The O-rings provide smooth stability between the rings and deter involuntary tuning. They are just a little too tight for comfort.This  explains the subjective sensation that gripping the band between finger and thumb tightens the movement. While wrapping a finger around the etalon band feels smoother.

Both belts proved to be too long. More shorter belts ordered. My search of a DIY outlet provided only stainless steel hose clips. Even then, they only had 60mm and I needed slightly greater diameter.

*

19.11.19

PST Etalon tuning, motor drive Pt.2 I do the [simple] maths.

*

I spent the morning measuring parts with vernier calipers and calculating timing belt lengths. 

The Helical focuser drum is 70mm in Ø. It rotates very easily compared to the PST etalon band.

The PST etalon band is 61mm in outside Ø. It has an embossed finish to provide friction.
The bare, etalon drum is 58.5 with the band removed but has a tiny raised ridge to keep the band in place.

My smallest GT2 pulley has 14 teeth from memory.
The drive belt for the FT focuser is 100mm long.

Next I needed to arrive at a suitable center to center distance for the motor pulley[s] relative to the diameter of the driven circumference.

I reasoned that driven diameter x Pi/2 would give me a nominal tooth count to use in an online belt calculator. They usually want a tooth count to make any progress.

I ended up ordering a 280mm belt and a 300mm. These lengths do seem extreme but they have to divided in half and wrapped around the transmission components. Circumferences always use up a lot of length. The belts are really quite inexpensive. In fact the postal charges were slightly more than the two belts put together.

I can progress with testing drive reliability once I have the belts here by using my existing Skywatcher motor. The belts will arrive tomorrow thanks to online dealers who care about rapid turnaround of orders.

I have searched online for suitable 60-61mm clamps to fit the AOK Swiss PST etalon adapters. The loads on the clamp are low. So a reasonable cosmetic appearance is arguably rather more important than sheer strength. Nobody wants to see an ugly exhaust clamp half way down their H-alpha telescope! Nor a screw hose clamp.

It would be easy to simply bolt the motor mounting plate [provided] to the AOK etalon adapter. However, this is a rather fixed arrangement. Rotation of the two motors, relative to each other, becomes awkward. One motor will face the talon. While the other will face the helical focuser. I'd much prefer a neat clamp for each. A visit to a large DIY outlet is indicated.

I could bore a 60mm hole in a piece of black plastic sheet and then cut it in half. This is what I had to do with the FT clamp. I wanted a compact arrangement with the motor laid low over the pinion housing. The difficulty lay in drilling down 2" [50mm] through the edge of the plastic to take clamping bolts. The FT has a stainless steel conical section behind one focusing knob. I decided to use that as my clamping surface. Not an easy task. Because the parallel section was narrower than the plastic sheet. The conical shoulder didn't help.

Despite all this, the focus motor worked very well and looked fine from a distance. Providing a revolution in my ability to focus precisely without touching the telescope. I was sidetracked by a focus motor control box which promised much but instantly crashed SharpCap. A recent software update seems to have overcome these difficulties.


*

18.11.19

18.11.19 PST etalon tuning, motor drive. PT.1 Thinking furiously.

*

Monday 18th November. For some time I have been mulling about using a Skywatcher focuser motor to drive the PST etalon adjustment remotely. While I'm there I really ought to have another motor on the helical focuser. The adjustments required are often too small to see. Those who have never tried a motor driven focuser would be surprised how a tiny degree of rotation can make a huge difference in appearance of the camera's image on the monitor. 

To that end I have measured the pull required at a tangent from the rim of my PST etalon. I arranged a thin cord in the form of a Prusik loop wrapped around the PST etalon band. This showed that I needed 2.8lbs of weight to make the ring rotate smoothly without stopping. A small excess of force will be useful for reliability.

The Skywatcher 12V gearbox motor easily raises most loads on the FT focuser. So I added 2.8 lbs to the Lacerta prism and the motor could still raise that weight on 12V. Though there is the matter of the ratio between the pinion and its rack. I'm talking about the focuser's direct drive knob here. Not the 10:1, slow motion knob. One rotation of either of the direct drive [black] knobs causes a 20mm movement of the drawtube and its rack.

To calculate the ratio you measure the movement of the rack caused by one full rotation of the driving pinion. One rotation is the active circumference of the pinion. A small pinion will provide a different ratio from a large pinion. The number of teeth on the pinion or the rack don't matter for this example. 

Where a belt drive is used, from the motor to the etalon band, the tiny pulley on the motor provides a lower gear ratio than if both were the same size. The actual number of teeth is again irrelevant because the etalon ring is structured rather than toothed. The drive relies on friction between the toothed belt and the etalon ring.

Now I ought to wrap a thin cord around the Skywatcher pinion to measure its ability to pull.Yet again I used a cord Prusik loop. By locking the cord to the toothed, timing belt I could hang weights from the belt while the motor was used to raise them. There was no hesitation in lifting a 1.5kg weight. [3.3lbs] There is a gear reduction ratio between the small pulley on the motor relative to the diameter of the etalon band. The ratio can be multiplied by the motor's ability to lift weights.The PST etalon band is 60mm in diameter. The present, timing pulley on the motor is 9mm Ø. So there is a minimum 10:1 increase in torque from the motor pulley to the etalon band.

Without doing any maths it is obvious the the motor can easily turn the etalon band. This is provided there is enough friction between the toothed belt and the etalon band. The band is rather slippery [slick] so may need some tension on the belt to achieve a reliable drive. Alternatively a "grippier" surface could be added to the band or the metal band beneath it. A rubber band. Or even better, an inverted timing belt, stretched tightly over the band with its teeth outwards.

The problem is calculating the exact dimensions of a suitable timing belt to grip the etalon band inside out. There is a risk that the belt's teeth will splæay to cause pitch problems. I'll use the same GT2 [2mm pitch x 8mm wide] pulleys and belts. Just as I did on my big, FT focuser.  I have duly ordered two Skywatcher motors. The other will be used for the helical focuser.

*

17.11.19

Sunday 17.11.19 Oh, Solar me, oh!

*

Sunday am: 11:00 41F. Weak sunshine with wind and some cloud increasing. Several modest prominences and one, paler, disturbed region in the solar southern hemisphere. It feels cold in the dome due to the wind.

I have captured lots of videos but  Registax is misbehaving. In a desperate bid to have something to show for my efforts I tried AS!3 [Autostakkert] and iMPPG to process some results. Then tried harder in PhotoFiltre to augment the final image. I usually, recolour the final images in PhotoFiltre7. Not with any great success. As can be seen on the right. Realistic sharpness of the final image still eludes me. Yet, the image cannot be sharpened artificially without producing digital artefacts. I am usually using 640x480.

The next image shows how imppg can bring out a 3D effect from exactly the same image. Though still not crisply.

Spreading the detail outwards requires a delicate touch and probably a lot more practice. Subtlety is not remotely easy to achieve. I have no clue as to the desirable settings and can't ever remember the details from the guides. The "chrysanthemum" effect arrived by sheer chance. As I played with the wiggly lines laid over the histogram on the right in iMPPG.

The third image is a photograph taken straight from my 25" monitor. It shows the active imaging screen in SharpCap. The "live" detail and huge scale is obvious. Though, in reality, is subject to various degrees of thermal tremors. Which a still photo cannot capture. Note the variation in brightness over the vertical depth of the frame.

I don't have any software to even out this variation. Though I believe Photoshop does. Having just watched an expert's video on using Photoshop to augment a solar image I am almost grateful that I don't have Photoshop. The number of steps, choices and selections is well past my sell-by date. I struggle to remember the basics of Registax and Autostakkert! I have the memory of a net.
 
"Lucky imaging" software is supposed to iron out the differences between the [software] chosen frames of the captured video. The faster the video camera the shorter the time span for avoiding camera shake or poor guiding. The faster the camera the more frames can be captured in a given time span. More frames means more data.

Camera speed is highly dependent on image brightness and frame size. A 640x480 frame of the solar surface in H-alpha can mean 350fps with the ASI174. While a small fraction of the limb with a dim prominence can mean the camera drops right back to 30fps. Prominences are usually made visible by over-exposure of the solar surface in H-alpha. It is not possible to see them in white light with normal, amateur equipment.

Camera speed is also dependent on the computer hardware. USB3, short cable lengths and a really fast hard drive [SSD] are important. The file sizes for video capture can be enormous as frame size increases. I rarely use the full 1936x1216 for video capture in SharpCap. Reserving the full frame only for finding objects. Things like the Sun and Moon. Which are elusive when Goto means something else altogether.


Click on any image for an enlargement.

*