*

Here I have added four long threaded rods. [studs or all threads] I drilled and tapped M8 threads for over an inch [25mm] into the top cylinder face. Stainless steel studs are screwed into the tapped holes and then pass through the two opposing plates and are held by yet more furniture nuts.
These extra studs provide an added compression effect across the declination axis bearing housing while tying directly into the cylinder. Previously I relied on the Tollok bush for Dec housing retention. It all helps to hold the 10mm [3/8"] plated box together. I fitted pairs of locked nuts to each stud to aid torquing the studs deep into the cylinder. I don't have an M8 plug tap so had to rely on a 2nd tap. This leaves a tapered thread in the very bottom of the hole. Which helps to lock the studs safely in place.
My desire to add these four 8mm [5/16"] studs to join the cylinder to the opposite plate proved extremely frustrating. I don't have a 10.5mm or 11mm drill and half the furniture nuts were slightly oversized in the shank! I wasted much of the day struggling to insert the nuts and then finding they would not turn if they did go in because of the friction. In the end I used a tapered broach to open the holes from both sides of each plate but it involved a lot of dismantling to be able to reach them all. Both sides of 14 holes on two plates is 56 broaching operations. I could have turned the nut shanks down in the lathe but that would thin their already slender walls. These things rely on thread depth rather than radial strength. Somebody somewhere decided to make them oversized. Or, more likely, they simply couldn't be bothered to check what was leaving the factory.

Removing the Tollok bush, cylinder and shaft [several times] was quite a fiddle until I removed the opposite plate to gain access with an extension hex key and ratchet.
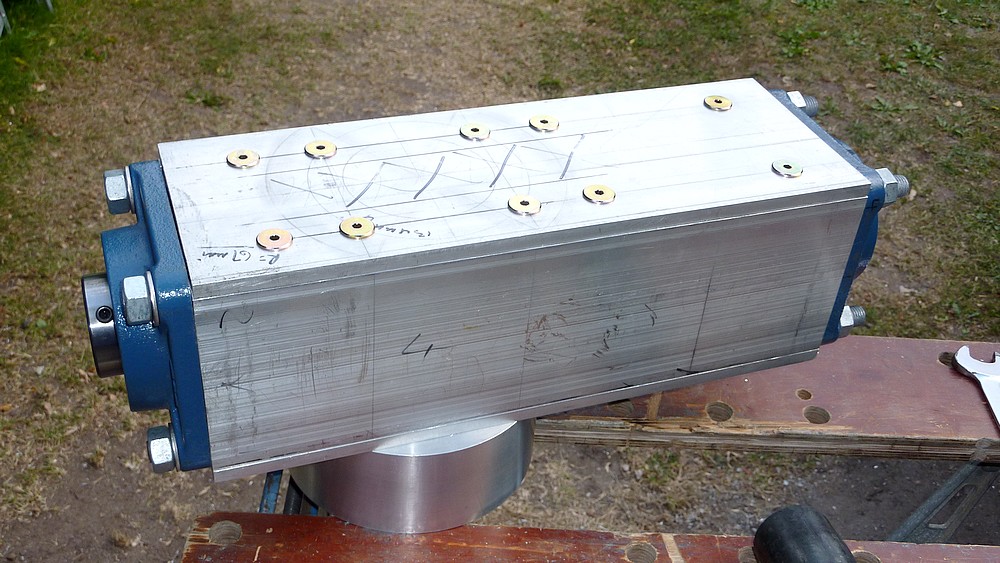
The image [right] shows the declination housing properly assembled onto the shaft, Tollok bush and 7" cylinder for the first time. The scribbles are to remind me to allow clearance for all the obstructions including the 50mm [2"] shaft and large studs. I now have 4 x M16 studs, 14 x M8 studs, 10 x M8 screws for the the Tollok bush and four grub screws on the bearing shafts to hold it all together.
Finding room while [deliberately] just clearing all the other studs was a bit of a fiddle. I'm afraid I tend to make up my ATM builds as I go along rather than having any particular master plan. The plates still need some fine adjustment to even them up but by now it was threatening to rain.
I should now add at least four cross studs to hold the side plates firmly together. Which I duly did. Then found I was several nuts short of a set. You would not believe how many names there are for these furniture nuts. Top nuts, cap nuts, ferrule nuts, joint connectors, sleeve nuts, barrel nuts & flange nuts are but a few of them in English. There are at least four names in Danish of a similar nature. Searching for stockists of these larger M8 [5/16"] is an absolute nightmare!
I do wish wholesalers would make it absolutely clear as to their intended purpose in life. Having to look through their terms and conditions of sale just to see if they will deal with a private customer is a complete and utter waste of a serious browser's time and patience! Who produces wholesaler's websites! Complete morons?
Click on any image for an enlargement.
*
No comments:
Post a Comment