*
 Having become thoroughly sick of struggling with the heavy miter saw, just to cut longer lengths, I resorted to common sense. The saw would be made mobile enough to EASILY take it outside and back into the shed again. Including clearing the steps and threshold.
I just happened to have a pair of sturdy pneumatic wheels and their solid 16mm axle from a cheap sack truck which had literally rusted away. It just needed they be fixed to the DeWalt stand without obstructing themselves or the vital levers and legs. The size of the wheels is perfect for mobility on rough ground and gravel. Some mobile saw stand makers really penny pinch and make the wheels far too small for rough ground.
Holding up the wheels on their axle against the stand showed they needed to be the correct
height to miss the legs of the stand. Too low and they hit the legs and would rub as they turned. Too
high and the material support bar locking lever was blocked in its arc. A large piece of angle would work as as an axle support bracket.
 I had no angle alloy big enough to sacrifice. So I cut a piece of scrap aluminium box section in the miter saw to make two pieces of angle. Then rounded off all the corners and edges with a file to avoid cutting myself while handling the profile.
Two holes had to be drilled in the yellow end plate of the saw stand. Placement was important to miss the internal leg support brackets and the leg release levers. I used two sturdy 16mm cable brackets to hold the axle. Since all loads would be pressing upwards, against the angle profile, these clamps should be perfectly adequate.
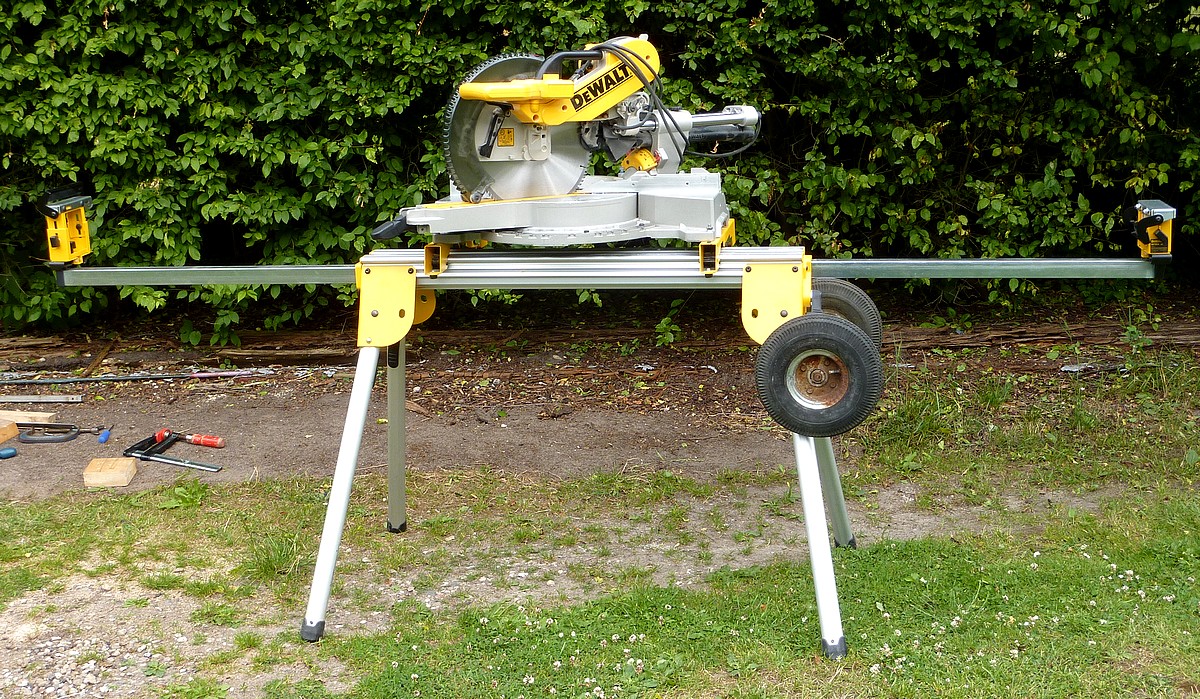
The trick to easy lifting is to pull out the material support arms to act as long, lifting levers. The arm on the wheel end is lifted at the far end and the legs unlocked and folded up. They are still easy to reach while supporting the saw and its stand with one hand. One the legs are locked up that end can then be safely lowered onto the wheels and the long arm retracted. There is really no need to fold the other pair of legs because there is plenty of ground clearance to walk the stand around. Only if steps need to be overcome would it really be necessary to fold them away.
 I lowered the saw mechanism and locked it into place to lower its C of G. Just in case it felt like tipping sideways on the garden's odd cambers during a first test run. In fact it was quite stable and never gave any cause for concern.
Mobility could be considered adequate now but I want to be able to park the saw and its stand, on end, for more compact storage. So a pair of support blocks will be required. A pair of comfortable handles for pushing and pulling would also add to the fun. These will be fitted to the extendable support bars when I come up with something suitable.
In retrospect I should have put the wheels the other end of the stand to make parking easier inside the shed. It is only a matter of drilling two new holes but I'll wait until I can park the saw and stand upright first. It my prove unnecessary to change ends. The saw can't be simply rotated on the stand. It is handed on its support brackets or the material support arms will badly misalign with the bed and fences.
In retrospect I should have put the wheels the other end of the stand to make parking easier inside the shed. It is only a matter of drilling two new holes but I'll wait until I can park the saw and stand upright first. It my prove unnecessary to change ends. The saw can't be simply rotated on the stand. It is handed on its support brackets or the material support arms will badly misalign with the bed and fences.
 I can claim no new insights for this useful mod since many saw stands have wheels already. It just needed to be put together in the right way. Some mobile stands demand a bent back lift to get the wheels off the ground so that the legs can be lowered and locked. This is not sensible when the long, material support bars are perfectly placed. They are strong enough to cope while providing a far more comfortable lift. The DeWalt, leg release levers make it easy to unlock the legs while supporting the weight of the saw. The wheels and angle bracket do not get in the way of the leg lever operation. Nor the extendible arm, lock and release lever.
I did swap ends with the axle bracket and wheels. I also cut some 2x4 timber into a quadrant to ease the climb over the threshold. Though 45° is far from ideal. The contact point with the tyre is almost unchanged over a vertical bar of the same height. Making the hurdle, to be overcome, just as severe. I shall have to re-cut the wedge to a much shallower angle.'
Next day I re-cut cut the ramp wedges to 30° and this made all the difference. The loaded saw stand will rest on end if the lower material support arm is pulled out a few inches and locked. Though a sturdy crossbar would be more useful for greater stability. My cramped saw parking space won't let it topple sideways but I'll look into the problem anyway.
Click on any image for an enlargement.
*
2 comments:
Wondering what the bracket size is and where to drill for holes thank you.
Hi,
The aluminium angle I used was 60mm x 60mm. You could use steel angle instead but it would be much heavier. I used heavy duty electrical cable clamps to hold the axle to the aluminium angle. Clamp size will depend on which axle size you use. Many clamp sizes are available. Hole spacing is also entirely dependent on your own choice of axle and materials. M6 and M8 bolts are appropriate.
Post a Comment