31.10.19

HitechAstro DC Focuser gets new Software Suite 1.4.

*

Thursday 2: Those of you still holding their breath for an update on my HitechAstro DC Focus controller saga will be relieved to know that they can now stop holding their breath. HitechAstro have finally released a new software Suite 1.4.

Software:
Hitec DC Focus - HitecAstro

Product:
HitecDCFocus - HitecAstro

Will the new software still terminally crash SharpCap? So that the laptop must be restarted because SharpCap will no longer respond to any key press? Even though you were in the middle of imaging and blogging and processing images.

Of course the moment the computer was restarted and you opened SharpCap, it would instantly crash again. Because you couldn't set it not to talk to HitechAstro's DC SharpCap Planet Destroyer before it crashed. Because [naively] you had trusted the software would actually work and had set HitechAstro to be the focuser controller under Hardware in SharpCap.

In the end I had to uninstall SharpCap and set the newly downloaded version to ignore the presence of the HitechAstro DC Planet Killer. Which meant choosing a simulator for focusing just to be on the safe side. But being a simulator it doesn't actually do anything. It's sort of... "pretend" software.

Oddly, the HitechAstro's painfully small control buttons still worked. So I could still focus with the little Skywatcher [clone] DC gearbox motor. You remember that one? Where the cheap little control box [paddle] buttons died within an hour?

Well, I had adapted the motor to drive my truly excellent Feather Touch 3545 focuser at great personal cost in time and initiative via a belt and timing gears. Doing so without any of the hideous protuberances common to the hellishly expensive commercial drive systems. Though I still had absolutely no control over the speed of the motor it was still useful. You would not believe how short a button press was required to achieve focus. Even on a long focus f/12 refractor!

I have duly downloaded the new HitechAstro software onto my laptop and will report tomorrow whether it works or destroys the planet as we know it.

Who knows, it might even force AWR-ASCOM to recognise PHD2? Nah, that's never going to happen. Is it?

Did I mention I had to twice reverse the direction of DECLINATION drive in AWR-ASCOM in the last two days? It arbitrarily changed direction without so much as a by your leave. Causing the familiar nose down slew to point at the NE observatory floor. I know I mentioned that AWR-ASCOM won't talk to PHD2. Or was it vice versa? Whatever.

Friday Update: Grey skies but good news: The New HitechAstro software Suite 1.4 worked. First I had to choose HitechDCFocus1 focuser under Files -> Hardware -> Focuser in SharpCap. I tried to run it on the first DCFocus option but SharpCap crashed again!

Get it right and a black control box appears on the screen with lots of really useful speed and distance of travel options. BTW: The blue on black bars are control sliders. Drag the puck along to taste. It is great to be able to see the focuser motor crawling around now.

It all works a treat but I'd prefer a "light" version of the control panel for we sun worshipper/imagers. Nevertheless, I have pinned the black control panel to the taskbar for instant access.

 Software:
 Hitec DC Focus - HitecAstro

 Product:
 HitecDCFocus - HitecAstro

*

31.10.19 ZWO ASI174MM-S Early efforts.

*
So here I am on a cold, grey, Thursday morning in the observatory. Watching clouds stream over a monochrome sun only pretending to be in H-alpha. The increase in clarity of the 174 over the 120 is as amazing as is the difference in image scale. The sun is covered in clear cells instead of pale pink, gelatinous blobs.

If I had to guess I'd say the sun's image in the 174 is 1/4 of the size of the 120. Though it ought to be about a half. The forecast is for a little sun or sunny periods. So it's going to be one of those days! More clouds than sunshine. Hours wasted in the hope of some decent images. Hours wasted hoping to see a sharp limb to capture the large prom at 4 o'clock! Just after ten and the cloud is at about 98%. The lack of sun makes it feel much colder in the observatory.

11.00 and I have had only teasing moments of partial clarity to capture a few fuzzy "Snapshots" with SharpCap. Of course the sky is clear blue overhead! I'll post better images if the sky ever does clear. Until then, these are purely for comparison of image scale.

Both images are 640x480 without any change in image size. It looks as if the 174 with 2x Barlow will match the 120 for image scale. See image right for 2x WO Barlow on the nose of the 174. Still 640x480 Mono8 settings. In fact the prom still looks slightly smaller with a 2x Barlow on the nose of the 174. Let's say 1/3 of the 120 image size without the Barlow. I hope I can capture a decent final image from all the videos by the end of today.

The speed of the 174 is astonishing at 640x480. Capturing 5000 frames in 12 seconds at just under 400fps. Of course, so many frames take longer to process. Not to mention the storage required. Now I can't get Registax to process 5000 frame videos! The processing screen instantly goes blank during alignment and never returns. Perhaps I had better make an effort to learn how to use AS!3.

An interesting feature of these ZWO cameras is the 180 degree difference in image orientation between the two, relative to the USB3 port. Accidental or deliberate? I was just getting used to the 120. Remembering to invert the cable out after the lunch time, meridian flip. Now I haver to relearn the correct orientation for the 174. I forgot to invert the camera after lunch. These last two images are at 4 o'clock on the limb.

When the cloud finally cleared after 12.00 the seeing conditions became truly awful. I have paused at 13.00 for lunch and to warm up. It has reached 47F but feels ten degrees colder out there after four hours. On go the salopettes, after lunch, to join the down and fleece jackets.

14:20 48F, clear but slightly milky skies now. Back to the fray. These last two images are taken with the 174MM Mono, processed in Registax from 50% of 3000 frames and recoloured in PhotoFiltre7. The 2x Barlow image has been heavily cropped and then enlarged again. To the detriment of the prom detail. The last image had only small amounts of the early wavelets and was cropped in Registax before saving. The black line was another, failed attempt to contain the Fill tool. The first signs of overlap into the prom are still visible.

Started packing up after 16.00 with the sun already below the trees. The crescent moon has been showing at dusk for the last two evenings but was far too low to capture.

Click on any image for an enlargement.
*

31.10.19 ZWO ASI174MM-S USB3.

*

The ZWOASI120MC-S seemed like a breakthrough after my struggles with the Neximage5. As the excitement waned I carried out endless research online.  Just trying to narrow down what works for the really skilled imagers. This suggested the 120 was not ideal. The smart money said I needed a mono camera if I was to progress.

But which? Image scale, pixel and sensor size, resolution and speed all reared their ugly heads in any decision. What that meant in terms of a 1200mm focal length +/- any GPC really mattered. Images and imagers seemed to be split between whole disk views and high magnification views of spots and prominences.

I greatly preferred the latter and I am far better equipped to capture these without further investment. Moreover, the Mercury Transit is coming and soon. [11th November] Earlier attempts to capture tiny Mercury as it slowly crossed The Sun's relatively vast disk were... what shall we say... disappointing? I am still struggling, years later, to positively identify Mercury in an earlier attempt. Specially purchased, brand new,  rechargeable AA batteries for my first digital camera were crap and wouldn't hold any charge. I had no spare batteries at home and was overdue back at work.

The most recent attempt was with the 7" and the Neximage 5. The image scale was hilarious! It softened the image and showed up chromatic aberration. Had the picture been better it would have been possible to see craters on Mercury! This time I want to be ready.

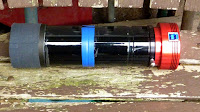
To that end I have a new ZWO ASI174MM-S USB3 mono camera to supplement the 120MC-S colour. Now I can capture in H-alpha as well as white light without needing to change anything. Nor does the 7" refractor, on its massive steel stand, have to be dragged outside the gate just to see the sun. The 174 has a much bigger sensor than the 120. As can be seen in the views of the active chip size. The 174 appears taller because it has a raised, 2" base. Into which I screwed the supplied 1.25" adapter. Both cameras have the same adapter.


Click on any image for an enlargement.
*

30.10.19

30.10.19 Another sunny day!

*

Wednesday: White frosty start at 29F. A male blackbird is pottering about on top of the dome.

I have just updated my ZWO software and drivers on the laptop. Just in case. The sun is clearing the tops of the hedges as their shadows sink slowly on the dome shutters at 09.30.

 I am still trying to improve my image processing. Any progress with iMPPG still completely eludes me. I have no idea how useful PhotoShop would be to me. So I use PhotoFiltre because that is what I am used to. Though even here I spend ages ruining what Registax regurgitates before cancelling all the steps I have taken.

With my limited skills it is near impossible to lighten the proms at the expense of the backgrounds. No doubt practice will help but it is very slow progress. Increasing gamma and contrast coarsens the texture of the prom.

At least my daubs are a rough record of the proms on a particular day. Often as they change over the course of an hour or two. All the images on this page were captured today.

PHD2 tells me that ASCOM[AWR] refuses to connect. I read online that it should be possible to auto-guide on solar and lunar features.


Click on any image for an enlargement.

*

29.10.19

29.10.19 More solar & the observatory dome.

*
Tuesday 33F-45F: Much colder but clear and sunny. Really struggling with poor seeing conditions today. 

I tried for several hours, with all three telescopes, to capture the disturbed area near the limb. The mottled mask is/was back! I was watching the temperature reading in SharpCap

Later in the afternoon I attempted to capture the 10 o'clock prom. [Image right] Not great but not truly awful!

I found my auto-guiding cable and downloaded PHD2. Sadly it will only lock onto stars. Not solar, nor lunar features, as far as I know.

PHD2 worked straight out of the box in finding the camera and loading the details without my searching.  It was also quite easy to understand. That may be the "Dummy" in the clever title. "Push Here Dummy!"

The chain drive to the friction wheel, dome drive is serving me well. It is much easier to adjust the dome while seated at the computer keyboard and monitor. Instead of finding my way across the dome without hitting my head on the telescopes.

This image of the dome was taken with my feet ten feet above the ground on a 14' tall stepladder. The sun was already setting behind the local trees. The reflection of the trees and clouds can be seen in the green, anti-reflection coating on the iStar 7" objective. The 6" f/8 H-alpha telescope is immediately below. While the silvery, solar foil filter is visible to the left on the 90mm Vixen f/11. I ought to make a new filter because the old one is years old. Luckily I found my stock of Baader filter material the other day.

The telescopes are peering over the base ring but the 7" just clears the inside of the dome when pointing higher. It used to brush the light bulbs, in slow motion, during some overhead slews. I found some more compact LED bulbs, moved them backwards and raised them slightly. The telescopes are considerably offset by the mounting but the dome also rotates. So one cannot be certain where a 7' long refractor will sweep at any particular time. It often pays to wait for some time before attempting a meridian flip. Otherwise they may brush too close to the bulky mounting and pier. Fortunately the mere touch of any of direction buttons on the handset will instantly stop a slew.


Click on any image for an enlargement.

*

27.10.19

27.10.19 GPC at 160mm from focus. Call the fire brigade!

*

Sunday: Bright sunshine from the start though with increasing cloud and SW wind. My first attempt at setting the GPC position was still too far inside focus. I had added a 40mm extender. The image on the monitor was enlarged and soft. I captured some videos for reference. Registax made a poor job of the fuzz so I removed the GPC and extender and captured some more videos with the "naked" PST etalon. See image right.

It was then that I smelt burning. Acrid smoke was filling the observatory! I was about to rush over to ask my wife if she had lit the stove. It was then I noticed smoke pouring from the dewshield of the 6" H-alpha scope! It proved to be a card ring I had fitted as a stop when I was struggling with heavy cloud. The card had warped and bent over into the hot beam reflected back through the objective by the Baader D-ERF! I dunked the card ring in a rainwater collecting bucket and returned to more serious matters. Like capturing more H-a videos.

Now  I replaced the 40mm, second extender, with one of 100mm. This brought the GPC to 140mm from the back plate. The back plate is at 300mm inside focus. So 300 - 140 = 160. The desired position for the GPC in front of the PST etalon. 

Now I was seeing increased detail in the big proms near the "top" of the sun. I captured more videos.The image scale has increased indicating the GPC is active. See image left. Poorer seeing, with thermal boiling, as the wind picked up. Which is the better image of the two?

12:16 it started raining through the slit!Then carried on with heavy showers in the afternoon! No rain forecast!

Monday: Plans for further Solar H-alpha imaging with and without the GPC are on hold while the cloud clears. Which it did, partially, only to tease me for the next couple of hours.

The image [right] was an experiment with Mono 8 saved as an AVI and processed as usual in Registax and PhotoFiltre7. This is with the GPC in place for f/10. Which is saving me having to use a 2x Barlow.

Interestingly[?] the GPC is giving me two options for capturing prominence videos. I have a red detailed option. Or the usual, overblown gain or exposure to bring out a white prom due to over-exposure of the disk. This Mono capture was using the red version. Another red capture appears on the left. Showing how rapidly proms can change ion a few hours. Both have been recoloured in PhotoFiltre7.

The image right is of a disturbed area near the oncoming limb. Horrible thermal shaking during capture. Pushed hard in processing to bring out the contrast of the light feature against the Sun's normal surface texture. 

Click on any image for an enlargement. 
*

25.10.19

25.10.19 GPC v 120mm aperture stop.

*

Friday: The 1:125 Baader GPC threw the focus on the 6" f/8 18cm further out compared to no GPC. By sheer luck I had just enough assorted 2" extensions to reach focus with the ZWO 120MC camera. The resulting image in SharpCap was huge and soft. Removing the GPC and extensions immediately produced a sharper and more stable image.

The weights in the image were to balance the telescopes after I removed the 2" Lacerta solar prism. It is easier to hang a weight by a cord loop than to adjust sliding weights and lose the normal balance position. Such long extensions can have a dramatic effect on longitudinal balance. These weights would dwarf smaller instruments but I have three fairly telescopes on the mounting.

Later I cut out a 120mm card ring to act as an aperture stop in front of the objective. This was to fix the focal ratio at f/10. The effect was subtle, compared to the "naked" 150mm. However, I was struggling with thick, passing cloud for most of the afternoon. The sky finally cleared after 16.00 and I captured a couple of videos of the most obvious prom at 2 o'clock on the limb. The seeing conditions were awful with obvious "boiling." So the final results from Registax very poor just as expected.

Despite being disappointed with the GPC it was hardly a fair test with so much thick cloud about. I'll try again at different spacings from the etalon when the sky is clear and the sun full strength. I should check the focus with the etalon and GPC moved away from the objective. Then adjust the etalon position to 200mm inside focus accordingly. It's a moveable situation because the focus and focal plane will change with the etalon + GPC combination.

Saturday: I have been informed that I should place the GPC closer to the PST etalon. So I bored out the baffle in the AOK etalon nosepiece to 28mm. This allows the nose of the GPC to pass through the baffle. The etalon then needs to hold the GPC in place. So I added 3 layers of rubber washers. Job done. Weather wet and windy so no chance to try the new GPC position until [perhaps] tomorrow.

Sunday: A sunny start. Time to test the GPC! 


Click on any image for an enlargement.

*

24.10.19

24th October: More PST modding PT2: GPC.

*

A little online homework later: The plastic ring is actually a push fit inside the small end of what is intended as a 2" nosepiece. [Which I earlier called an adapter.] The GPC is then pressed into the plastic ring and trapped in place by the next component. Usually a binoviewer. The flange on the GPC is very thin and sharp so threading the GPC into the ring might bring tears or blood. Pressing it into place in the plastic ring should be done square-on and gently. The thin flange is obviously intended not to use up any more focal length [nor thread length] than absolutely necessary.

The GPC lens housing has lots of useful text in English wrapped around it. Using the GPC as a Barlow will cause colour error. The device is designed to compensate for Glass Path Length of the Baader MkV/Maxbright binoviewer. The knurled ring on the nosepiece is intended as an adjustable stop for the T2 male thread. Care should be taken not to allow the GPC to fall out of its plastic ring prior to trapping it safely by threading on the binoviewer or following component. The convex side of the lens should face the telescope.

The inside of the nosepiece is threaded for a 2" filter. So there may be a way to adapt something to this thread. To support the GPC safely in a PST H-alpha telescope conversion.  An empty 2" filter ring?


The AOK front etalon adapter is also threaded for 2" M48x 0.75mm filters. The GPC flange fits inside the 2" thread in the nosepiece though rather loosely. So concentricity must be carefully attended to. A couple of male, all threaded, 2" filter rings could trap the GPC between them in the front, AOK etalon adapter quite nicely.

 https://www.teleskop-express.de/shop/product_info.php/info/p4516_TS-Optics-Adapter---continuous-male-M48-thread--as-with-2--filters-.html

No need for any extra expense or modification. The Baader 2" binoviewer nosepiece is intended to hold the GPC firmly in a plastic ring with the correct orientation. Convex lens pointing towards the telescope. Read the instructions printed in tiny text around the GPC lens barrel.

Once the large, knurled ring is removed from the nosepiece the whole assembly can be slid straight into my 2" x 60mm WO extender. Which screws onto my home made backplate. The AOK front etalon adapter pushes the Baader nosepiece forwards to a suitable position inside the WO extender. See images above.

Click on any image for an enlargement.

*

21.10.19

Monday 21st. More PST modding.

*

A regular contributor on Solar Chat Forum has given me some information related to the positioning of the 1:1.25 Baader GPC. It has to be placed at 160mm inside the focus of the telescope objective. Or 40mm in front of the PST etalon. This distance should convert my 150/8 to a 150/10. Which is a further option instead of stopping down the 150mm objective to 120mm. The proof of the pudding will be when I have the GPC installed. Will the extra aperture be obvious in image quality?

Well, that's odd. I just logged into TE's website to see why I've had no notice of dispatch. Where I was told five days for obtaining stock of my GPC. Now I have just had another email saying they have dispatched my order. Are they reading my blog? Delivery now expected on Wednesday 23rd.

Tuesday: I fitted a 2-pole switch in my power supply to the observatory. I'm still using 2-core extension leads with 2-pin plugs. No earth for garden and power tools.  It isn't safe to assume you have isolated the power with a simple switch. You could have isolated the Neutral and left the Live lead untouched. Cutting both Live and Neutral should be safer. IP44 rating provides splash proofing. As used in carports, garages and under roof overhangs.

I also added another LED white bulb and socket spaced 3' away from the original, high overhead in the dome. After blacking out the dome it was too dark to see much with a single 11W LED bulb. Particularly when I needed to work on something fiddly on the desk with the dome shutters closed. This happens more often than I would like. What with the present run of westerlies carrying endless cloud, continuous rain or showers.

Wednesday 23rd: With a low sun and occasional, fast moving cloud from the SW, I returned to checking the mounting alignment. Next time I shall remember to set the camera upright first on the SharpCap reticule. There wasn't much to see on the sun and only small proms.   It is breezy through the slit so I have to be careful the wind isn't moving the telescopes. Which can bias image movement on the screen. I now use the sun's image itself to adjust the mounting. This ensures I am not overdoing it. It is a nice coincidence that 200x zoom of the SC solar image perfectly matches the ring on the reticule. It completely clouded over by 12.00.

The Baader GPC turned up as promised. It has a clear aperture around 24-25mm. Probably just adequate given the 20mm of the PST etalon group. A full A4 side of printed details is all in German. No illustrations. I can probably find these details in English online. There is a plastic ring supplied with the GPC. The 2" [supposedly matching] adapter has a knurled ring on an external thread. The plastic ring, packed with the GPC, doesn't obviously fit the adapter being oversized. Nor does the thread on the GPC fit the oversized adapter. [See Pt.2.]


Click on any image for an enlargement.

*

20.10.19

19.10.19 Vignetting continued.

*


Saturday: The sun showed for only a short while. My 6" f/8 has a solar, light cone diameter of about 30mm at the etalon group 200mm inside focus. I also confirmed 11-12mm Ø at focus. Which suggests that much of the light never enters the 20mm Ø etalon. The front AOK, etalon adapter has an internal baffle which could be "borrowed" to support the GPC.

I mocked up a few OTA light cones with two straight edges. Only a 50mm f/10 has a solar, light cone small enough @ 20mm Ø at 200mm from focus to pass through the PST etalon. Every aperture larger than this will throw a large light annulus [halo] around the etalon.

I checked a 60mm f/10, 90mm f/10, 120mm f/10 and a 150mm f/10. Each, in turn, throws a bigger halo around the etalon. It is obvious that solar disk image size increases with focal length. Each increase in aperture at f/10 will increase the focal length. Image size = FL/109.

The obvious question is whether this matters. Does heavy, mechanical vignetting affect image resolution? Can we go on adding aperture, ad-lib and gain resolution with each step up in objective size? It would seem so. I intend to try some small baffle stops in front of the etalon to see if can easily detect any difference in the image.

Sunday: Trimmed the veranda doors and then continued with the dome chain drive. I used a piece of thin plywood as a pattern to save wasting aluminium plate.  It is a struggle to achieve the correct angle so that the friction wheel remains perfectly tangential to the dome base ring. If it isn't tangential it steers the dome in or out at that point. When the crank was at the SE corner I must have hit the right spot by accident. I am struggling to avoid a tight spot in the new position. I have marked all the steering and support rollers so I can monitor, from a distance, whether they are turning. Brief watery sunshine around lunch time but not enough to be useful.

*

18.10.19

F/8 to F/10 to match PST H-alpha etalon mods.

*

The PST etalon group expects to see an f/10 converging light beam.  When fed with a typical f/8 beam, from one of the popular 6" refractors, the etalon narrows down the beam to f/10. The problem is the loss of aperture as a result. The telescope effectively becomes a [slightly emaciated] 120mm refractor. You lose the aperture you paid for.

Today I discovered a thread on the Solar Chat Forum. Where the Baader 1:1.25 glasspath corrector is used to achieve an f/10 beam. So that the PST etalon "sees" its intended, light cone angle. Whether the f/8 beam is vignetted will depend on the position of the GPC and its clear aperture. One user suggested that it made no difference to their modified PST instrument whether the GPC was placed against the etalon group or spaced more towards the telescope objective lens. This matters because of limitations in mechanical support available off the shelf. Most PST etalons sit between the two, AOK adapters. It would need a unique adapter to place the Baader GPC in the front AOK.

The solar image diameter of any telescope is focal length/109. So a 1200mm focal length will have an image diameter of 11mm. Sadly, this is not a figure we can use because the etalon is usually placed 200mm inside the focus of the donor telescope. This is because the original PST used this layout. Even though the PST's internal prism folded the beam to achieve a more compact instrument.

So we need the diameter of the f/8 light cone at 1000mm. Not 1200. If only the sun would shine it would be a piece of cake to place something at the desired point and measure the almost focused, sun's bright spot.  Preferably before it bursts into flames! Though not with a D-ERF already in place.

As I typed those words the sun came out for the only time all day. I dashed over to the observatory, opened the shutters, turned the dome and swung the telescopes onto the sun. Thick cloud instantly intervened with large areas of clear blue sky teasing me overhead. Grr!

The PST etalon/lens group has a 20mm clear aperture. So the GPC needs to be a minimum 20mm clear aperture not to vignette the light cone any more than the etalon itself. The further forward of the etalon the GPC is placed the greater the risk of vignetting.

I have stared at all of the sales images online and the Baader GPC looks to be over 20mm. Perhaps I am an optimist and the images were taken in the hands of a petite female? But that would make me a cynic or [merely] paranoid. Or both. Guessing wildly, I'd say the GPC aperture is somewhere between 22 and 25mm. Which would make good sense for an expensive binoviewer with a larger clear aperture. 25mm?

Exact positioning within the light cone also affects the power of the negative lens [GPC] because it is so far from the eyepiece. Instead of the useful correction of f/8 to our [hoped for] f/10 it could become even more. F/11 or f/12 or worse. It is no use placing the GPC after the etalon group because it won't have the desired effect on the etalon but work only as a Barlow. A GPC may act like a Barlow but is is designed not to produce false colour and other optical aberrations when placed a long way inside focus.

One must hope that the numbers Baader publish to describe their GPCs are accurate in the context of their intended role in binoviewers. Do the large Baader binoviewers have a similar glass path length to a PST filter stack? Probably not. Most of a [modified] PST filter stack is just fresh air. Most of a binoviewer is solid glass.

The 1:1.25 Baader GPC is supposed to provide 30mm more inward focus when used in conjunction with their binoviewer. This is supposed to save the owners of valuable instruments from having to saw lengths off the main tube. Just to be able to reach focus. The 1:1.25 has a remarkably gentle effect compared to the 2x, and more, GPCs offered for "lesser" binoviewers. Low magnifications will help to maintain a wider field of view. 

Another question is how the modified focal length affects the position of the etalon relative to the focal plane. Is 200mm inside focus relevant to our [highly theoretical] 1500mm, new focal length? It seems obvious that I must accurately measure the true focal length of the system after the GPC is inserted in front of the etalon.

Or, should I leave out the etalon group and measure the bare focal length? Then place the etalon in the correct place relative to the bare focal length?  I know from experience that my supposedly neutral, etalon group affects the focal length of my 6". From, completely untrustworthy memory, I think it made it slightly longer. I believe the etalon group should be present because that is how they designed to perform in the original [unmodified] 40mm f/10 Coronado PST.

First get your 1:1.25 Baader GPC! Yet more expense as we approach the predicted, longest solar minimum since they last held winter fairs on the ice of the Thames. It has to be said that the last numbered, solar "blemish" [AR] wouldn't have embarrassed a prom queen on the biggest night of her life! More on this when my 1:1.25" GPC turns up in the post.

I have already realised that the recommended [and expensive] Baader T2-2" adapter will be utterly worthless. Since it won't fit inside the AOK, front, etalon adapter. Another Grr!  It might be possible to cut a slice from the adapter to make it fit inside the AOK. Then the GPC can screw into an internal T2 thread in a short ring.

I will just have to console myself that I am saving myself the expense of buying a new f/10 6" objective. Or even a better 6" ED OTA to replace my ageing Celestron CR150HD. There's a nice AP 6" Apo for sale which is f/9. Closer, but still no cigar. The cost of a divorce easily outweighs any such temptation.

What about this for a mad idea: Offer 6" [152mm] D-ERFs with weak, negative power to correct 6" f/8s to f/10 for all the PST H-alpha modifiers? Nah. The number of buyers would be absolutely minuscule.

The cost of the 160mm D-ERF is now close to 1000 Euros. That is more expensive than an iStar objective of the same size! But, it would also keep most of the sun's heat out of the telescope. Better instrumental seeing than an internal D-ERF? The images from external D-ERFs are certainly enticing. Yet an instrument builder, with  very real experience, claims that it makes no difference where the D-ERF sits. He says there is no sign of any thermal effects inside the instrument due to an internal D-ERF.

If I had a tube worthy of drilling I could fit a computer fan and blow air across the tube to an exit port. However, the CR150HD has a thread for the objective cell. So it is not easy to fit the objective cell accurately to any other tube. An oversized tube would make sense because the light cone grazes the inside wall just behind the objective of my CR150. Presumably a desperate attempt to keep the tube diameter to a minimum to save costs. 


*

16.10.19

Wednesday 16th Chain drive to dome rotation crank.

 *

Wednesday 16th. A horribly wet day gives me a chance to work on the chain drive to the dome rotation. It shouldn't take very long once I find a suitable, bottom bracket cartridge. The axle has to be long enough to allow chain clearance from the timber work. If I use a separate supporting block that will give me greater freedom in placement. The only bottom bracket I had wasn't suitable.

Drove to town to find the bike shop closed for a week. Ordered online. Should have it tomorrow. Back to square one on the left hand thread, RH side, BB locking ring. I found one in my collection last time. Never found one online after days of searching. I used the ring to lock the BB to a thick alloy plate. I don't think it's the same size as the LH thread ring used on fixed gear hubs. No ring means no security for the bottom bracket when I crank the dome around.


Even Interpol couldn't find a bottom bracket locking ring with a left hand thread. I may have to make my own. The recycling centre is beginning to think all my swarf is coming from a business! I have to carry little bags of swarf in my pockets and tip them into the scrap metal container when the guards aren't looking.

Here's are reminder of the existing and very successful, counterbalanced, friction drive roller set-up. The drive ratio is 1:30. [4" roller : 120" dome diameter] The ratio was sheer coincidence but has worked very well without requiring much effort on the crank. I can use my pinky [smallest finger] to turn the crank.

The trick is to reliably maintain the upward pressure on the roller as the dome, base ring, rises and falls. The 5kg counterweight supplies the required pressure, with plenty to spare, thanks to the long, pivoted lever. A fixed roller would never work because the dome cannot be perfectly true.

Friday 18th With all the parts brought together I was able to mock up the dome, chain drive. I made a left hand thread locking ring with a tap. Simply by forcing the tap through a normal, right hand thread, locking ring. I clamped the ring in the 3-jaw chuck. Then backed up the tap with a centre in the tailstock. Cranking on the tap with a spanner forced the opposite hand thread into the metal. No power was applied to the lathe, of course. A crude but effective method.

Now I just need to make a support plate for the lower crank assembly. A chain tensioner may be necessary as the drive roller rides up and down under the base ring. Only experience will prove if a tensioner is necessary.

Click on any image for an enlargement. 


*

15.10.19

15.10.19 More solar alignment.

*

Tuesday 15th: Warmer 55F, but more breezy. Unexpected brightness despite a grey forecast. Nice
crisp image today after yesterday's struggle with cloud. The sun is visible but the sky is very milky.

Pointed at the sun and set the Solar drive going same as yesterday. Already made a small adjustment to the right and down. The wind is moving the telescopes very slightly.

11:00 Image still sinking so more westerly PA pointing required. Decreased PA altitude angle.
I am now monitoring the slight physical changes on the screen to avoid overcompensating. This ensures I am actually moving the mounting. Bringing the disk back into the circular reticule afterwards.
11:20 Image still sinking slowly and moving right. Still reducing PA altitude and turning west. Movement out of the circle is becoming slower and slower.

11:25 Image on the screen now seems stable within the reticule after 5 minutes.

There  is a slight complication if the mounting baseplate is not perfectly level. Rotation in azimuth will slightly alter the PA altitude angle and vice versa.

11:30 Alignment very close now. No drift after five more minutes. I'll leave it running to confirm. The wind is "exercising" the image by a couple of millimetres in each direction. Makes it feel much cooler than yesterday's almost calm conditions. Edge of sun's image visibly "boiling."

Can't do any imaging in these conditions anyway. Visible cloud arriving now. Breeze is teasing by moving the image over a centimetre each way. Blowing around my ears too.

12:00 Clearing again. Fitted two long roofing screws between the mounting's cantilevered base plate and the pier. Tension on the screws is confirmed on the screen as pulling the PA down. So the asymmetric weight distribution on the base plate is having an effect. Do I really want to strip everything down just to drill a new hole in the base plate? I'll see how the screws perform first.

12:30 I think I have the alignment as close as is likely in these breezy conditions.


*

14.10.19

14.10.19 Solar/SharpCap mounting alignment first trials:

*

Monday 14th occasionally windy, clear start but cloud promised for the rest of the day. I'm watching the dome for the first signs of sunshine reaching it. There is a low hill to the east which blocks sunrise until later, depending on the time of year.

Make sure your telescopes are balanced on the mounting to avoid errors as sagging occurs.

First and vital stage: Setting the camera perfectly upright. The Declination drive is used to move the image of the solar disk up and down the screen. While the camera is gently twisted until the limb moves parallel to the upright cross hair. To put it another way: The limb should touch the line where both horizontal arrows are shown. 

In normal use the ZWO USB3 cable of my ZWO ASI-174sticks out of the bottom of the camera body when the image is upright on the computer screen. While the ZWOASI-120MC the cable sticks out of the top. Inversion of the camera will cause problems later. You can check uprightness of the image by focusing on a tree or a roof. Don't forget to replace the solar filter afterwards! 

To save making a solar filter to protect the ZWO camera I just popped the home made, 90mm Baader Solar foil filter cup over the modified finder. Then I had an hour of sunshine before it completely vanished behind the cloud.

With the instructions in front of me I repeatedly adjusted the mounting mechanically to keep the solar disk within the circular reticule in SharpCap. I used 200% zoom to expand the sun into the circles after the first rough trials with maximum field of view.

Image drift on the SharpCap screen: Physically adjust the mounting as follows:

Image drifts North or UP on the screen?  Move the top of PA to the EAST. [Clockwise]
Image drifts South or DOWN?                Move the top of PA to the WEST.[Anticlockwise]
Image drifts East or LEFT?                     Increase PA Altitude angle. 
Image drifts West or RIGHT?                  Lower PA Altitude angle.

Carefully Recentre the sun's disk in the reticule each time using the slow motion drives after each mechanical adjustments is made. Allow time for drift to be established before making further adjustments. Beware of false drift caused by cloud softening the disk's edges. Try zooming in SharpCap to produce a large image which best matches the reticule rings.

Make sure you don't have the mounting adjusters locked before making adjustments. Either nothing will happen. Or only partial changes will be made. In cloudy weather you can keep adjusting the gain or exposure in SharpCap to produce a sharp edged, bright image of the disk. Above all be patient. Make small adjustments at intervals long enough to be sure of the direction of image drift. If you do  overshoot you will just have to work backwards using the same instructions.

My PA altitude was slightly low and was pointing too far east. Just before the sun was lost I had  hardly any movement between the disk and circles over several minutes. As usual I levered the mounting in azimuth with a 3' scaffolding pole pushed through the altitude adjusting port. PA altitude adjustment was via the turnbuckle. There was no need for an external reference because it was all there on the screen. Nothing more was required other than the sun's disk remaining central in the reticule. Naturally, the AWR drives were set to Solar first.

Second stage: Centring the sun's disk in the circular SharpCap reticule and hoping it stays there. If not, then slight, mechanical adjustments are made to the mounting. Only use the drives afterwards to bring the disk into the centre of the reticule.

I kept playing with SharpCap's Exposure and Gain settings to keep the disk just visible behind the earlier and thinner cloud. Eventually the cloud won but not before I was very close to being correctly aligned. A very satisfying result.

I'll post some pictures after morning coffee. The sky is becoming darker and greyer now. Exactly as forecast. It's a good job I took a chance on the early sun appearing rather than going for my morning walk.

I should add that the physical adjustments required to the mounting were all very minor. It wasn't possible to see any real change by eye alone. A gratifying approximation using only a compass and a digital clinometer on the PA shaft

That said. the sun used to sink slowly on the screen as I captured videos. Though it should be remembered that this often involved using a 2x Barlow on a 1200mm focal length. The equivalent of 2.4m focal length. Plus the 5.6x crop factor produced by the tiny chip in the ZWO 120MC-S.

Later glimpses of the sun teased me into trying again but were too short lived to be certain of image drift. Later still, there was watery sunshine allowing me to check image drift at intervals between heavy cloud while I scribbled on my blog.

Click on any image for an enlargement.

*

13.10.19

Dome rotation drive major rethink:

*

When I fitted a hand cranked, friction wheel, dome drive I put it out of the way in the south east corner. It has worked faultlessly from first installation. See image right. The trick to getting it to work so well was the long lever providing mechanical advantage from the 5kg weight at the far end of a lever.

The friction wheel is pressed upward with probably 50kg thrust. Moreover, the pulley can effortlessly follow any undulations in the dome base ring. A sealed, cycle bottom bracket bearing supports the friction wheel and drive crank on opposite ends of the axle.

Yesterday, after lunch, I hit my head on the telescopes. Not just once but twice while ducking under them to reach the crank handle. What a silly Billy! In the afternoons the telescopes have flipped at the meridian and are now, largely filling the eastern half of the dome. All morning they have filled the western half of the dome.

I really need to move the manual drive system nearer my seat at the monitor. Just to avoid repeats of the head butting. Three telescopes have considerable moment and greatly resist being accelerated by human heads. So it's like banging your head against a brick wall. One with protruding objects which hurt! 

The northern wall is bad for the crank. I'd repeatedly bang my head on the crank. Absolutely 100% guaranteed! On the north east and north west walls would get in the way of the focusers when I am viewing objects low in the south. Which is the usual direction for solar and lunar viewing and imaging. Particularly in the winter in the case of the sun. I never look north because of the trees behind and above the dome. Much the same to the west except for higher up to south west. West and north west is all solid trees except very high up.

What are my realistic options without using electricity and motors? Well, I could easily fit a dropped chain drive to a lower crank. It is a bicycle crank and bottom bracket bearing set-up after all. The lowered drive crank could be low on the wall on either side of my chair.

I'd need another bottom bracket bearing for the drive crank. With just a sprocket up top beside the friction wheel on its axle. The minimum sized sprockets are limited to inner chainwheels. I could gear up or gear down. Or have a straight 1:1 drive. I find the present effort of turning the handle quite perfect. I used standard square ended cotterless axles for the system and have plenty of spares of those. I just need the sprockets [or rather chainwheels] and the cranks to go with them. The smaller the sprockets the better.

Having re-examined my chair relative to the monitor and computer desk I find it is asymmetrical to the dome walls. Being a few inches nearer the east wall. So using the north west corner post for the lowered crank bearing makes most sense. I need only turn slightly to my right to reach and effortlessly turn the crank.

A simple hole, bored straight into in the 4x4 post can hold the lower bottom bracket assembly. Half way up the post is fine. Then I can reach it comfortably while sitting or standing. A slit into the timber, centred on the hole, will allow a clamping bolt at right angles. Just to ensure the bearing doesn't move around in the hole. Or even pull right out.

Alternatively a split block can be bolted beside the NW octagon post to hold the sealed bottom bracket housing. That would save modifying the post itself and perhaps weakening it slightly. A block could easily be moved again if it was felt necessary. Whereas a big hole in a post is an eyesore if it is later abandoned.

I have just ordered two, rather smart pairs of square taper, 170mm alloy cranks with 33T fixed steel sprockets. Plus a set of plastic pedals. I can cut the right pedal down to the central bearing housing. Just as I did with the previous drive system.

Plastic is much nicer to handle than cold metal. There is no need for a pedal platform. Just a simple, cylindrical handle, of ample diameter has proved ideal. I shall have a disk behind the pedal spindle to avoid trapping my hand between the crank and the post. A white plastic disk will be ideal as it will be easily visible in the dark.

The upper chain wheel crank will be sawn off and then turned in the lathe to a neat boss. Only the sprocket and hub are really needed. I can't see the point in having a second drive crank higher up. It would only get in the way. Might even be a danger after dark. Total cost of the new components is about £45 including a new rust free chain. Should have all the bits together by Tuesday afternoon. And did, thanks to the usual excellent service from Cykelpartner.dk. The online bike spares store by which others should be judged. Order early enough and you will usually have it next day.


*

12.10.19

12.10.19 Mounting re-alignment continued.

 *

Saturday: Mounting alignment adjustments aren't a daily occurrence in a fixed observatory. So there is really no need to apply micro-adjusters to the mounting itself. All it really needs is some means of monitoring azimuth rotation of the base plate during adjustment. An arm extending from the plate, provided it is stiff enough, can be carried over to the observatory wall for measuring rotation relative to a simple indexing mark.

The means of rotating the entire mounting becomes almost irrelevant provided it is smooth and finely adjustable. An indicator moving across a simple scale will suffice to check movement. The sheer weight of the loaded mounting makes small radius adjusters likely to be rather hard work. The accuracy of any measurement directly on the mounting is likely to be equally as poor. While a 1.5m [5'] radius arm can show really tiny changes in the mounting's pointing direction. The arm would be removed once the adjustment is made. There being no need for it until it is considered worth changing the alignment again.

The sheer effort required to remove the three telescopes, counterweights and heavy shafts is a very serious hurdle to making any changes. I would like to change the central pivot point on the base plate but it would mean hours of heavy lifting just to be able to do so. It would only mean a slightly better balance point relative to the base plate.

A counterbalance would have to be really massive to balance the present offset. But it occurs to me that I could run a couple of screws [or studs] down from the baseplate. The thick plywood top of the pier can then resist any tipping forces on the base plate itself. This would only be be done once the mounting is accurately re-aligned. To avoid the screws or studs resisting base plate rotation.

With a little more foresight I could have had a tipping top plate for the pier. Though I do have a fine altitude adjuster on the PA in the form of a turnbuckle. The 16mm PA altitude pivot, axle clamping nuts just need to be slackened off prior to making any changes.

We are getting some weak sunshine now. So I may be able to make a start on re-alignment using SharpCap and the sun. It's a shame about the gusty, southerly wind blowing straight into the slit. At least the rain has stopped for a while. I completely filled a standard bucket this morning with the contents of the sandwich boxes resting on the base ring.

This followed 40mm [1.5"] of overnight rain. At least I feel in control of the dome leakage now. What is collected in the shallow plastic tubs can't do any harm to the structure of the building. Fortunately the telescopes haven't been threatened with drips yet. The spiders seem to like the fact that the centrally mounted instruments stay dry. Because I am usually sitting and facing the light the fine strands of their webs are beautifully highlighted.

As soon as I was set up after lunch, just after 14.00, the sky darkened and it started raining again! Hours later I was still struggling to find an objective with a short enough focal length to match the solar disk to SharpCap's ring & crosshairs reticule.

I took a quick snap of the SharpCap screen with the ZWO camera fitted to the 90/11 1000mm Vixen. The mismatch in solar disk diameter is clearly visible. Imagine how large the solar disk appears with longer focal lengths and added Barlows! The 7" has a focal length of 2.16 meters. The sun on the monitor when the ZWO has a Barlow on its nose is huge!

Fortunately I remembered I had an old, possibly Skywatcher, 9x50 finder in my optical junk collection. This would do but had an odd tube diameter. Just undersize for a 2" push fit. Bigger than 2" OD. With the screw-in eyepiece removed the camera just focuses on infinity when pressed up against the end of the finder's main tube.

Now I just need to turn down a 2-1.25" eyepiece adapter to fit inside the finder tube. It would make the finder much more useful if it had a standard 1.25" eyepiece fitting with locking thumbscrew. So I might as well aim for that. The finder base can easily slot into the Vixen 90's focuser dovetail.

The sun finally broke through the cloud at 16.45! For just long enough to confirm the solar image diameter matched the reticule. I'll need a scrap of Baader solar foil to safely filter the finder for the camera. Then all I need is more sunshine.

Sunday: All day cloud with rain later. So I took the opportunity to turn a 2/1.25" adaptor down to fit inside the finder tube. It was very close to not reaching infinity focus. I even had to turn a recess for the camera nose plate in the outer face of the adapter before I could get a sharp view of distant woods. That also required I remove the objective focusing, locking ring. After that it worked perfectly with just a margin of excessive travel and a nice, sharp image of the neighbourhood.

Now all I need is some sunshine to put the mounting alignment procedure into practice. It is not looking at all promising at the moment. With wall to wall, solid grey overcast and spots of rain in the air.

*

11.10.19

Whoopee! Polar alignment using SharpCap and the Sun!

*
My regular readers will know how inaccurate are my Goto slews. So I was desperately searching for a daytime mounting alignment system for a site where Polaris is never available.

Moreover, I have no polar alignment telescope nor guide camera. Though I am aware the AWR system has a guide port and my ZWO can be used as a guide camera.

This video is just what I was looking for. I spend hours gently compensating for drift while capturing solar videos for later processing. AWR has two stages of slow motion guiding as well as the usual, "high speed" slew.

Though we won't dwell on its actual slew speed in reality. I was shocked to see a Skywatcher mounting swinging a 12" Newtonian around the sky! My slew speed is almost glacial in comparison. With a 90° slew literally measured in minutes. The Guide and Center speeds are slow enough to be ideal when dealing with several meters of focal length, on a small sensor camera, projecting onto a large monitor screen. As I have intimated in the recent past the sun's image must be six feet, or more, across.

I had hoped to use the "top" of the sun to improve my big, DIY, mounting's alignment but seemed to be suffering from solar image rotation as well as obvious drift.

Cue the sun for some [REAL] alignment fun and games? Oh no! Wall to wall cloud, gales and days of rain forecast. Grr! Ah, well. I shall just have to rehearse by watching the video several times until the details sink in. I have already purchased the SharpCap Pro License. £10 Sterling per year as of October 2019 is great value.

The license key is sent automatically on purchase and backed up by email. The license key allows the private user to add it to several PCs or laptops for their own use. Business or professional users must buy a separate license for each PC. The Pro version of SharpCap provides a range of advanced facilities under Tools on the top menu. It now occurs to me that there is no need for the Pro license for the test in the video. Only the circle and crosshairs is needed to monitor the movement of the sun's image on the screen.


More on this later. Meanwhile I can be designing and building a mounting baseplate, azimuth adjuster. I usually just use a four foot long scaffolding pole, a 2m aluminium, straight edge and a compass. I kid you not! Stop sniggering at the back! There is some point to my madness.


*

10.10.19

Dome? Or inverted coracle?

 *

Wednesday: 50F, very cloudy and breezy with heavy showers. I set up during a "blue teaser." Whereupon I discovered the settings for observatory site in Skychart were wrong again. Then it rained hard and I didn't care any more. There were several more cloudbursts running into the evening.

And, running inside the dome! I went over to check how the dome was coping. The worst leak, by far, is half way up the shutters on one side only. This drips straight down onto the floor where it can be easily collected. Probably the horizontal seam which lies over a cross brace. I have arranged a series of square storage tubs on the observatory floor. Their shape means they can be arranged tightly together. Where round buckets would have too many gaps in between. Further sandwich boxes were placed on the base ring to catch the worst of the drips.

It never stopped pouring outside as I searched for leaks with a torch. The smaller leaks are at the vertical, panel seams where they lie over the ribs. I put far too much faith in expensive, flexible, seam fillers. Unfortunately the low angles involved made aluminium, z-shaped, flashing strips pointless. They would just fill with water and sit there to rot the plywood panels over time.

A number of options present themselves. Fibreglass tape and resin on all the joints? That would need cleaning back the paint to the bare plywood. A complete GRP wrap? Expensive with difficult access! Welded rubbed gores? Heavy and I lack the skill to neatly join the vertical overlaps with a flaming torch.

Full height, aluminium gores? I'd need to make, or buy, a sheet metal bender to cope. Though it need only have a capacity of a little over 2' wide. I wonder if there is an affordable Chinese example? I don't really need a proper sheet metal brake. The angles of the facets and their width at the bends are quite modest. They could be achieved with timber. Or timber sections reinforced with right angle metal profiles.

If only I'd had the foresight to have small overlaps on the horizontal joints. At the time I thought, mistakenly, that the sealer would do the job. Besides it wouldn't have been so pretty to have hard lines at all the joints. I thought, at one time, that I might cover the dome in smaller scales. Though I didn't want to use tar based products. Simply because of the weight issue and thermal retention problems.

The angles between panels are too sharp to allow easy overlapping of stiffer materials. The panels tapering from top to bottom would require perfectly scaled "scales" to suit the width of each panel. Rubber pond liner could be glued down to produce a traditional fish scale covering. Though the weight and thermal issues would be a serious drawback. Not sure painting rubber is a good idea. Bare black rubber would be awful for heat build-up.

PVC tarpaulins could be glued or heat welded to form full drop gores. That instantly solves the horizontal seam leakage. Vertical overlaps are easier to achieve with this softer and thinner [waterproof] material but finding suitable colour options might be a problem. Green PVC buildings, like temporary garages, are readily available in a truly hideous, bright grass green. Not sure a sage green is available for an amateur builder's one-off requirement.

My present sage green paint is very pleasant on the eye even as it deteriorates. I have now watched quite a few heat welding tarpaulin videos on YouTube. It looks quite manageable but they have mostly been working indoors. Not dangling by their toes, hooked over a ladder's top rung, while inverted over a dome 20' off the ground, in a howling gale! Perhaps I exaggerate? 😉

A further option exists to have bare tarpaulin stretched over a plywood skeleton. Though I think the plywood panels backing the tarpaulin might be more sensible. Probably offering a longer life by reducing flexure and local wear and tear.

*


8.10.19

8.10.19 Sol o'leako!

*

Tuesday After early rain the sky cleared to blue. A soon as I was set up the sky was solid grey again!
The mounting was covered in dew. The sandwich boxes on the base ring were well filled from overnight rain. Weather coming from the west today.

The next couple of hours were spent waiting for teaser patches of blue. The prom was a struggle due to background glare. I rotated the tilt plates several times to darken the background and then added the 2x WO Barlow. More adjustments followed. PhotoFiltre7 tidied things up.

Gong H-a shows no proms and only minor markings on the disk. Nothing visible in white light. First slew to the sun was  way off the mark again. Both LST calculators agreed with AWR's LST. Location in DC Du C [Skychart] is accurate as is AWR.

The image right is a recoloured view of the solar surface in white light. The granular appearance is the result of convection cells. Captured with the ZWO120MC with 2x WO Barlow in the 7" for 4.3m focal length. Processed in Registax6 and PhotoFiltre7. The sun's disk as seen on the 27" monitor must be over 6' in diameter!


Click on any image for an enlargement.

*

7.10.19

Sunday evening & Monday morning: The Moon and alignment.

*

Sunday evening found me back in the dome with the solar gear swapped over to white light. You might be surprised how many times I have failed to find the Moon. Through a telescope still equipped with solar filters from the fun and games earlier in the day.

The ZWO camera was able to detect the moon this time but utterly failed to show Saturn again. I captured a series of 1000 frame videos of different areas of the Moon. With no clue as to whether the results would be worth processing. There was, to put it mildly, considerable movement and distortion of the lunar features on the big screen. All the videos are still on the laptop so I need to transfer them to the SSD.

Monday morning at 33F is bright and clear but with the car covered in ice as testament to a chilly night. I shall be back in the dome if it continues clear. Yesterday was almost continuous cloud.

My first slew to the sun was hopelessly poor despite having just synced the parking position as usual.

45F @ 11.30am. I have been letting the mounting follow the sun's upper limb in H-alpha with 2.4m focal length and the ZWO camera.

49F @ 13.00. The cloud turned up so I processed last evening's moon videos while I waited. As usual, I am amazed at the increase in quality compared with the stills from the video. They are by  no means high quality but just satisfying enough to warrant continuing.

The moon was very low indeed and just above the roof of our home. All these images are using the 7" f/12 iStar refractor with the ZWO120MC fitted with the Baader Solar Continuum filter. Captured in SharpCap, processed in Registax 6.2 and recoloured in PhotoFiltre7.


 Click on any image for an enlargement.

*